
Check out all these examples of side-by-side images down below in the article, and learn how to make them using PicMonkey's collage maker.
The simple act of putting two pics side by side is trickier than it looks when using other photo editing programs, but fortunately, PicMonkey makes it super easy. Our collage tool isn't just for showing off six, seven, ten photos (although you can definitely do that too). But for today, simply opt for a two-cell collage to create a side by side photo fast.
In this tutorial, we'll show you:
How to make a side by side photo in PicMonkey
Provide specific examples of side by side pics
How to use the mobile app for pairing up pics on the go.
But first, some quick steps for those in a pinch.
Quick steps for putting two photos side by side:
1. Open the collage tool in PicMonkey and choose a layout with two cells.
2. Click the Photos & Video tab to add your images, or browse our stock collection.
3. Drop your images into the desired cells.
4. Voila! Download your design or share directly to social media from PicMonkey.
And for those who are like, Whoaaaa, Nelly! We got you. Here is the step by step process for side by side pictures.
How to make a side by side photo in PicMonkey
1. In PicMonkey, click Create new and choose Collage.
2. You'll be asked to choose a canvas size—select from popular social media sizes, basic print sizes, or enter your own dimensions in pixels in the upper right corner.

3. Next, choose a collage layout. To master the art of placing two pictures side by side, simply select a layout with two cells (don't worry about the cell width and height later or the padding, you can adjust them later!).
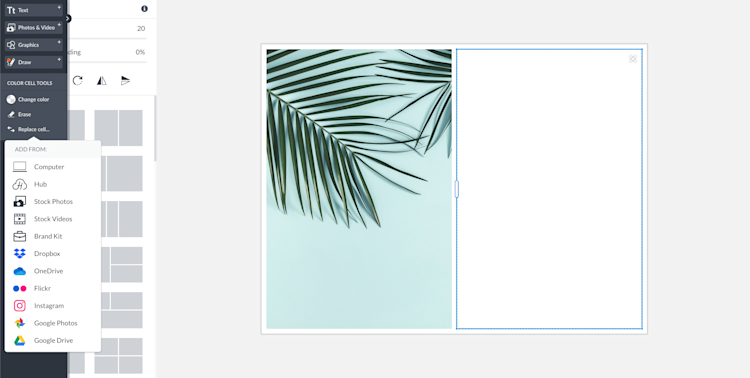
4. Now it's time to add your images to the collage. From the Photos & Video tab, click Add photo or video. This'll let you upload your own images (or choose from our millions found in our stock library), which you can then drag into your cells.
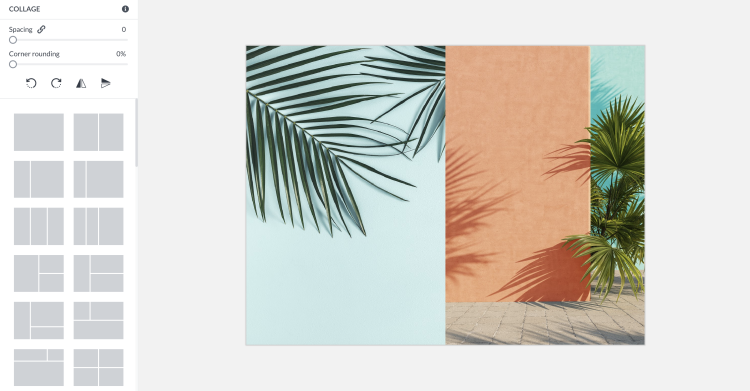
5. After you've added both of your photos, you can adjust the padding around the images—simply drag the Spacing slider to add or reduce the spacing around the images. Putting the slider to 0% will remove all padding and produce seamless side by side pictures.
6. Finally, download and share your creation with the world! Select the dowload dropdown for JPG, PNG, PDF (for Pro subscribers), or GIF / MP4 for any added animated elements.
For more on using the collage tool in step by step detail, check out: How to Make a Collage
5 inspiring uses for side by side photos
Ask not what to do with your side by side pictures, instead ask what can't you do with them? You can put two photos side by side for:
Before-and-after shots
This or that polls
Who wore it better contests
Comparing and contrasting products or companies
Creative flyer concepts
and more!
We've captured some popular ways to use your side by side pictures. Check 'em out!
1. Before & after Facebook covers
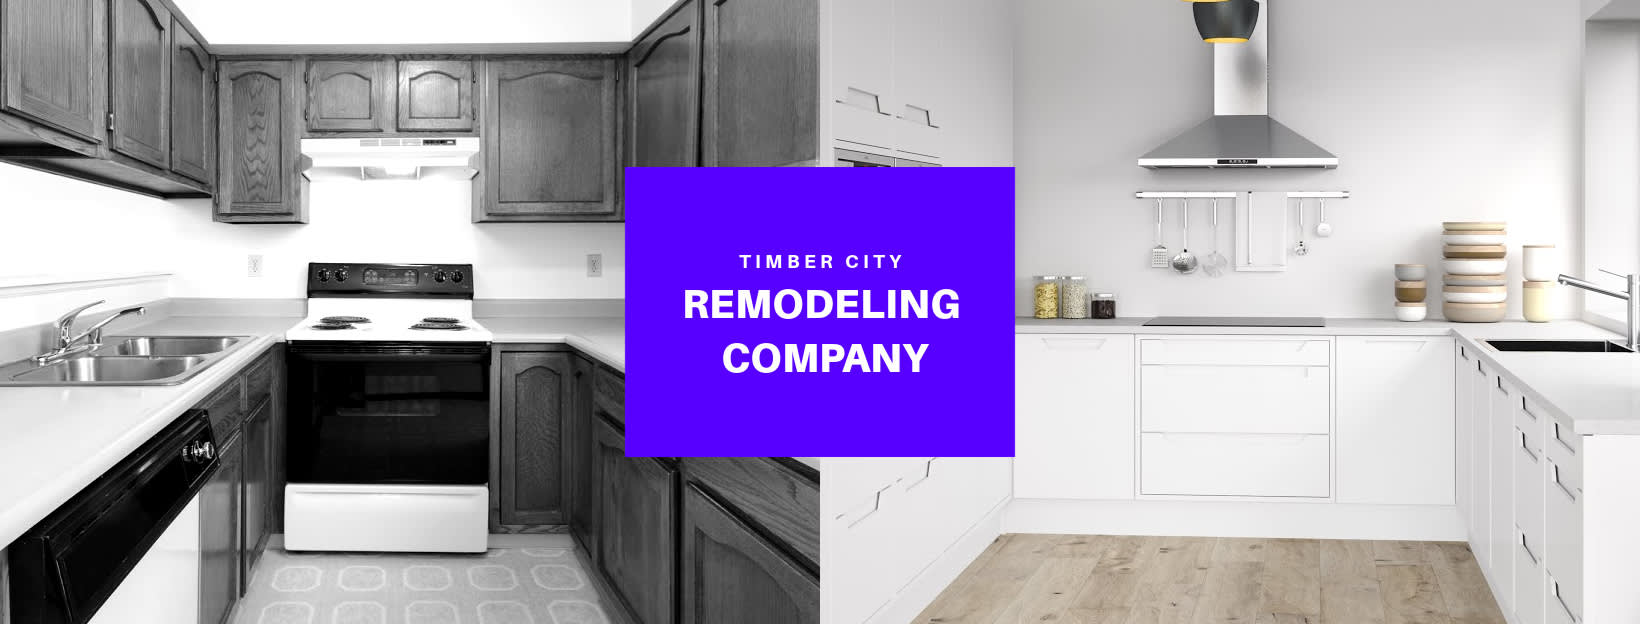
To create a before-and-after Facebook cover, (or any side by side photo cover), launch the Collage tool from the top toolbar, then select the correct canvas size for your cover.
Choose a layout and simply drag your images into the collage. Need to crop or resize them first? Check out our tutorial: How to Resize a Picture Like a Pro to learn the difference between cropping and resizing.
Once you're set, grab the edited pics from your PicMonkey cloud storage, Hub, to fill in the cells. Drag, drop, done!
Pro Tip: You can add text and graphics over your collage, too. Try adding a basic shape graphic like a rectangle or circle, then putting text on top to really make your words pop.
2. Create a YouTube thumbnail with two pictures side by side
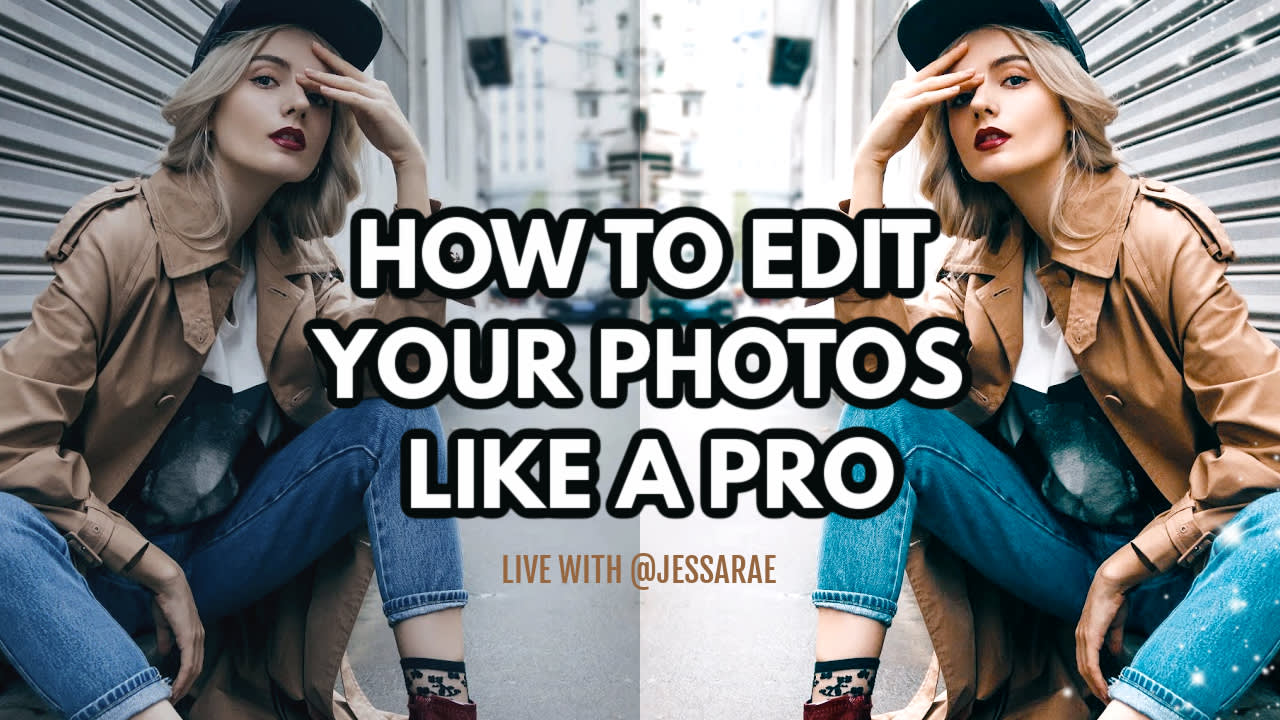
Side by side photos are perfect for tutorials and how-to videos. Compare and contrast states of whatever it is you're demonstrating—photo editing, hair braiding, power washing, or the new favorite genre of behind-the-scenes Instagram pics.
Pro Tip: To get a mirror-image effect with your two photos, simply use the black/white arrows from the Image Cell Tools to flip one of the pics to face the other. Take a deep dive into our nifty tutorial: How to Make Mirror Images That Literally Turn Heads.
3. Choose a side by side outfit comparison Instagram post

Present a this or that style post on Instagram with a simple side by side photo collage. Contrast the same outfit styled in two different ways, or compare which OOTD was worn better. The options are limitless.
Design tip: You can mix and match fonts in a single design for more visual interest or to separate text from your personal logo or watermark.
Need some help? Check out:
4. Half-photo, half-aesthetic side by side pictures for Facebook ads

Put two photos side by side to tell a story about your brand, perfect for creating an ad for Facebook or Instagram. Select one photo showing your product and pair it with a second aesthetic to set the mood—think wooly socks/campfire or vegan soap/plants or lingerie/velvet settee...you get the idea.
Ad know-how: Some text is allowed on ads created for Facebook and Instagram, as long it doesn't cover more than 20% of the image. See Facebook's Best Practices For Image Ads for more information.
5. Create seamless side by side pictures for Pinterest

To create seamless side by side pictures for Pinterest (where does one pic start and the other begin?) use the magic that is our one-click Background Remover. Simply remove the background of each of the photos you want to use and keep them safely stashed in Hub. To do it, just highlight (click) on the photo and find the scissors icon on the lefthand menu. Click Remove bkgnd. Abracadabra.
Next, create a single "seamless" background to span your whole post (no collage tool needed for this design, but you could use the single-cell layout if you prefer). Then choose Add an image to bring in your background-less pics and arrange how you like.
Did you know? You can export your Pinterest designs directly to your Pinterest board of choice when you connect your account. Click Share on the top toolbar and select your destination.
For more on boosting Pinterest engagement, check out:
Use the PicMonkey mobile app to make side-by-side posts on your phone
Quickly create a before and after Instagram post, or an image with two photos next to each other to send to your group chat right from the PicMonkey mobile app. Don't have the free app yet? Get it now!

Get the PicMonkey Mobile App!
How to put two pictures together on the mobile app:
Open the app and tap the "+" to start a new design
Select Start a design and pick your post size and create a background with color or texture. Tap the checkmark.
Choose Graphics from the bottom menu and scroll to photos. Select the first photo to use.
Position the photo to one half of your canvas, then repeat the previous step to add the second photo.
Add text if you like, then share like you would a photo from your camera roll.
Need to crop your pics first? No prob! Open and crop each one separately, save, then start a new design to add your newly cropped pics to your canvas. Voila! Carry on, Creator!
