PicMonkey lets you remove the background of a photo with a single click so you can make layered designs, clean up product photos, and create gorgeous social posts.
There are many reasons for a photo background eraser: to get rid of clutter, clean up a product pic for display, or cut out an object or person in the foreground to use in a new layered design. We’re seeing lots of everyday use of the background erase technique — especially in YouTube thumbnails, Instagram Stories ("shop my picks" type posts), and of course, product photos.
PicMonkey Pro subscribers have access to our automatic background eraser tool. If a photo is a single layer, all you need to do is click Remove bkgnd from the Background Tools menu. It’s just one click and you're done! Plus, only PicMonkey lets you further tweak your erasure afterward by painting back on parts of the background, or, using the eraser tool to remove just a little bit more.
Now that you've got the inside scoop, it's time to walk you through it. Here's what to know.
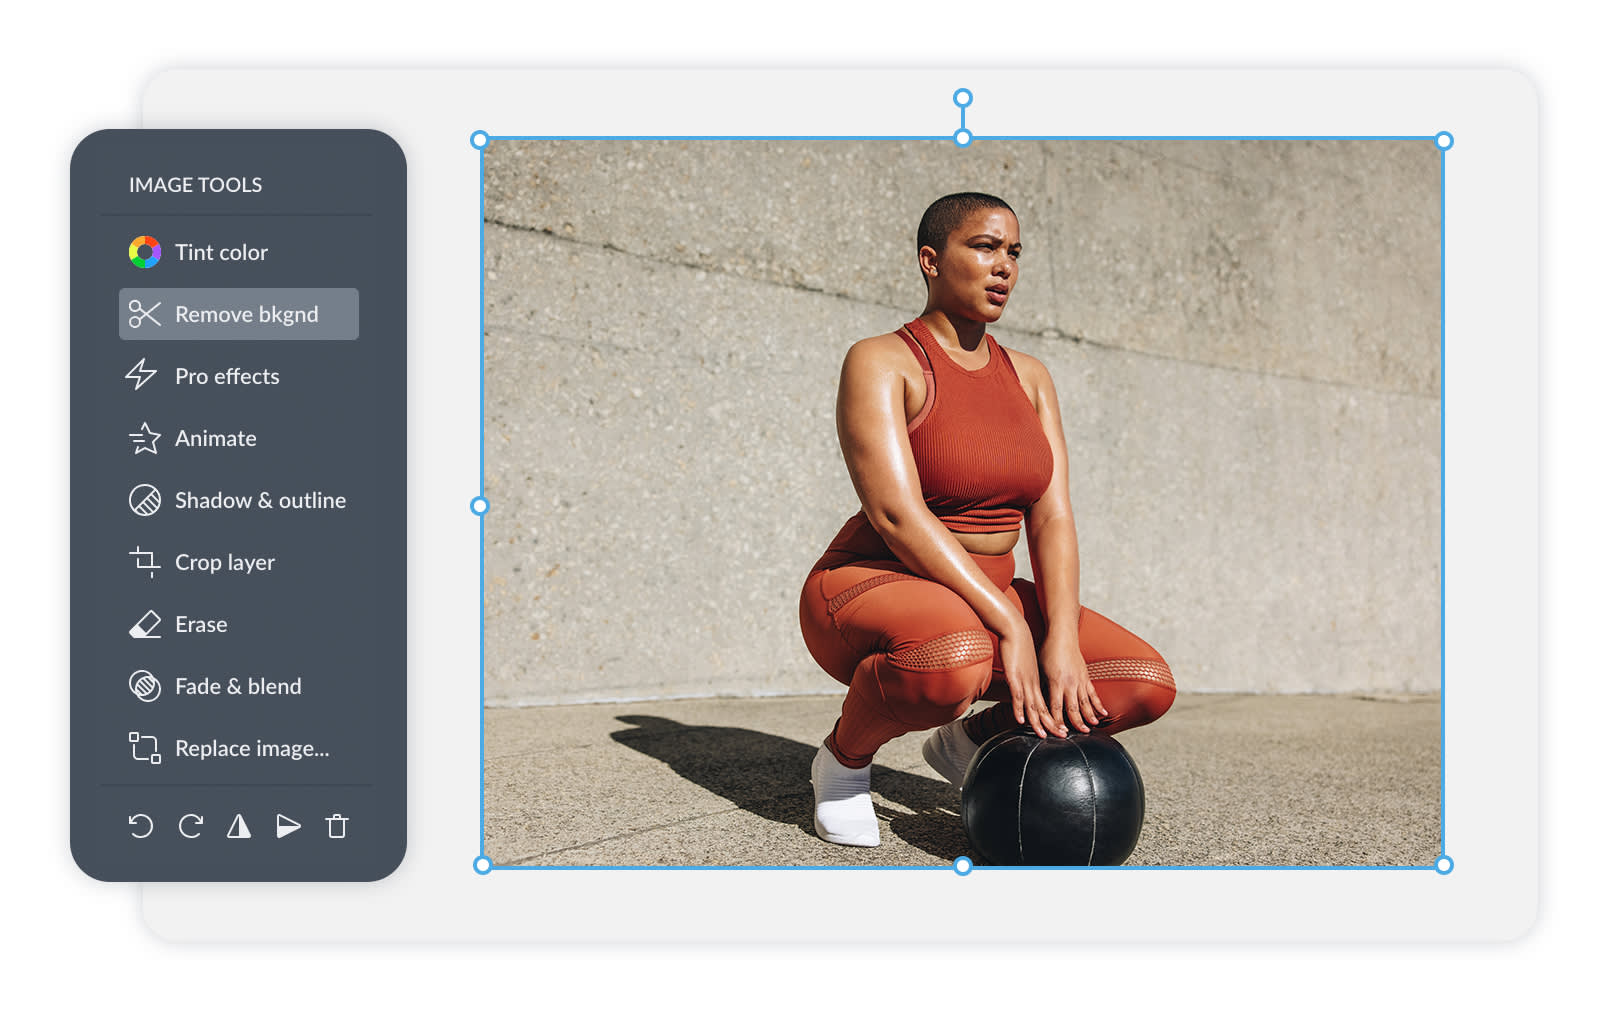
Quick steps to erase a photo background
Open your photo in PicMonkey.
In the Background Tools section of the left panel, click the Remove bkgnd button.
Poof! Your image will automatically be saved to Hub with a transparent background.
Note that removal may take a few seconds. In the case that your image isn’t a good candidate for removal, the feature will give you an error message.
How to remove a background from an image in PicMonkey
To erase backgrounds in PicMonkey from a photo in a design, just:
Select your photo's layer from the Layers panel, or by clicking it on the canvas.
Click Remove bkgnd from Image tools, which opens in the left panel when you select your photo layer.
All done!
Replace an erased background with color, photos, video, or a texture
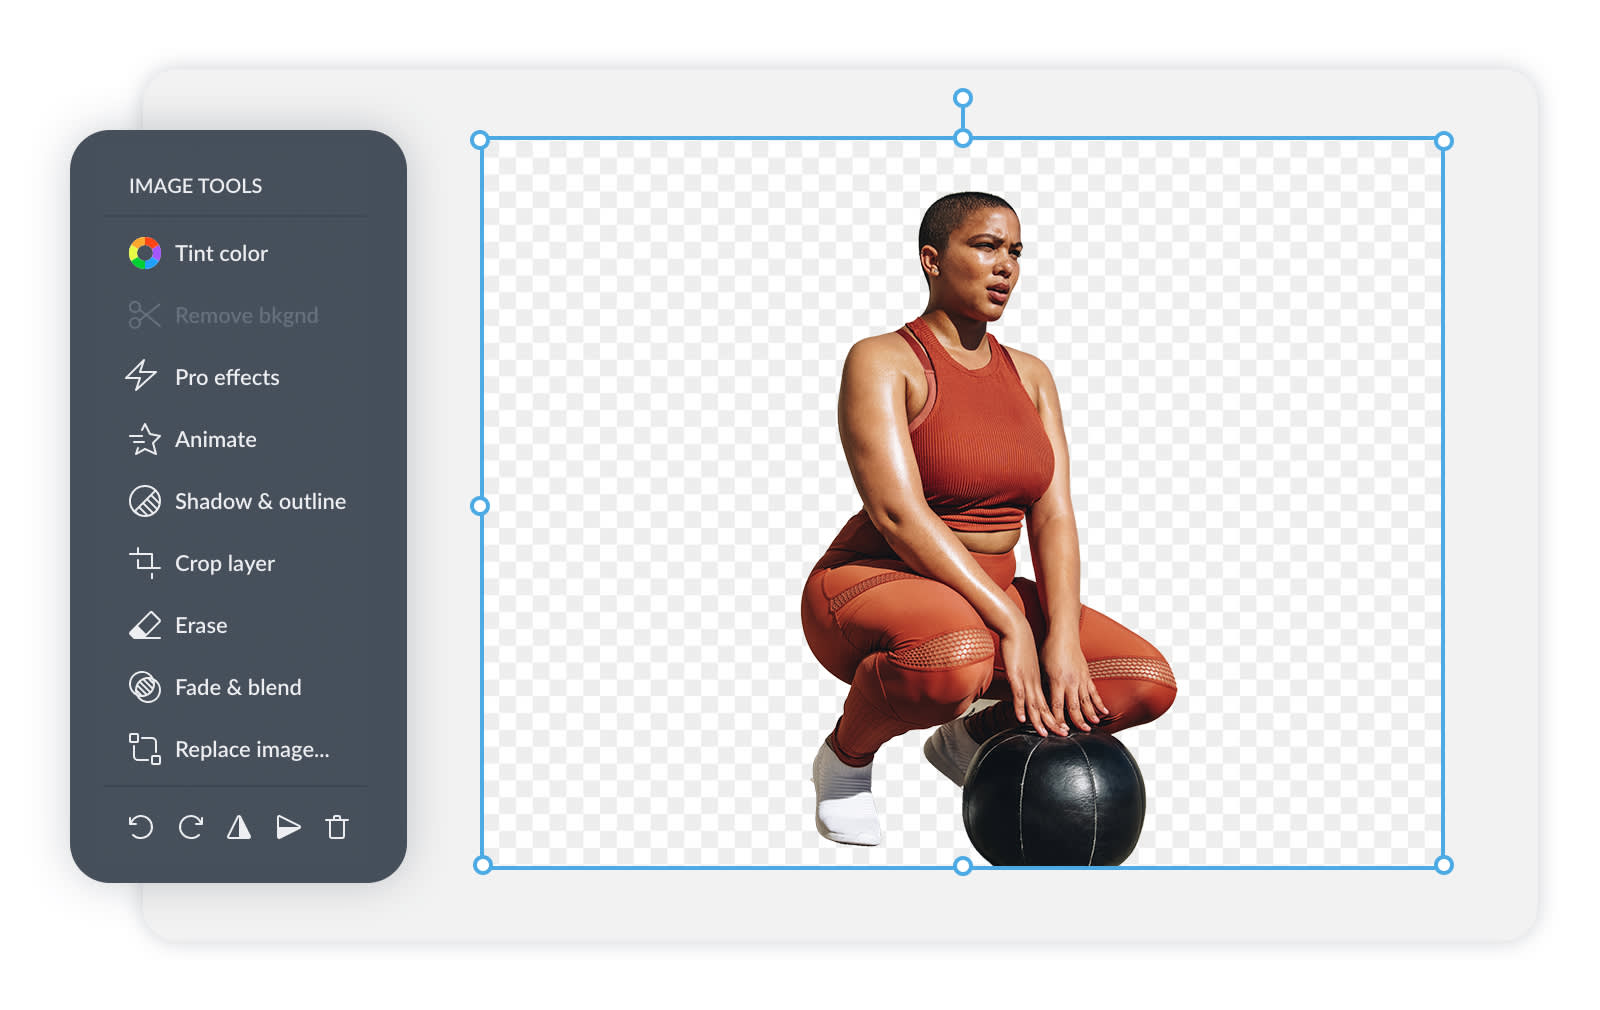
When the background is successfully removed, the Remove background button will be grayed out.
After the photo background is removed, you’ll see a gray and white checkered background underneath your image—congrats! Your photo has a transparent background! You can now create a new background for your image, or you can download your image file as a PNG — it's the file type that will preserve the transparency.
You can do so many things with your background-less pic. Here are four ideas:
1. Make a solid color background for your photo
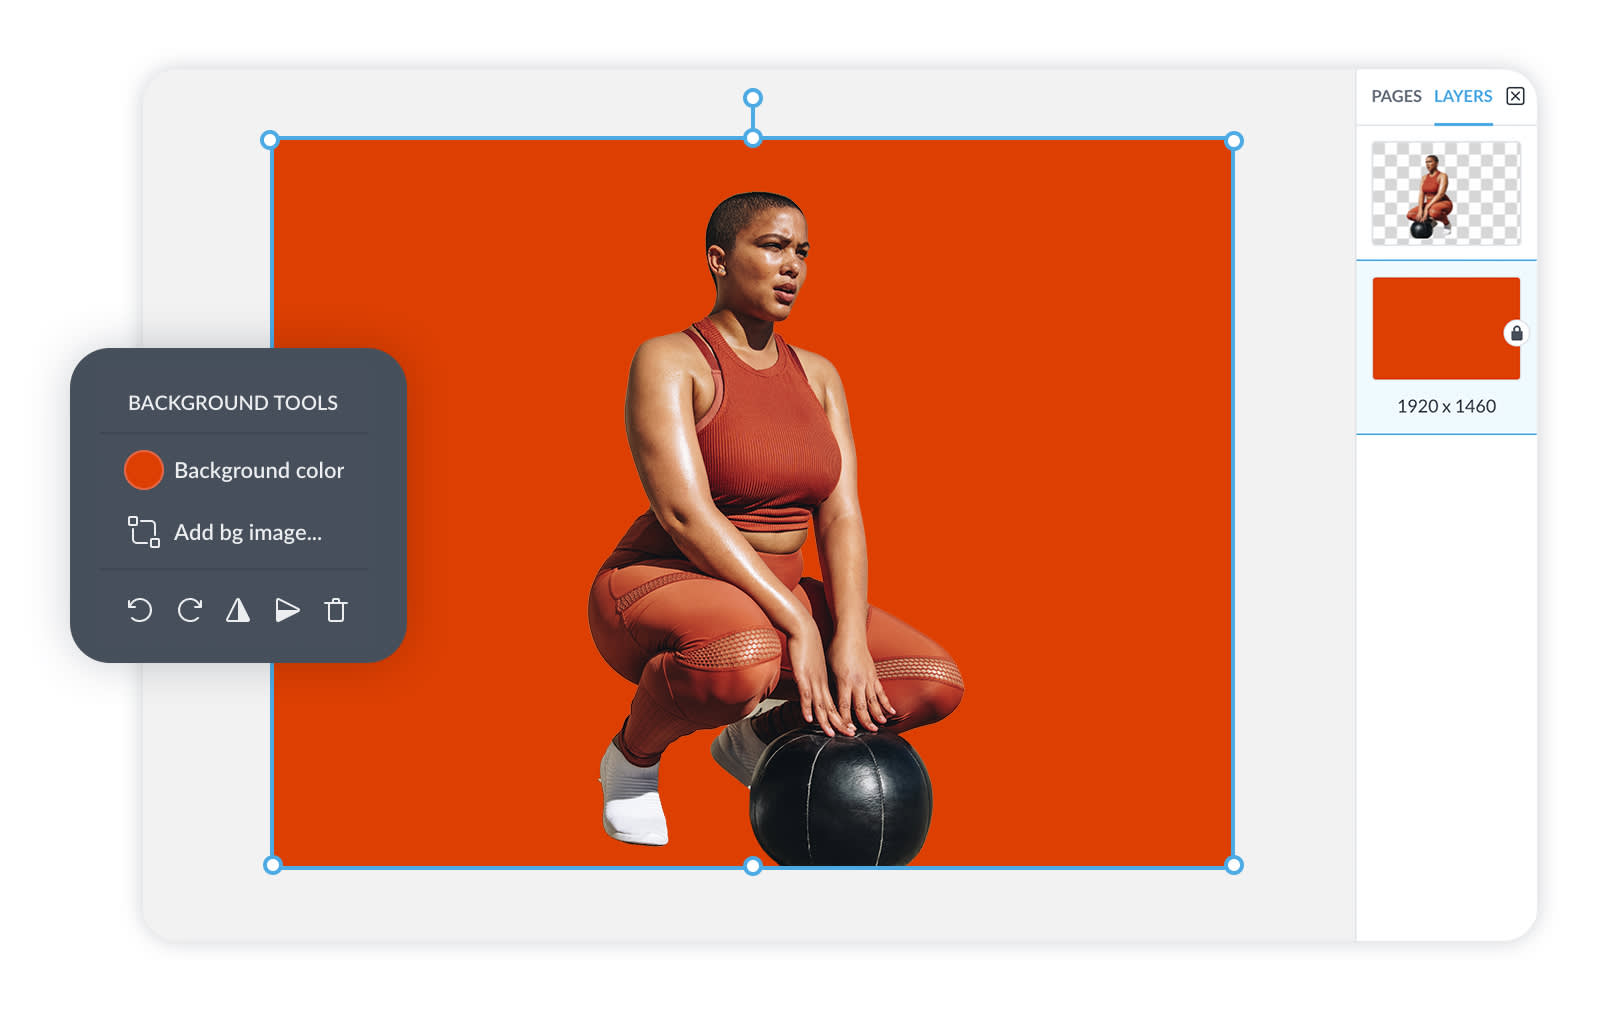
To make your new background a solid color, follow these steps:
Open the Layers panel, and select your background layer.
From the Background Tools menu, click on the color picker.
Use the color swatches to create a color background underneath your image.
Click Apply.
2. Set a texture as your photo background
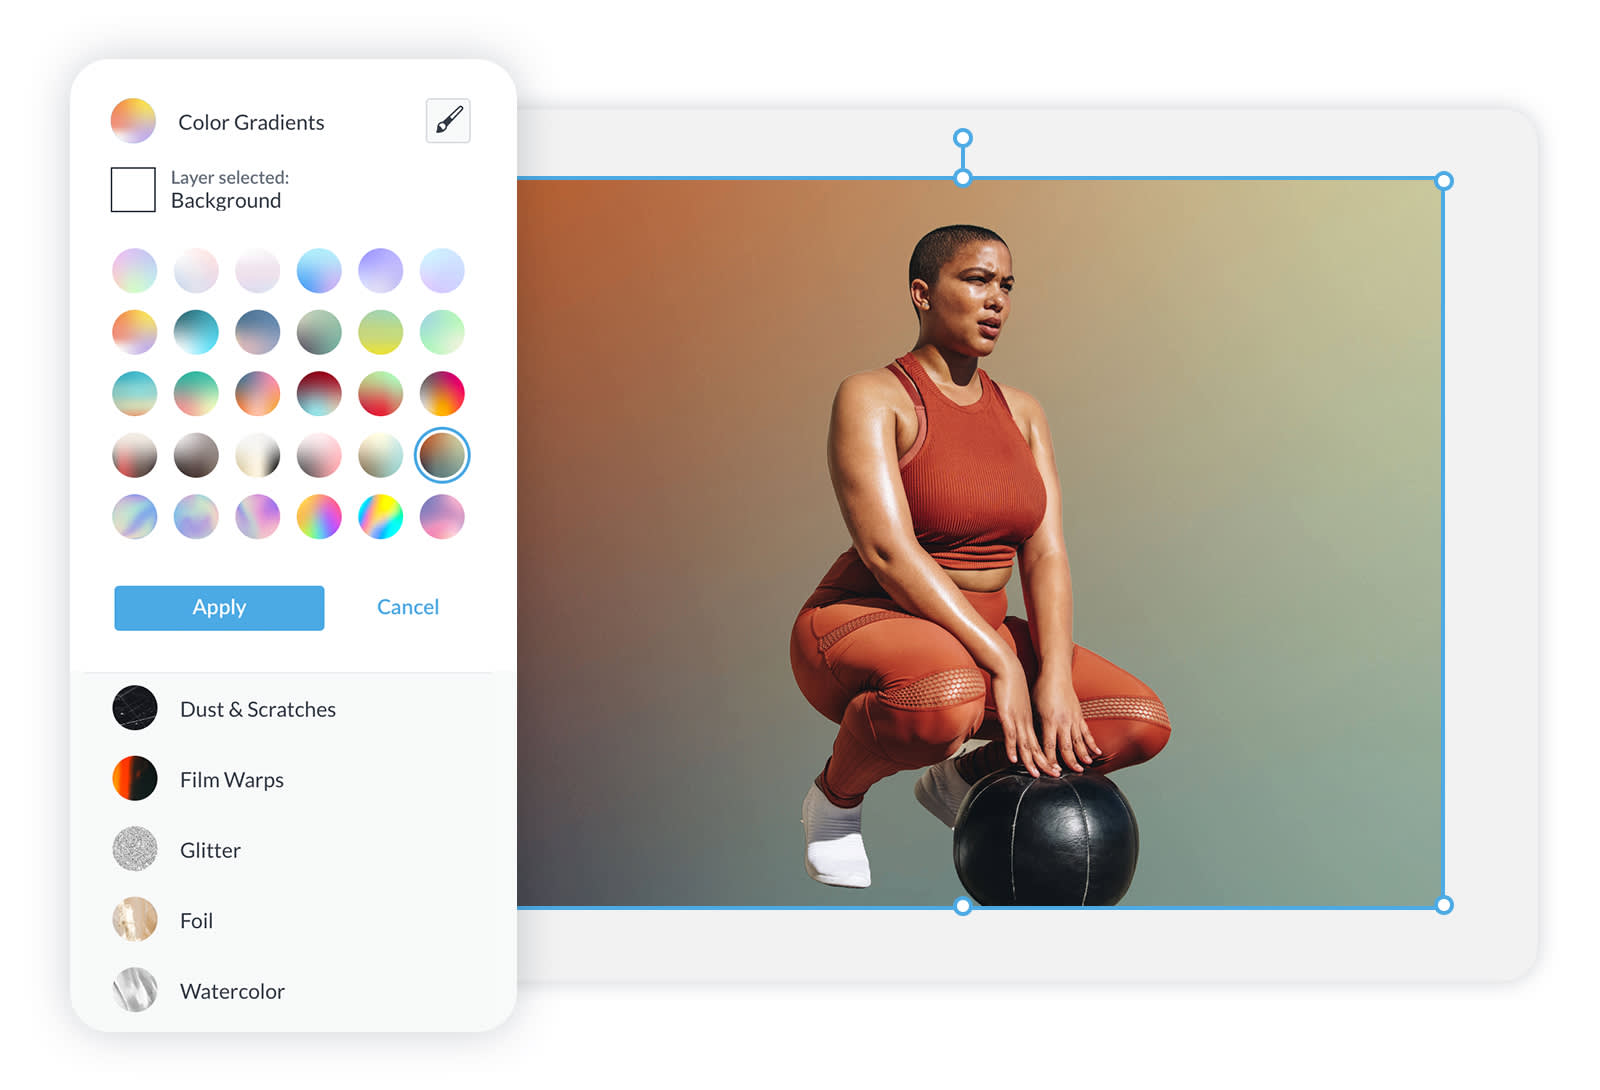
To set a texture as your new background, follow these steps:
Create a color background (see above).
Select your background layer from the Layers panel on the right.
Go to the Textures tab in the left menu.
Choose a texture to apply to the background.
Adjust the Fade slider depending on how much of the texture you want to show.
Click Apply.
3. Create a video background
Use your background-less photo atop a video, and for an extra "whoo-weeee!" effect, change the blend mode on your photo for a partially see-through look as in the above example.
Upload your own video or find the Photos & Video tab on the left-hand menu.
Browse PicMonkey's stunning stock video library and choose your fave.
Click to add the video to your canvas. Send behind your photo by placing its layer below the photo on the Layers panel.
Use the Video Tools menu to crop your video or adjust other elements.
Select your photo and play with Fade & blend on the Image Tools menu to adjust how your photo looks against the video background.
To learn more about using video in PicMonkey click here: Bring Your Designs to Life with Video!
4. Put a new photo as your photo background
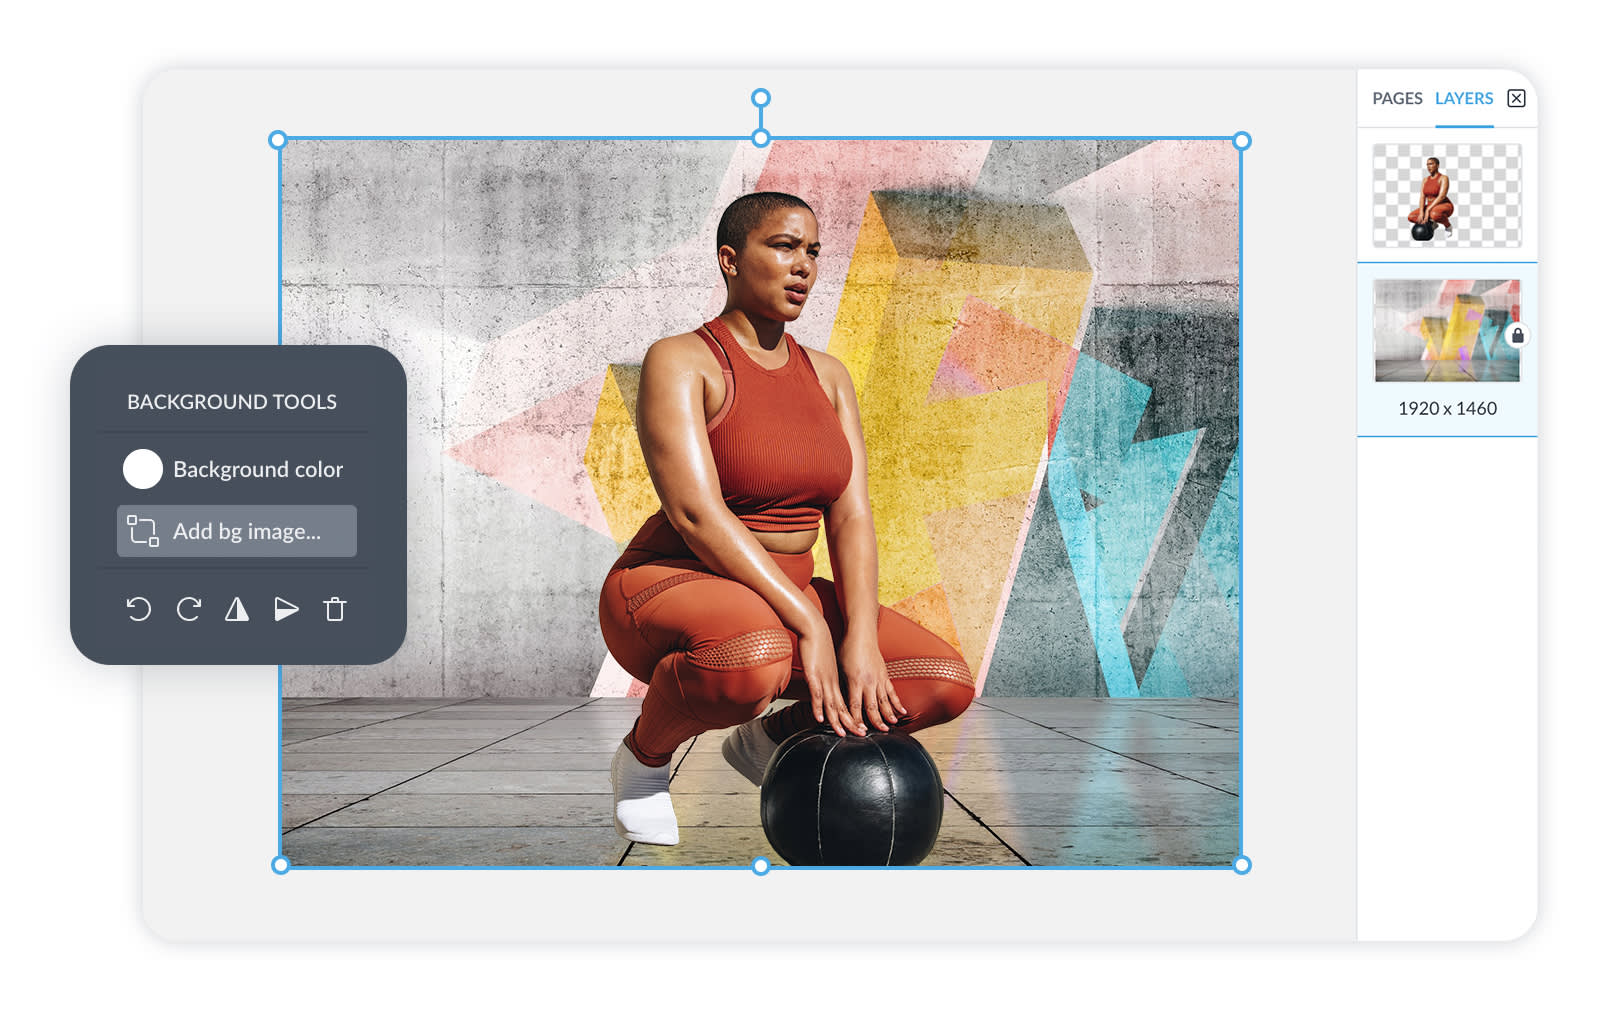
To make the background a photo, follow these steps:
Click Replace with image on the Background Tools menu.
Choose the source of your image.
Now, use the Background Tools to adjust your image, or change back to color.
Create a multi-layered design with our photo Background Eraser tool
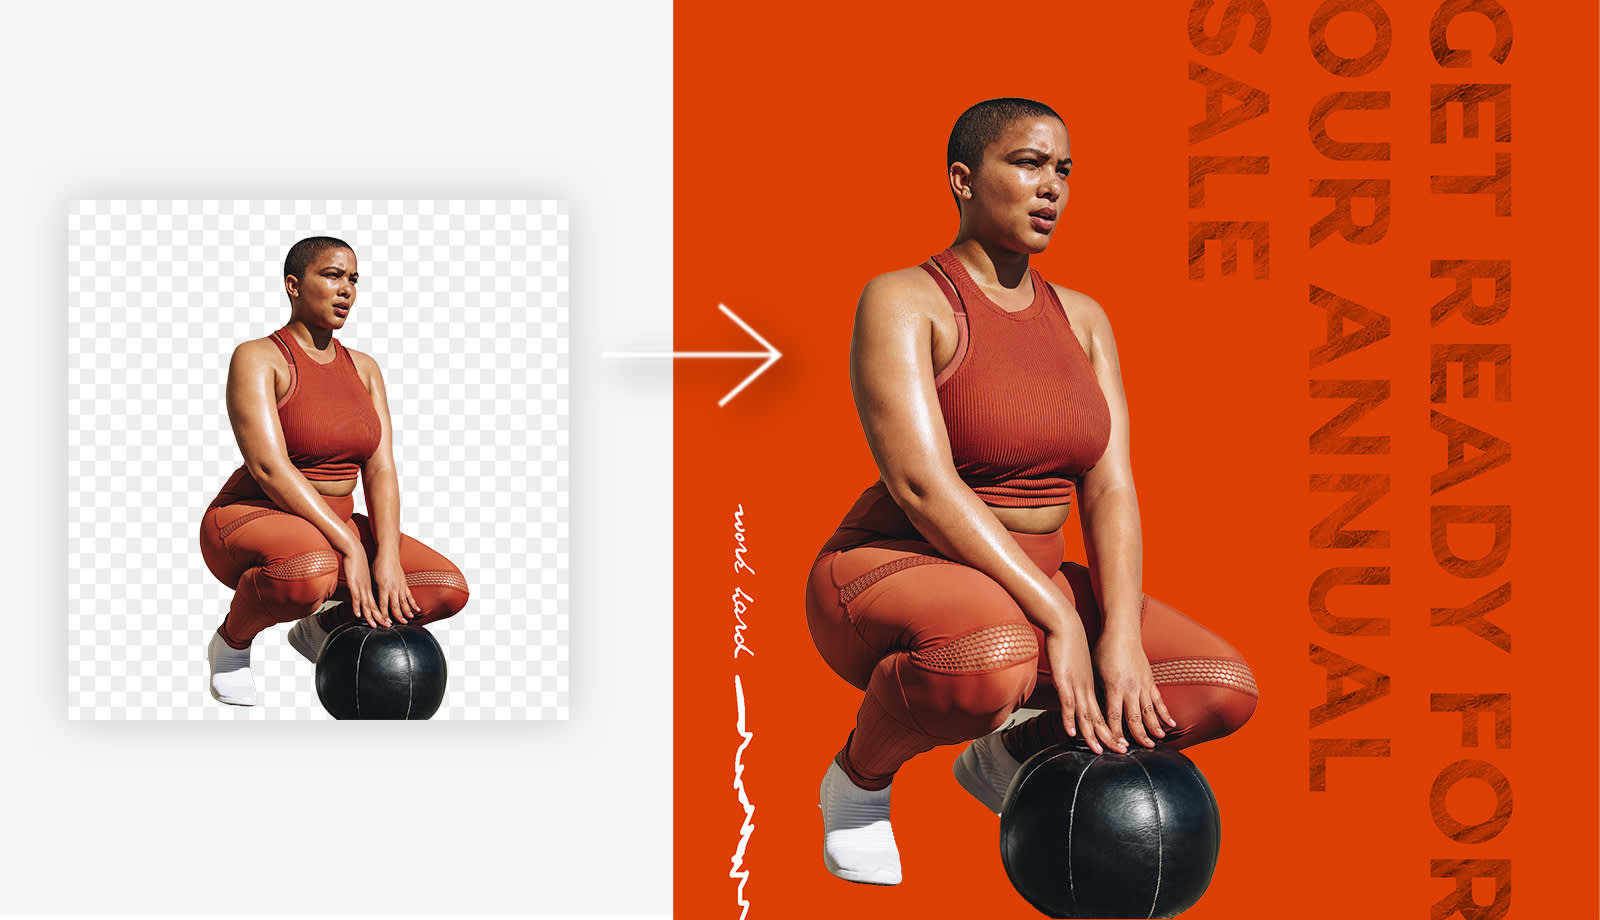
Once you’ve removed the background from your image, you’re ready to place it over a new background. Your image will be saved in Hub so you can grab it when you’re ready to start a new design.
To create a multi-layered design with our photo background eraser, follow these steps:
Follow the same process as above, or start from scratch by opening an image you want to use as the base of your design.
Add your background-less image to your canvas by selecting Add image.
Adjust size, orientation, or add an outline or a drop shadow from the Image Tools menu.
Add graphics or text to your design if desired.
Your new design is auto-saved in Hub as a multi-layered file so you can continue to adjust or edit it later on. Woo!
Best practices for the photo background eraser in PicMonkey
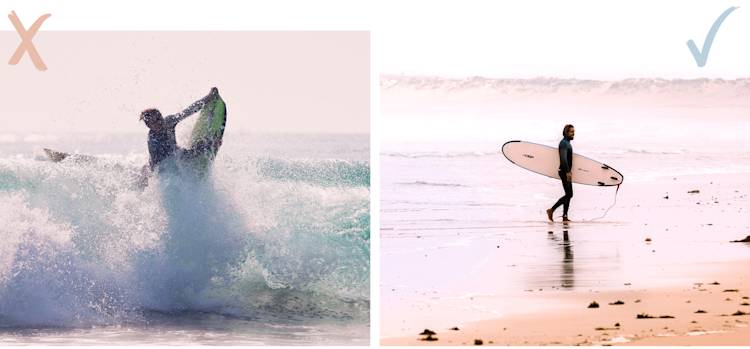
While the photo background eraser feature is amazingly magical, it may not work every time (and we'll tell you why). Here are some guidelines for learning how to remove backgrounds from images in PicMonkey.
Subjects and objects
Photos with a clear subject in the foreground will work the best. This could mean photos of people, animals, products, houses, cars, etc. In other words, choose subjects that are close to the camera.
Contrast
Images with good contrast between background and foreground are ideal. Pics that are too dark or too light won't translate. Consider editing your photo before removing the background to ensure highlights, shadows, contrast, and brightness are balanced. Otherwise, it may just not be the pic to use (sad emoji).
Backgrounds
Plain backgrounds are better than busy backgrounds, otherwise your background erase might look disjointed or confusing. Clean is what we're going for!
Simplicity
Images with just one or a small handful of people work better than images of large groups of people, as it's easier to separate the subject(s) from the photo.
Positioning
Images where the subject is cut off at the edge of the photo’s frame are better than images where the subject is cut off in the middle of the frame — like behind a desk, for instance —which will look odd with the background removed.
The best way to have your own photo background eraser victories, though, is to try it! Play around and don't give up if it doesn't work out the first time. Magic takes practice, after all (just ask Harry Potter).
Background eraser on the PicMonkey mobile app
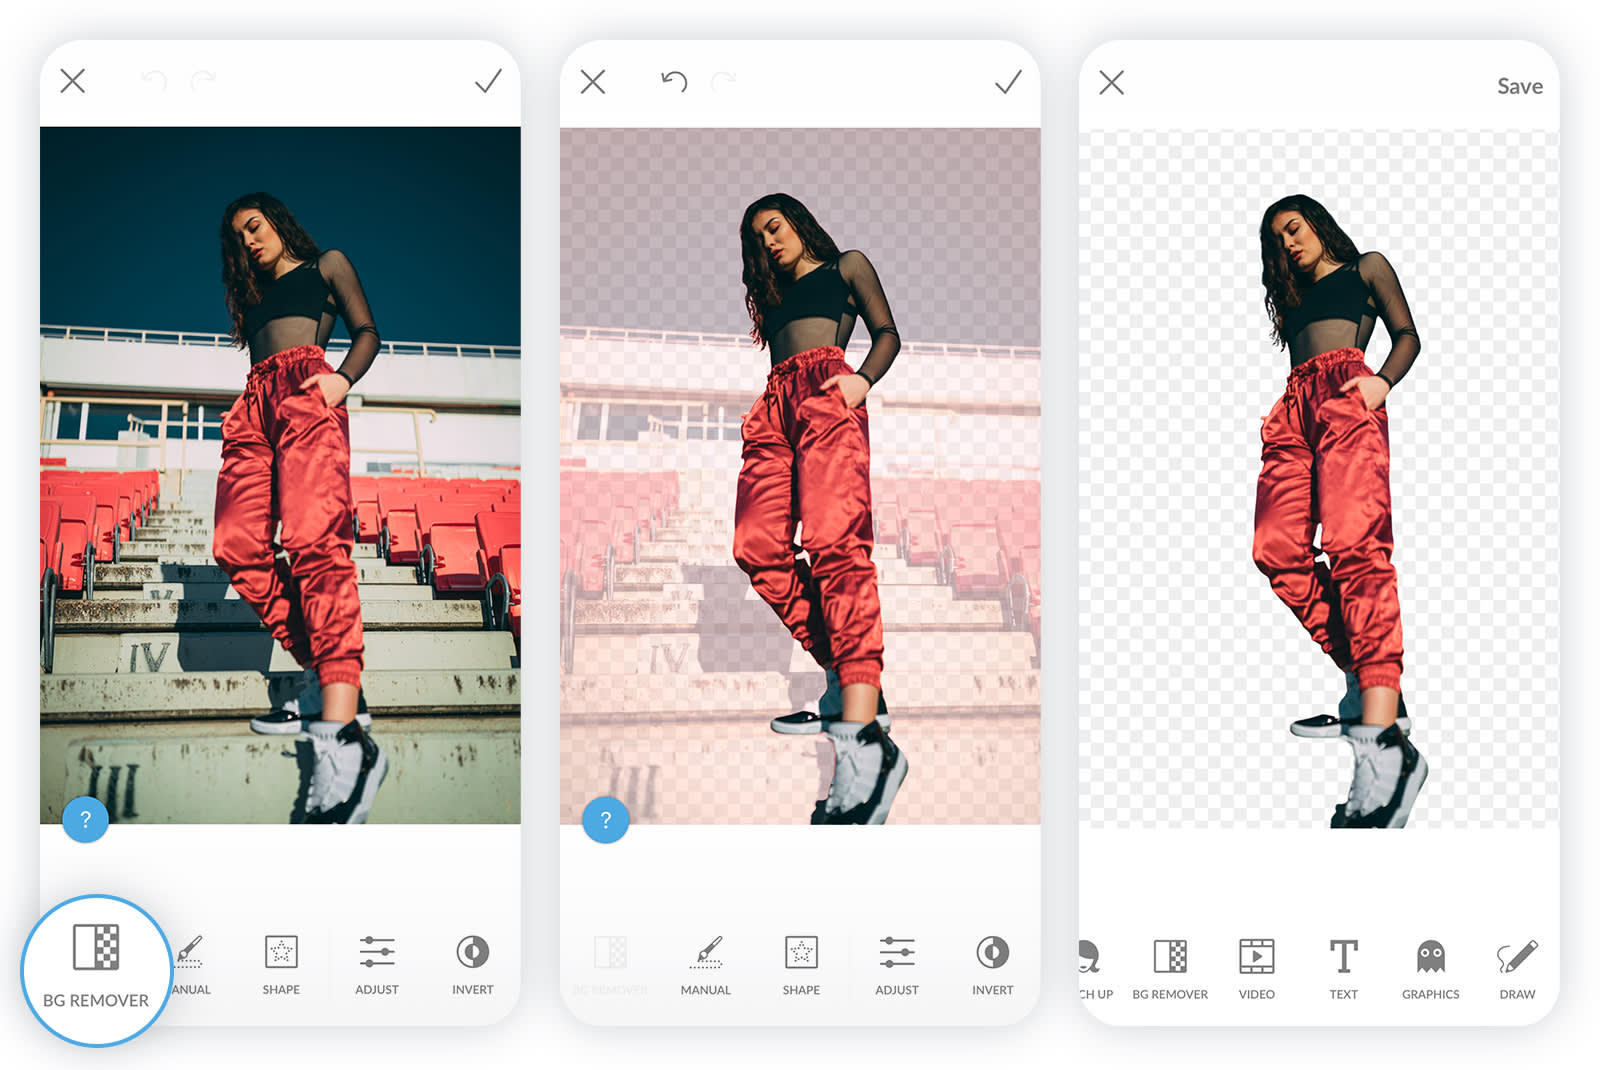
One-click background remover is also available in the PicMonkey Mobile App for iOS and Android users! If you don't have the mobile app, well, we've got you covered. Click below to get started!


It’s a Pro subscriber feature, so if you already have a Pro subscription then you have unlimited access. If you don’t have a Pro subscription, well, what are ya waiting for?
How to use the background remover app
First you’ll need to download PicMonkey from the App Store (iOS) or Google Play (Android) from one of the apps above. If you already have the app, be sure to update it to use the new feature for primo upgrades.
How to remove backgrounds on PicMonkey's mobile app
Open a photo to edit in the PicMonkey Mobile App.
Tap BG Remover in the bottom toolbar, then BG Remover again.
If too much background gets removed, tap Manual and use the paintbrush to restore. Alternately, you can use the Eraser tool to remove even more of your photo.
Tap the checkmark in the upper right corner when you’re finished.
Tap Save to save and/or share your creation with the masses!
Bada bing, bada boom. Done and done!
You can use the additional BG Remover suite of tools to fine-tune:
Manual gives you a paintbrush and eraser to further clean up your background. Zoom in to fine-tune your edits.
Adjust lets you fine-tune your choices when you’re restoring and erasing.
Tap Edges and adjust how sharp or feathered the edges of your image look by moving the slider up or down.
Invert lets you swap the erased part for the non-erased part of your image and vice versa.
How to remove background images with shapes
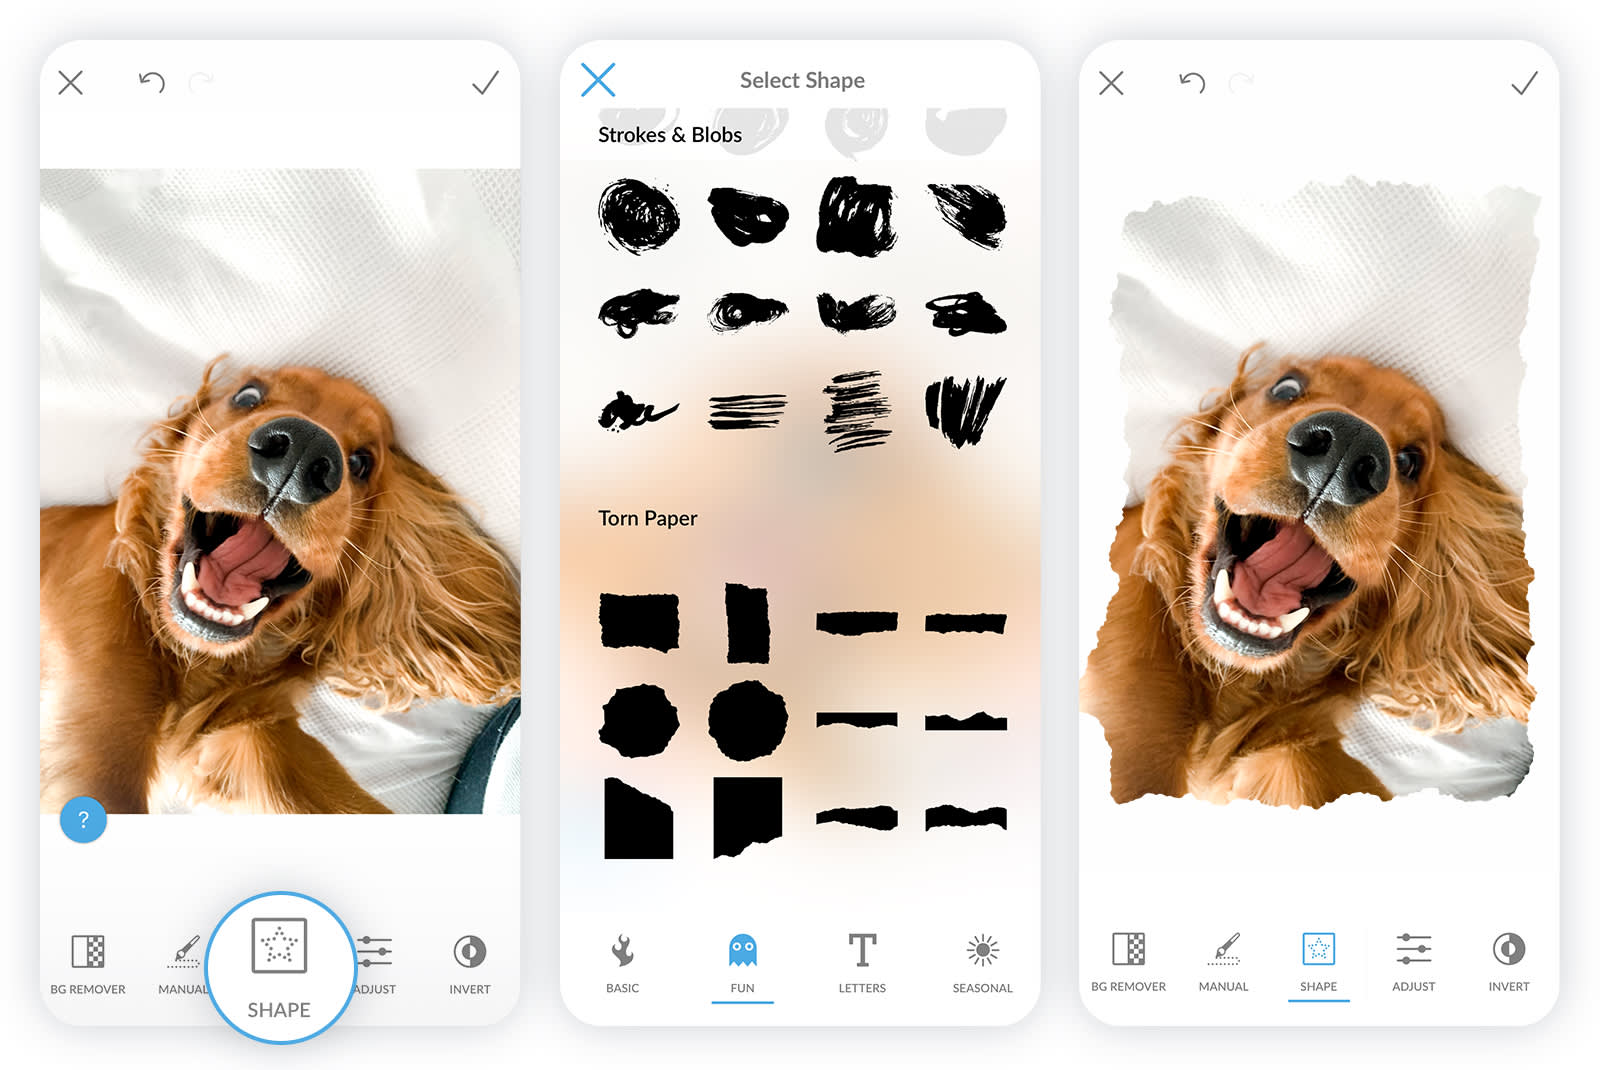
Shapes, you say? If you'd like to remove your background in a more creative way, PicMonkey's Shape option is for you.
Shape cuts out the background and fits the part you want to keep within the bounds of whatever shape you select. Once you pick a shape, you can adjust its size and placement over your original image.
Why use PicMonkey's photo background eraser?
Before you go, knowing why you need a background remover can actually help the execution. Consider...do you need it to be fast, trendy, practical, or all of the above? Being clear about the purpose of your designs fuels their function.
Fast
It may be true that good things come to those who wait...but our background eraser tool proves that great things come to those who don't, too! Why spend hours on something that can take you seconds? Expedite your creative process with PicMonkey's background eraser for instant creative rewards.
Trendy
Gain and maintain a loyal following with images that make people say wow. Knowing how to remove backgrounds from images in PicMonkey sparks elements of mystery, intrigue, and curiosity. Increasing the time your audience engages with your content can result in the following things:
Improved customer acquisition
Customer loyalty
Traffic
Sales (if you're doing the business thing)
At the end of the day, staying current with design trends is a primary ingredient for success. Your metrics thank you.
Practical
For all the times you've felt, ugh, I love this pic — if only this random person wasn't photo-bombing it. Salvage your favorite moments with a quick background erase. So even if you're not going for intrigue, photo background removers are also perfect for nuances and cleaning up parts of your photo.
Alright, we've given you the goods, so now it's your turn to make instant, one-click creations on desktop and mobile for all of your design needs. Hop to it!
