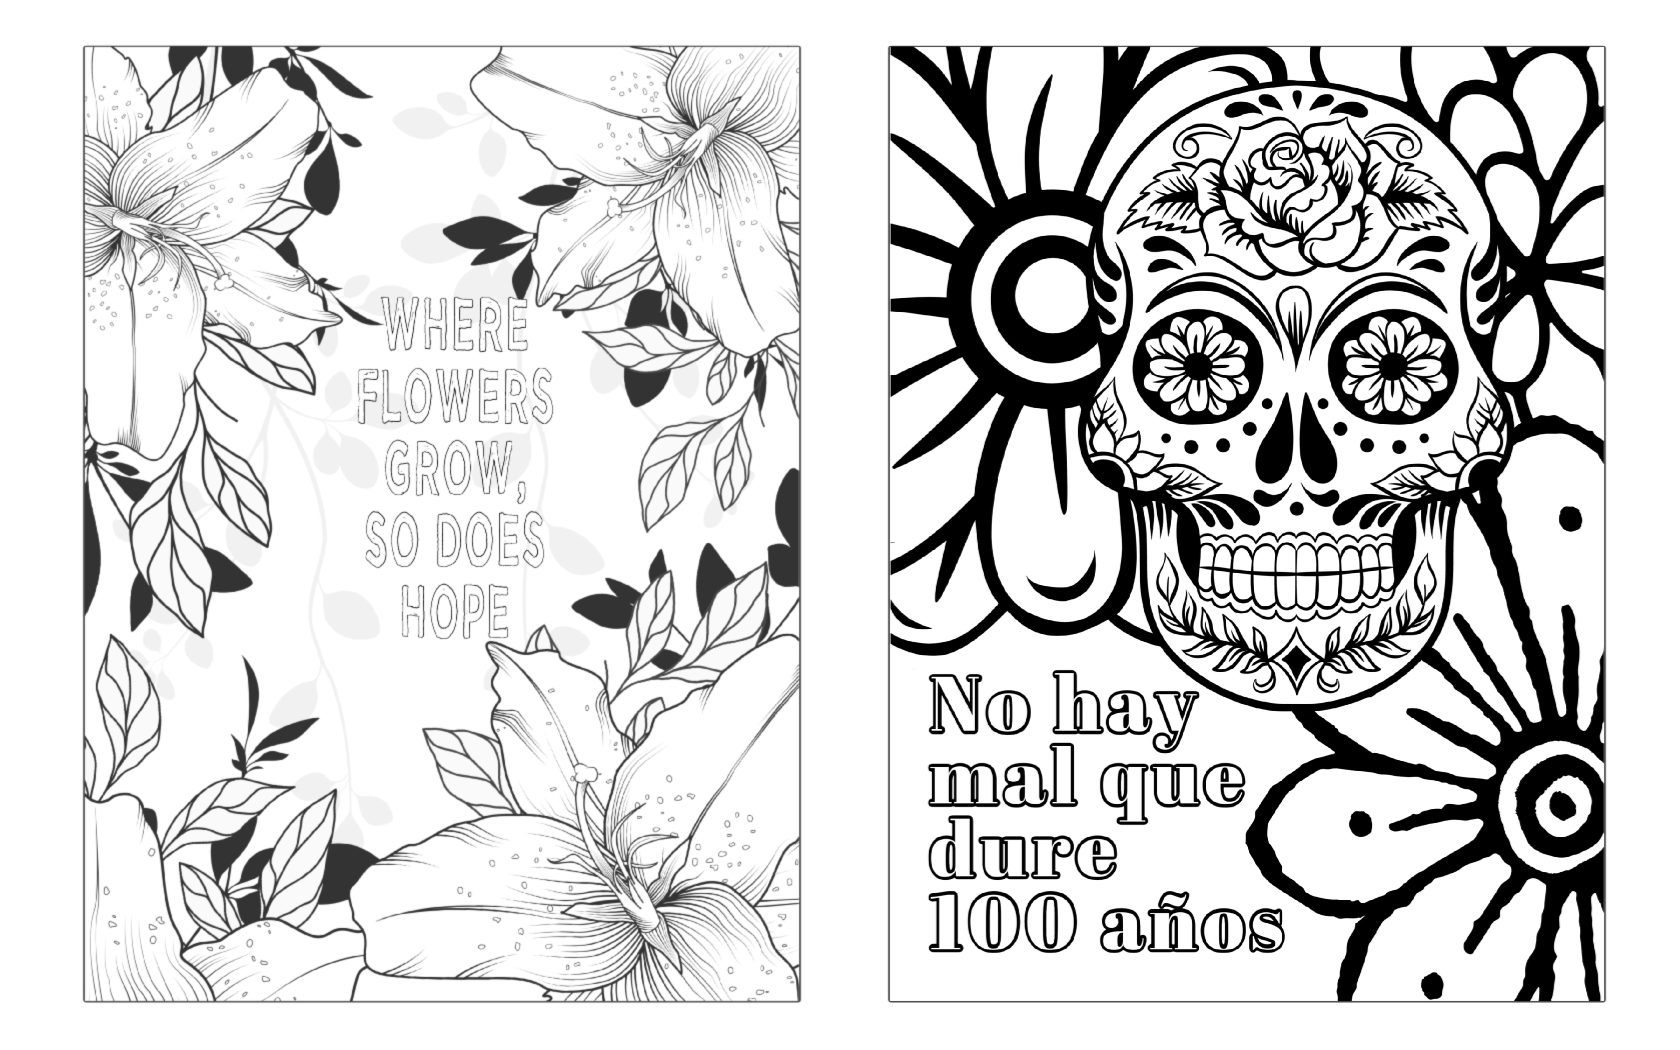
People from all walks of life love coloring books. Even Kate Middleton, Duchess of Cambridge, has been rumored to do a little royal relaxation with an adult coloring book and a box of crayons. Coloring is a bona fide stress reliever, so whether you're looking for a dose of stress relief yourself or just want to exercise some creativity, we'll show you how to make a coloring book in PicMonkey that can be enjoyed at any age.
How to make a coloring book in 5 simple steps
Open an 8.5" x 11" blank canvas in PicMonkey.
Turn on crop and bleed marks to create a safe space for printing.
Click Pages on the bottom toolbar to add more pages (up to 30).
Download your design as a PDF (Pro feature) and print.
That's your quickfire, be-coloring-in-minutes option; for more detailed steps on how to make a coloring book (that'll still getcha coloring pretty fast), keep reading.
1. Open an 8.5" x 11" blank canvas in PicMonkey
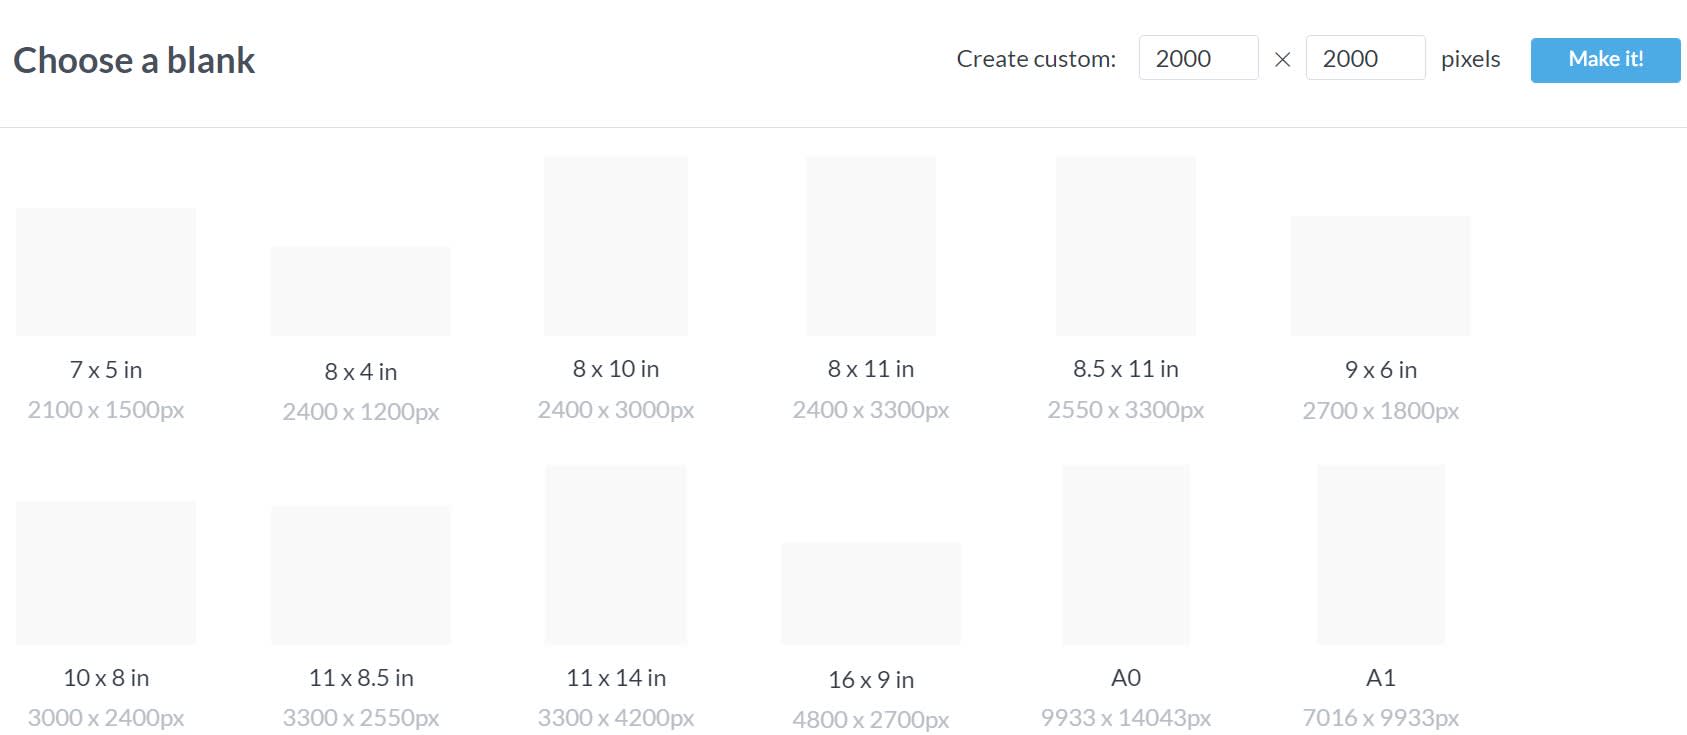
Open an 8.5" x 11" blank canvas in PicMonkey to get started.
You'll want to use an 8.5" x 11" blank canvas for this project. You can choose from portrait or landscape orientation.
To start with a blank canvas:
Open PicMonkey.
Click Create new > Blank Canvas.
Scroll down to the "Print Sizes" section and select your canvas.
2. Turn on crop and bleed marks
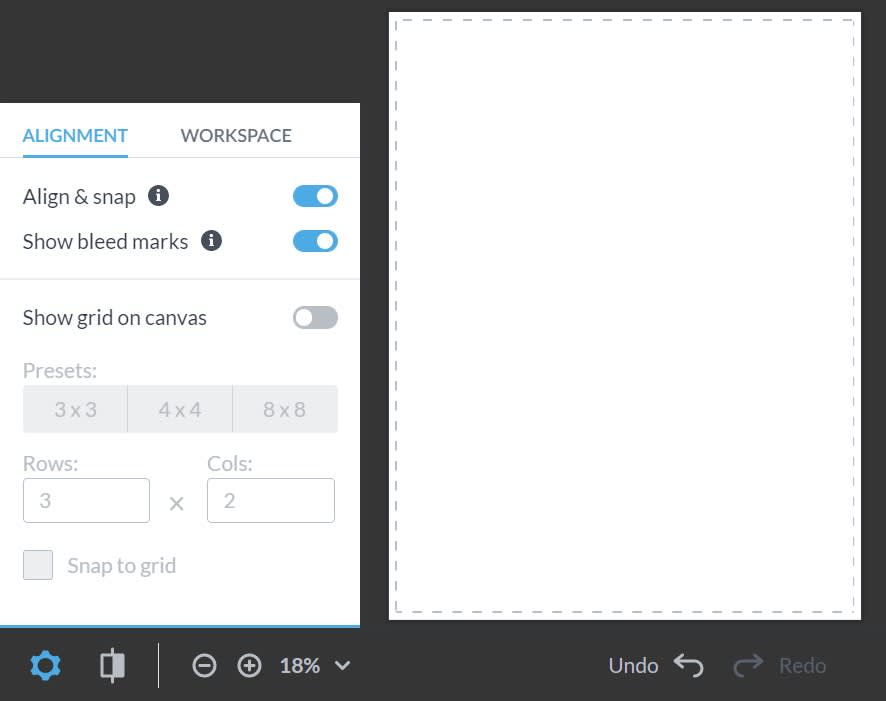
Printers can't print to the exact edge of a document, so you'll want to set crop and bleed marks so that you have a sense of where to design (and none of said design is cut off when printing).
To set crop and bleed marks:
Click Settings on the bottom toolbar (the cog icon).
Toggle on Show bleed marks.
Design within the bleed area border.
When you download your project, crop marks will indicate exactly where to cut it for perfect edges and a perfect design.
Learn more: Setting Crop and Bleed Marks for Printing
3. Customize your coloring book

Now comes the fun part — customizing your coloring book!
To customize your canvas with graphics:
Click the Graphics tab and browse graphics. To add one to your canvas, just click on it.
Select and drag the graphic to place it where desired. Use the corner handles and top handle to resize and rotate.
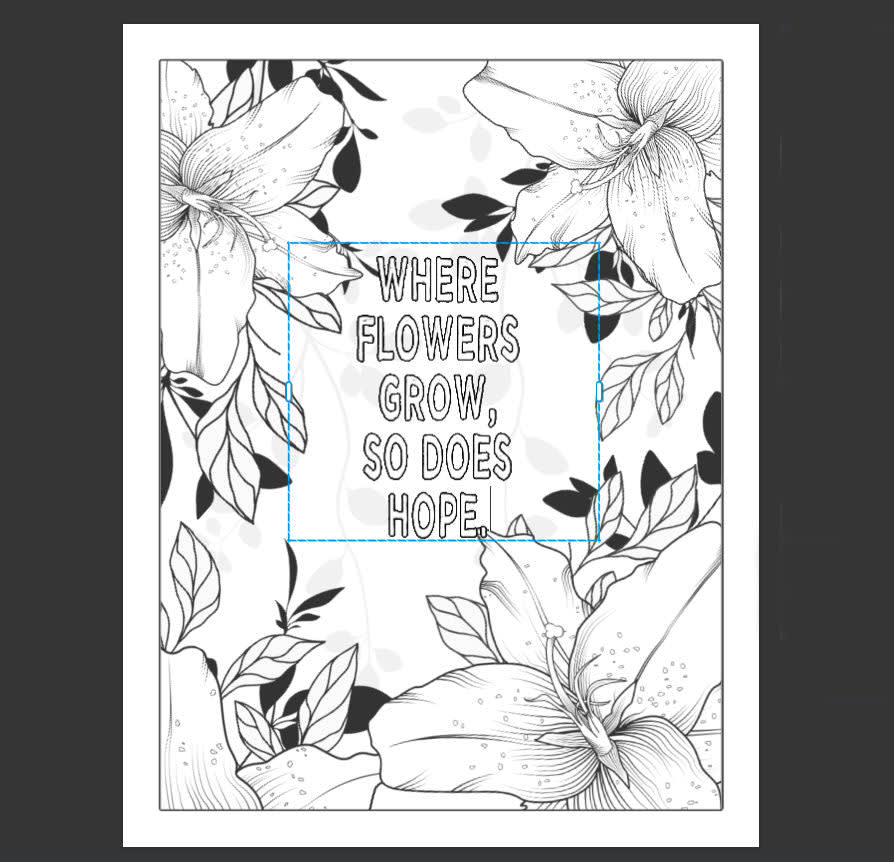
The above design uses flowers from the Illustrated Botanicals set and leaves from other sets. Some of the leaves are dark grey and some are light grey to create depth.
To customize your canvas with text:
Click the Text tab, then click Add text.
Type your text in the text box that appears on your canvas.
Use the tools menu on the left panel to change your text's size and appearance, or add effects.
To create outlined letters that you can color inside of, click your text layer, then click Effects on the tools menu. Select Outline and change the color of the outline to black (and make sure your text color is white). Adjust the Thickness slider as desired.
Pro tip: Play around with the fading of various graphics for a uniquely blended look. Just select your graphic and click Fade & blend in the left tools menu. Use the blend mode drop-down menu to try out different blends, then adjust with the Fade slider.
4. Add more coloring pages
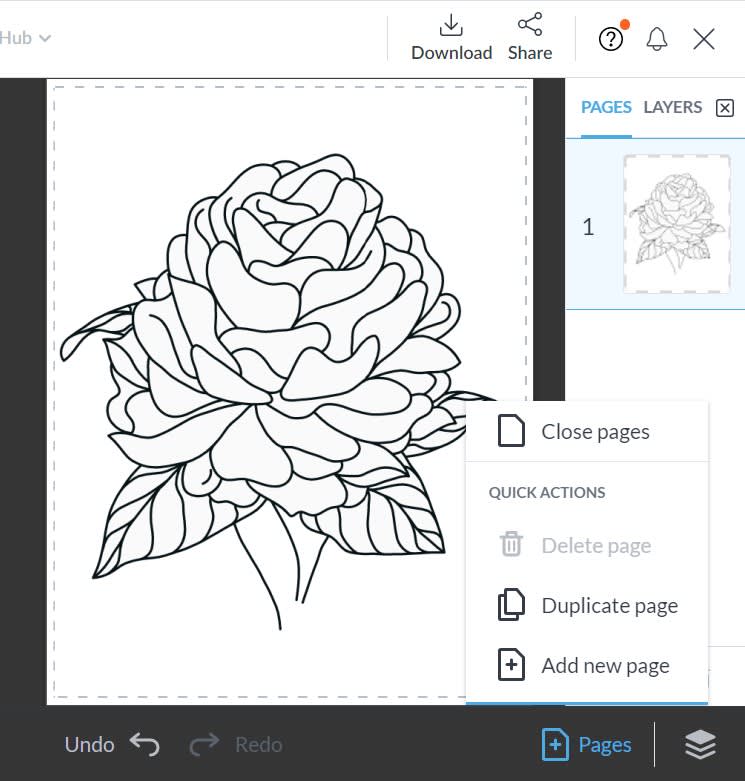
PicMonkey's multi-page tool lets you add up to 30 pages to your design! To do so:
Open the Layers panel and click on the Pages tab.
Click Pages in the right corner of the bottom toolbar.
From there, you can choose to either Duplicate page or Add new page.
Learn more about multi-page projects: Adding Multiple Pages to a Project
5. Download and print
Click Download in the top toolbar to export the file to your computer for printing. If you're a PicMonkey Pro subscriber, you'll want to download the file as a PDF for easy printing. Since you toggled on Show bleed marks, your downloaded design will display crop marks — these are especially useful if sending your design to a print shop.
Note: Multi-page projects downloaded as JPGs or PNGs will save to your computer as a ZIP file.
Make a coloring book with vintage artwork

Turn this poster by Alphonse Mucha into line art — it's public domain!
Okay, now you know how to design coloring pages in PicMonkey. But what about when you crave something more complex? Something that can transport you to another world? That might be a good time to embellish the pages of your DIY coloring books with public domain illustrations.
Public domain images include things like vintage posters, government-printed documents, certain art folders, and illustrations from 87 years ago or more. Check the rights to anything you want to use, but once you’ve got the all-clear, let your imagination run free!
Public domain illustrations can be super simple to turn into great-looking coloring books, because many of them are printed in either black and white or a limited color palette. Here are a few different styles of coloring books you can make with these up-for-grabs images:
Fairytale/storybook. Take advantage of the availability of beautifully detailed Victorian and Art Deco illustrations from children’s stories and novels.
Anatomical. This might make a good DIY gift for one of your weirder friends, we’re just sayin’.
Mucha. The artwork of Alphonse Mucha is so iconic, just his name recalls flowing lines, soft-faced women, and bounteous flowers.
Vintage ads. Turn old-school nuclear families into green-skinned aliens! Or just enjoy a little retro flavor in your doodling.
Pro tip: If designing a coloring book to sell, spend some time figuring out your book's theme. This'll also depend on your audience...what age range are you designing for?
But what do you do if these images aren�’t black and white? Or they are, technically, but they have kind of a yellowish cast and lots of discolored flecks? Don’t despair: these pics aren’t doomed to obscurity. They just need some fixer-uppering.
How to convert color art to black and white art
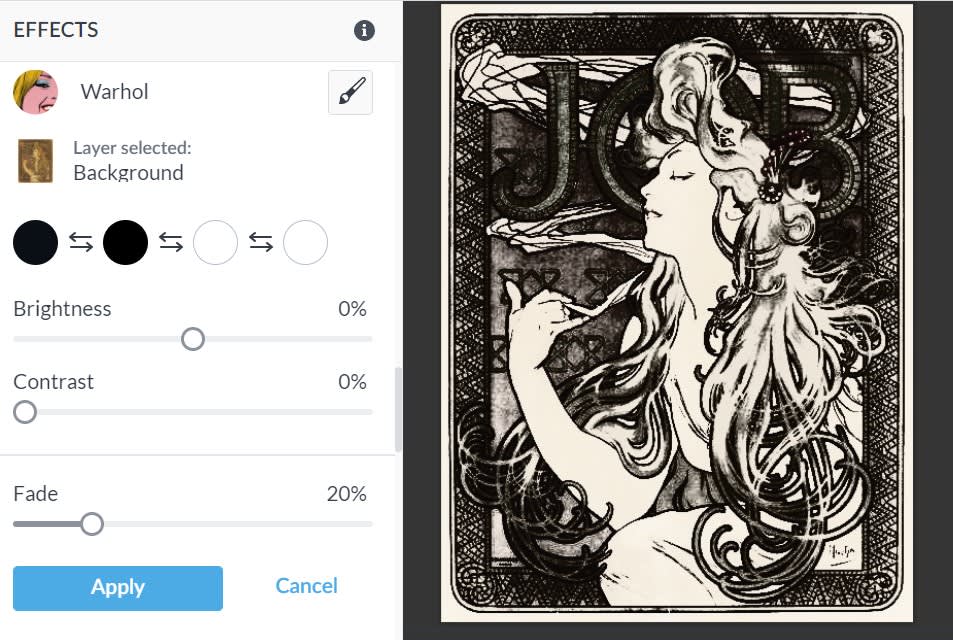
There are many paths to perfect coloring-bookable images but we’ve come up with three simple steps in PicMonkey:
Go to Effects, click Tri-X, and choose 1600. Click Apply to save your changes.
Also in Effects, choose Warhol, and change each of the color dots to black, white, or a shade of grey.
If necessary, go to the Edits tab, and click Exposure. Adjust the sliders to calibrate your perfect contrast.
Why Tri-X and Warhol? Well, both effects work to clear out those pesky midtones that keep your images mired in grays instead of clean lines. In addition, Warhol’s got its very own Brightness, Contrast, and Fade sliders, which make it easy to adjust the effect to suit your image. Use these two effects on public domain illustrations to make them their very most colorable.
