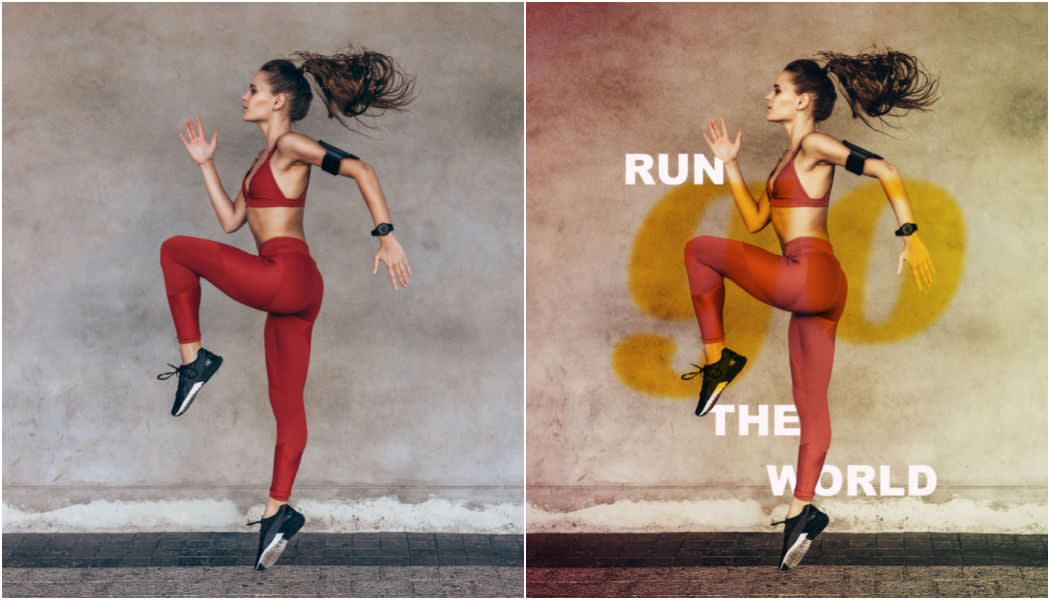
Make the image on the left into the design on the right. Magico!
Layers are your best friend, whether for upscale techniques to kick out a high-end look or as a simple way to sophisticate images. Layers aren't a photo editor effect, nor are they a tool, exactly. More accurately, layering images is a method.
To layer images simply means to organize the arrangement of objects — photos, text, graphics, background color — that you've placed in a design or photo so that you can manipulate them more easily.
This tutorial will cover how to use PicMonkey's Layers panel while creating a design that has gorgeous depth and a hip gradient look. Take a peek at our quick steps below, or keep scrolling for the complete walkthrough.
Quick steps for controlling layers while you design in PicMonkey:
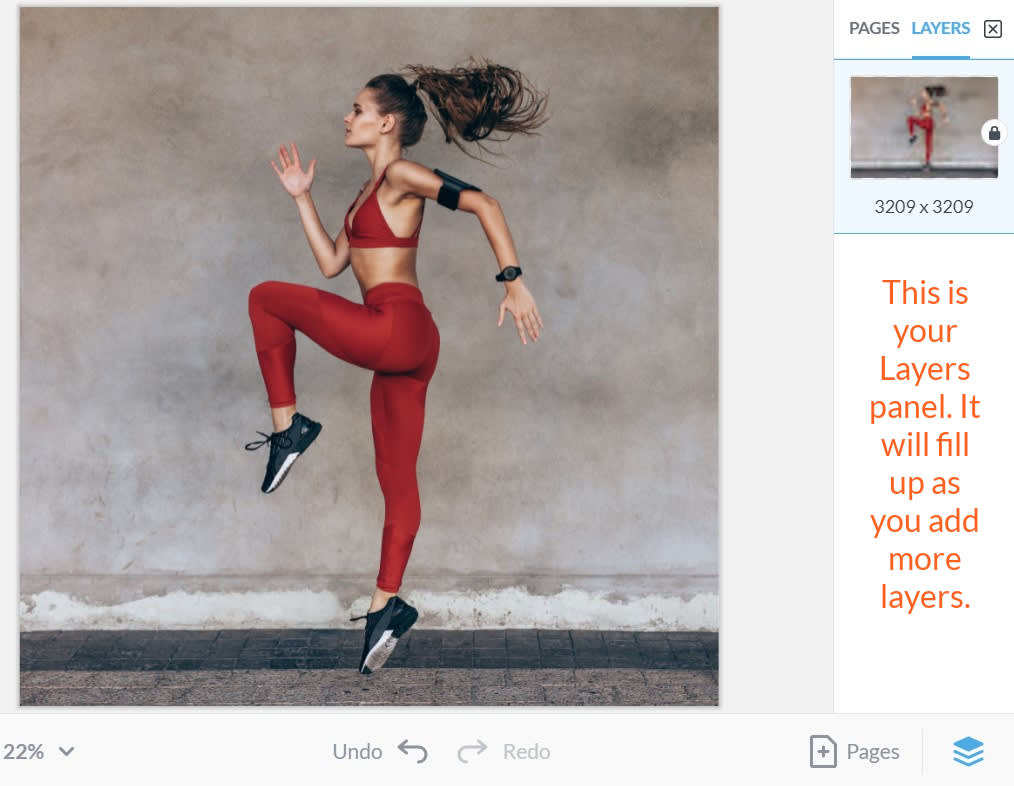
Open an image in PicMonkey or add any object to the canvas and the Layers panel will open. (If you close the Layers panel, click the stacked-squares icon in the bottom toolbar to open it again.)
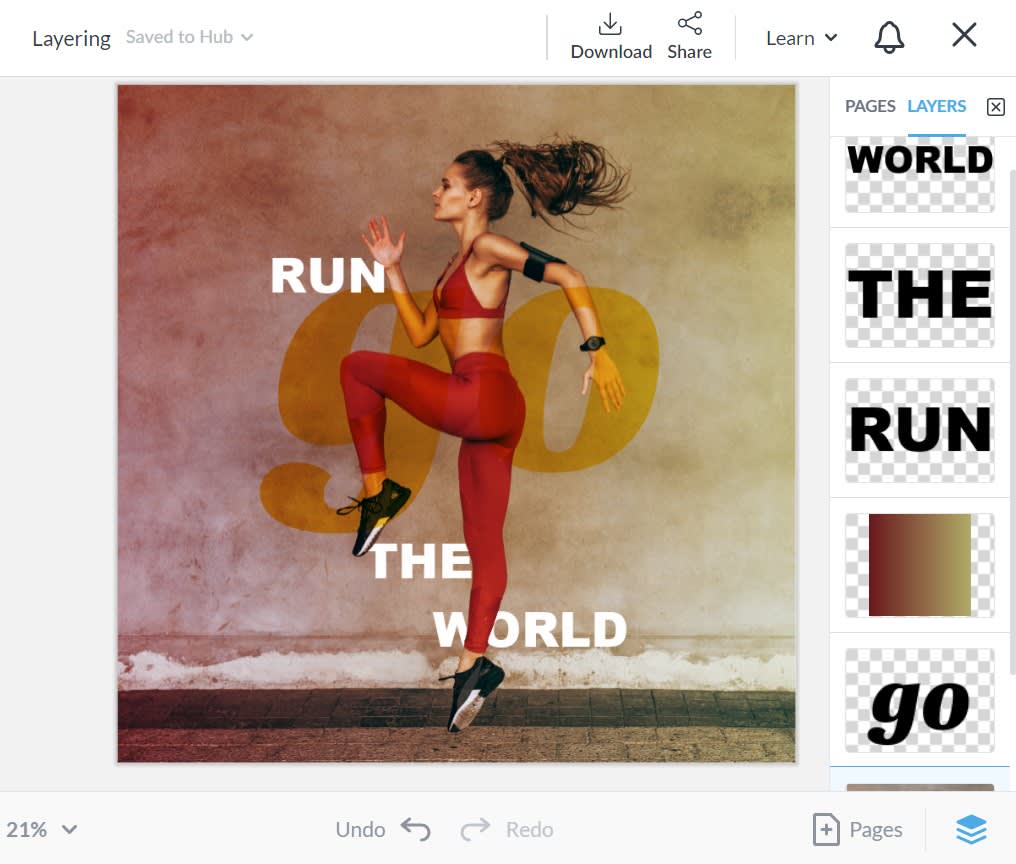
Any new text or graphic layers that you add will appear in the panel.
Reorder layers by using the up and down arrows in the panel.
Group or merge layers together to edit them at the same time.
Now that you’ve got the quick steps, let's dive into the deets behind learning how to layer images like a pro.
Open your image in PicMonkey

To master the art of photo layering, simply click Create new at the top of the homepage, then follow the prompt to upload your own image or select one from PicMonkey's stunning stock photo collection.
The Layers panel should open automatically next to your image. If it doesn’t, or if you close it and want to open it again, the Layers icon is in the bottom toolbar (it looks like a stack of square pancakes).
That little patch of rectilinear goodness is going to keep all your stuff organized, but right now it’s only showing one layer: your image, which is also its own background. (Inception!) You can separate your image from the background by clicking the padlock icon, which can be useful if you need to change the canvas size, and move the image around to find the best placement. (Not an essential step for this project.)
Create a gradient layer

To get the gradient (also called a color transition), we need to create another layer by adding a square graphic that stretches to the perimeter of the image. To get there, click Graphics in the side tabs on the left (shapes icon), and then choose Basic for geometric shapes.
Once you choose a square, it will appear on your canvas and in your Layers panel. Drag the corner handles of the rectangle to stretch it to the perimeter of your design.
From the side tabs of the editor, click Effects (magic wand icon), then choose Gradient from the menu. Choose your two hues and adjust the Direction and the Fade sliders (we did 180° and 20%, respectively). Click Apply. To make your original image visible through the gradient, make sure you have the layer selected, and adjust the Fade slider in the Graphic Tools menu.
Step one of photo layering, complete.
Manipulate text layers

Tip: use the eraser in the Text Tools menu to erase where text overlaps with the photo subject, and it will appear to be behind her.
To manipulate the text layers on your image, simply click Text in the side tabs of the editor and then Add text at the top of the menu. Customize your text in the text box that appears over your image.
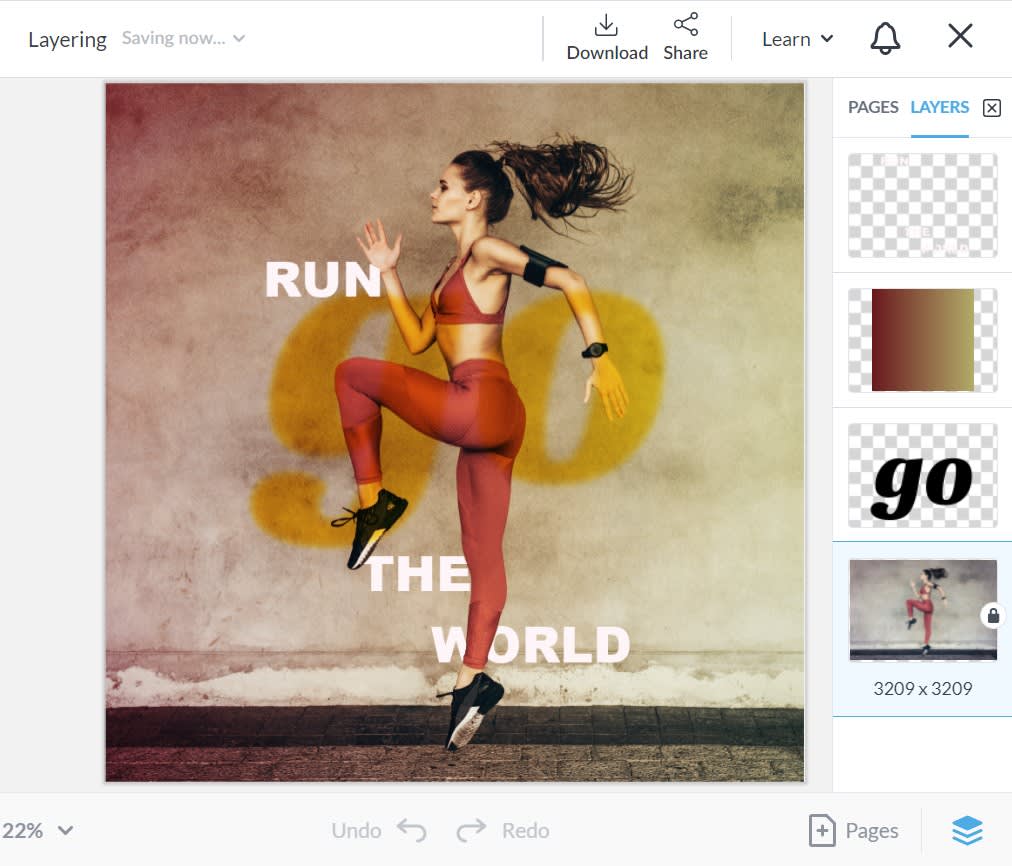
To get the look for the “Go” text we have in this design, change the blend mode to Multiply and adjust the Fade slider in the Text Tools menu. In the Layers panel, select and drag the “go” text layer under the gradient layer, so it appears behind it. Add more text, and it will be shown in its own layer. Your panel is fillin' up!
Pro Tip: Part of being your own graphic designer is knowing there are multiple ways to do something (sweet freedom!). You can either make stylistic choices as you go — like choosing unique fonts, colors, and graphics — or you can do that once you've put all your components on the canvas. Either way, you're in charge!
Apply effects to specific and grouped layers

Here’s a nifty feature we hope you’ll go nuts with: you can apply anything to anything in PicMonkey. So anything in the Effects tab is fair game for any layer (text, an image, a graphic) in your design. From the Effects tab, add the Moonlight effect to your original layer (the photo of the athlete in this design).
To blur the “go” text layer a bit, select the layer and click Effects (the wand icon) from the side tabs on the left. Choose Soften from the menu, and apply it to the text layer. Subliminal, right?
To make changes to several layers, group them by hitting CMD+G (CTRL+G for Windows) on your keyboard, then selecting several layers. We applied the Pink Fog effect to the entire image, for this design (notice in the image above that "Run," "The," and "World" have been grouped together in the top layer on the Layers panel.
That’s it: a deceptively simple design made possible by befriending the awesome Layers panel. Now, for more tips on layering photos properly.
Best practices for photo layering
Undo/Redo live on the bottom toolbar (and are featured in every tutorial image above). They make your life much easier if you make a mistake or don't like a look and need to revert (or even, revert your revert).
Ordering layers lets you choose which design elements (layers) appear to be in front of other ones, and which should appear behind. Select and drag layers in the Layers panel to change their order.
Duplicate a layer (or layer group) by clicking Command/Windows + D, and clicking the layer. Some like to duplicate a layer and experiment with a bunch of different looks, so they can choose the winner without having to click “undo” a bajillion times.
Delete a layer by selecting it, and clicking the garbage can icon in the lower left of the editing menu.
Select several layers (multi-select) by pressing your Shift key before selecting them in the Layers palette or directly in the design. They’ll remain as distinct layers after you’ve applied changes to them.
Flatten layers by clicking the Flatten button in the lower left corner of the palette. This combines all the layers into one flat image, and you won’t be able to make changes to individual layers afterwards.
Make a layer show through text or a shape. Select a layer containing text or a shape, then click Textures. Click Add your own texture and choose any image you want. Bam! You’ve got a mask.
Why layer pictures?
Okay, so we've given you the design inspo, but let's take this one step further. As if it wasn't already obvious how cool it is to layer images, let's establish the benefits of this method.
Dynamic
Truly understanding how to layer pictures is the difference between photo editing and graphic design. Unlike photo editing, implementing the layering technique is a design tactic. It adds dimension, complexity, nuance, subtleties, and texture to any photo.
A balanced photo includes the right colors, graphics, font, and textures. We're looking for that Goldilocks just right feeling, so be sure not to make your components too busy or loud if that's not your intention.
Easy
Guess what? No design skills are required to learn how to layer pictures effectively. If you're looking to keep things simple, maybe you layer images in a subtle way to make people think it's a natural photo edit.
Or, if you're looking to strut your graphic design talents, this is the place to do so! Either way, Professor PicMonkey wants all students to pass this class!
Captivating
When it comes to learning new skills, what better way is there to interact with your work than by layering images step-by-step, one-by-one? Photo layering is an easy way to connect with your intuition and make the right stylistic choices. Not only does this method captivate audiences, but it captivates you, too!
We aim for you to feel empowered in your art. (We've found it helps to blast some Bey in the background.) And if you get stuck, be sure to check out our tutorial on color theory for a quick reset. Even one small light-bulb moment can re-route your momentum.
We have full faith in your graphic design capabilities so make us proud and get to layering!
