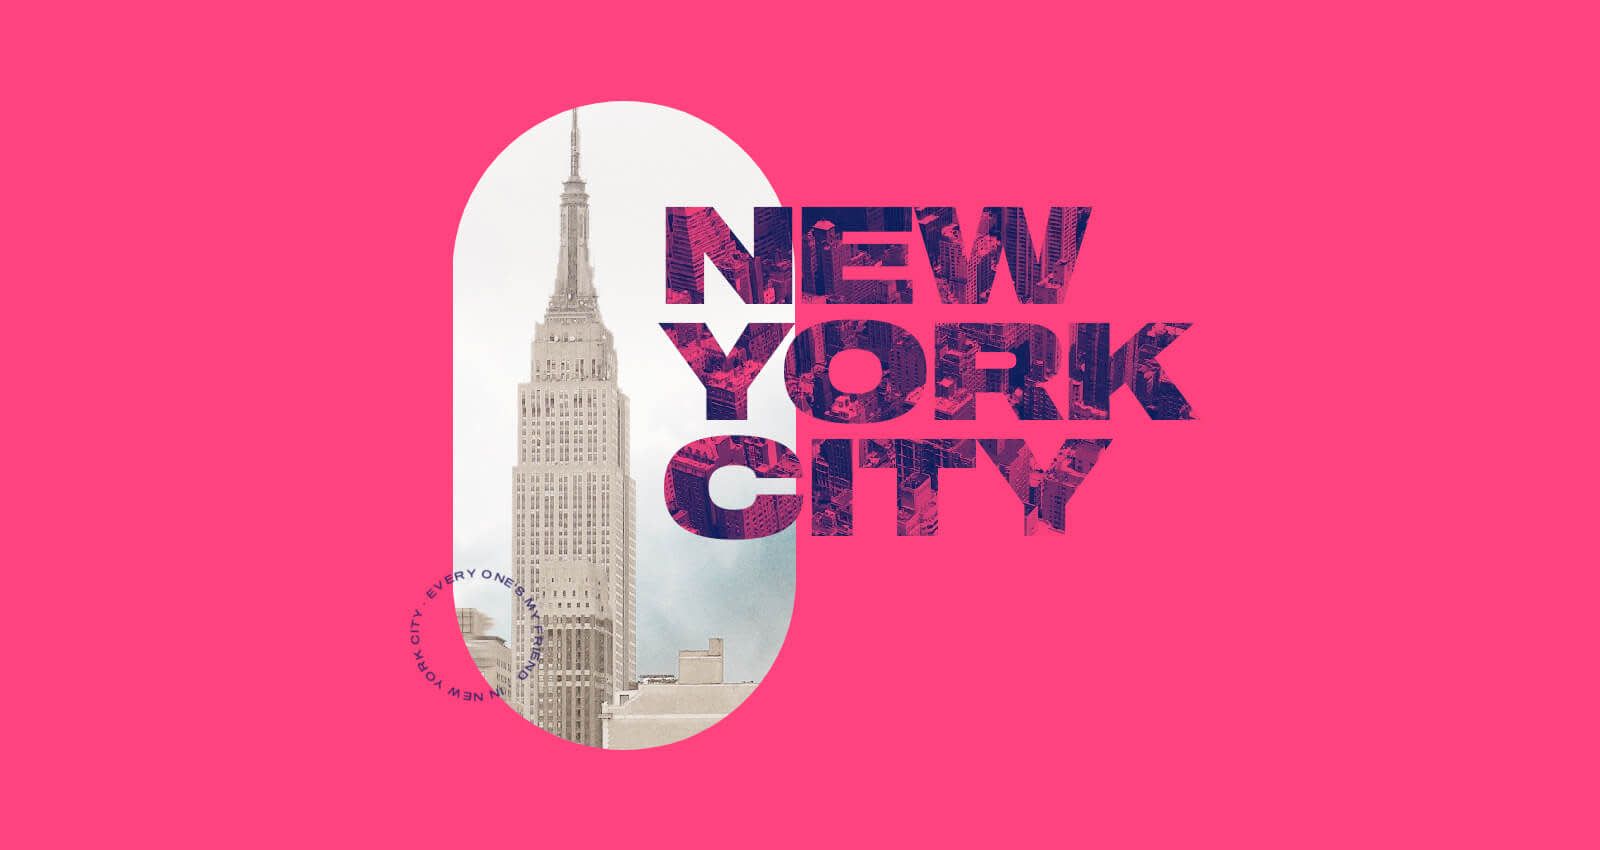
Say you wanna put a photo inside of your text, or an image inside of graphic shapes. Other photo editing and design programs make this so hard that you want to pull out your hair. And we were like, "Why tho?" So we made creating clipping masks super duper easy. Like, one-click-of-a-button easy.
Image masking is like combining two images in a layer so that one image appears to peek through the outline of the other. It might sound complicated, but trust us, it looks great on text and graphic graphics alike. Get excited for gold foil, floral, sunkissed, picture-inside-of-an-object goodness that you’ve been dreaming of and never realized ’til now how easy it is to make.
Quick steps for creating a clipping mask:
Select a text or graphic layer to fill with an image
Click Fill with image on the tool palette & choose an image
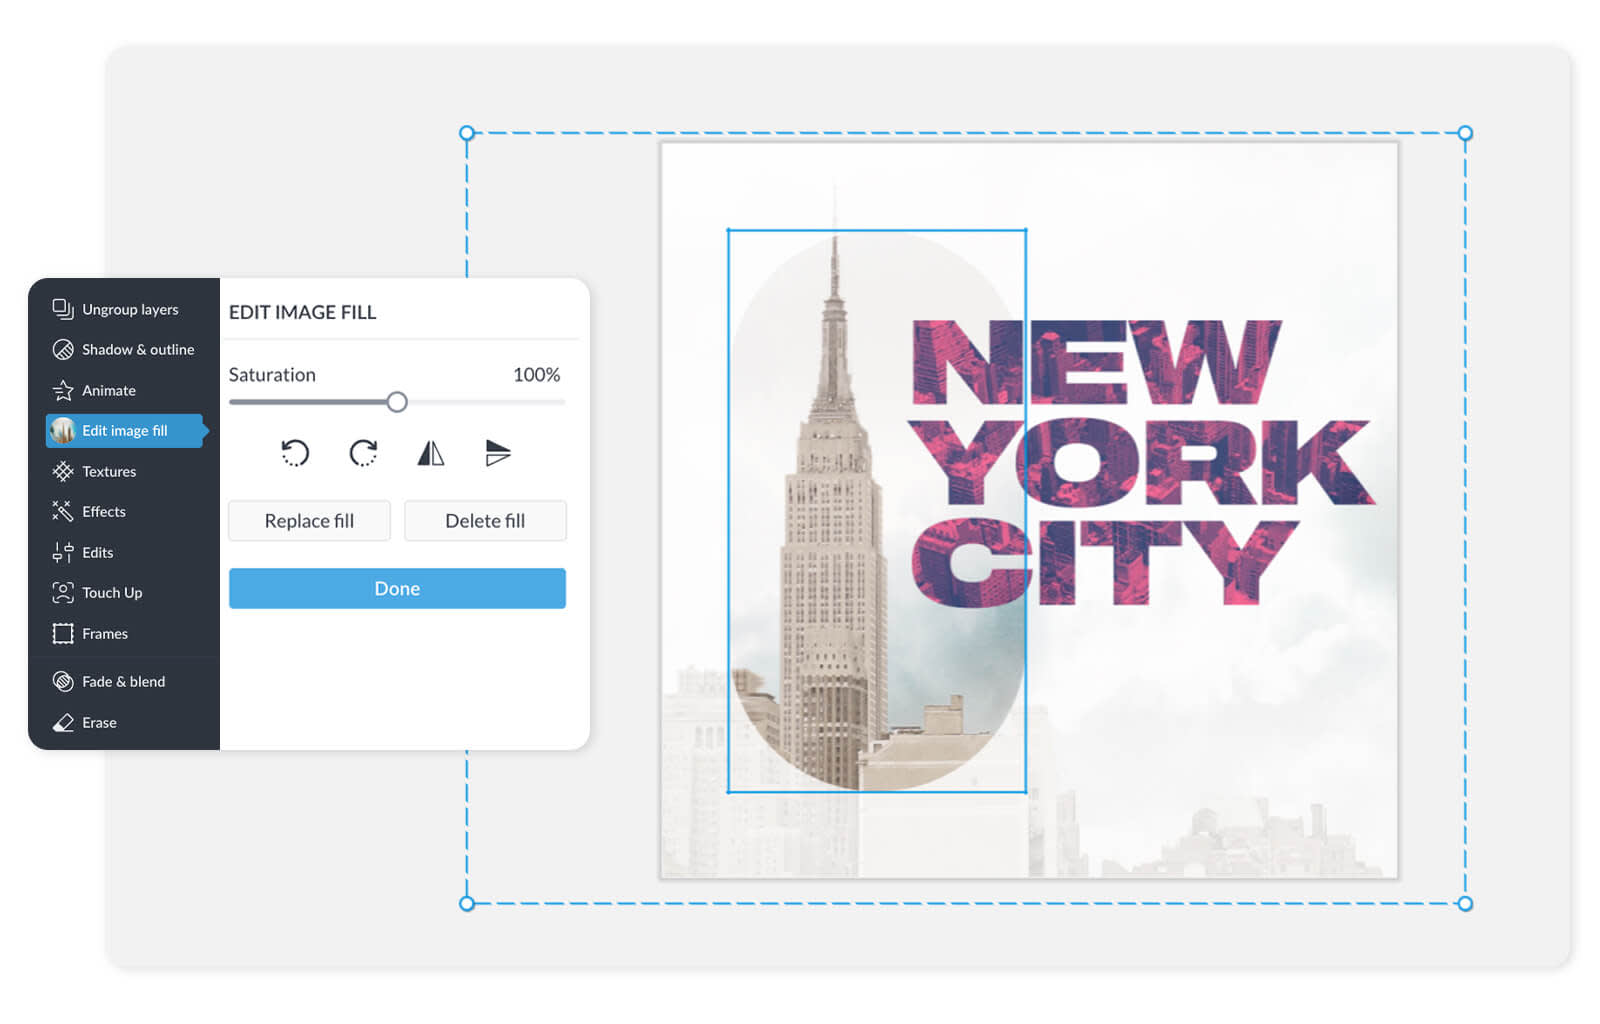
Select Edit image fill on the Text Tools panel
Adjust the image behind your text or shapes, then click Done
If you’re ready to dive in deeper, follow our more in-depth steps below.
Add text or graphics to your canvas
Head to PicMonkey.com and start with a blank canvas.
Place the graphics or type the text onto your canvas that you want to fill with images. Use a font with chunky letters so your picture will show through. Some great options are: Heebo Black, Impact, Chivo Black Chunk Five, Poetsen One, Molle, Bungee, Komita...you get the idea.
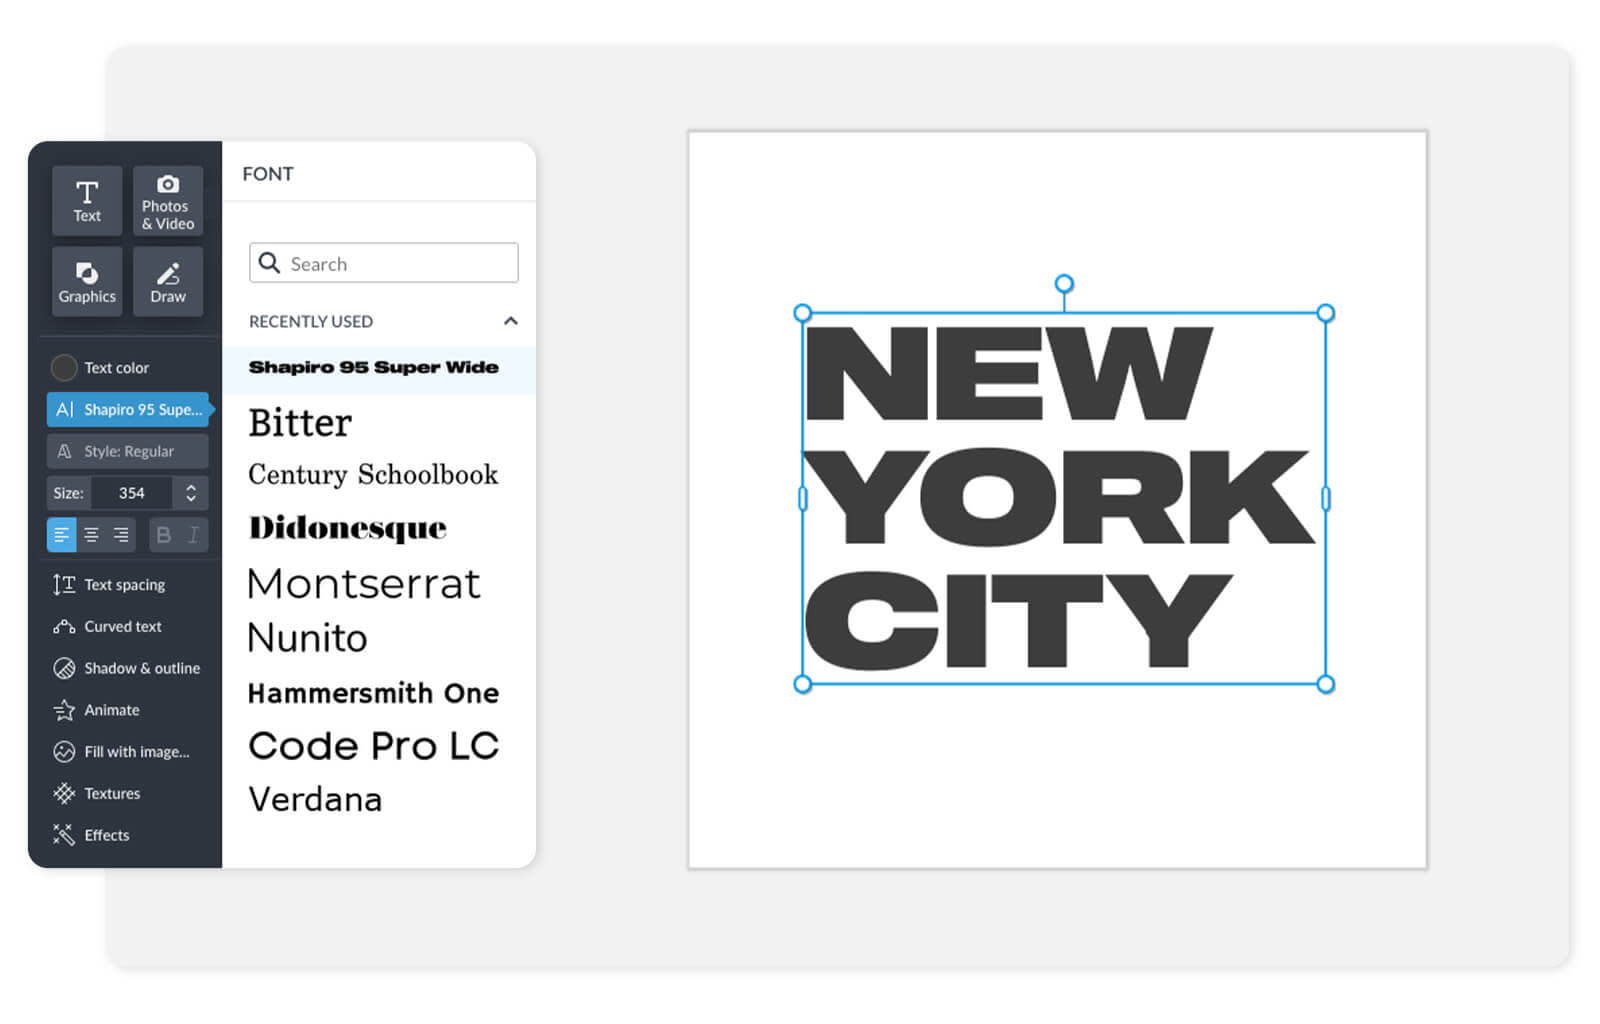
Choose a chunky font for filling with an image so more of the photo shows through
3. Select a layer (or multi-select 2 or more layers) that you want to fill with an image. Use the Layers panel or simply click the layer(s) on the canvas.
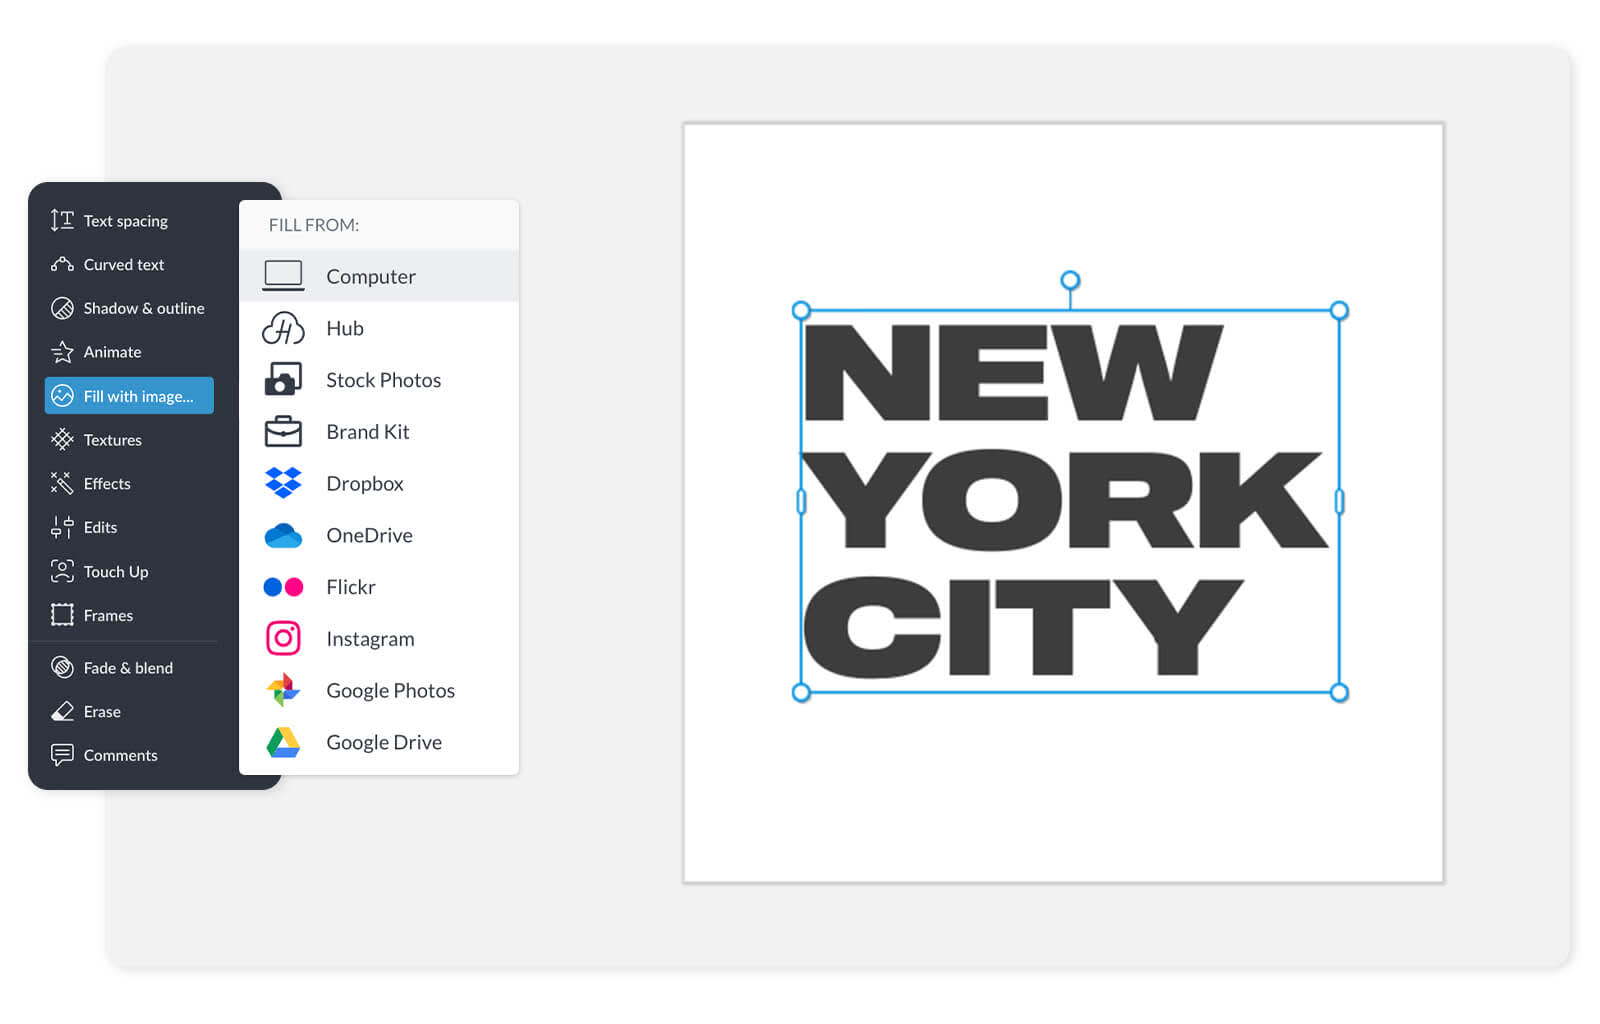
4. Click the Fill with image button on the left Text Tools panel, or Graphic Tools panel. Choose an image from stock photos, your desktop or elsewhere to fill the layer.
Adjust the image mask
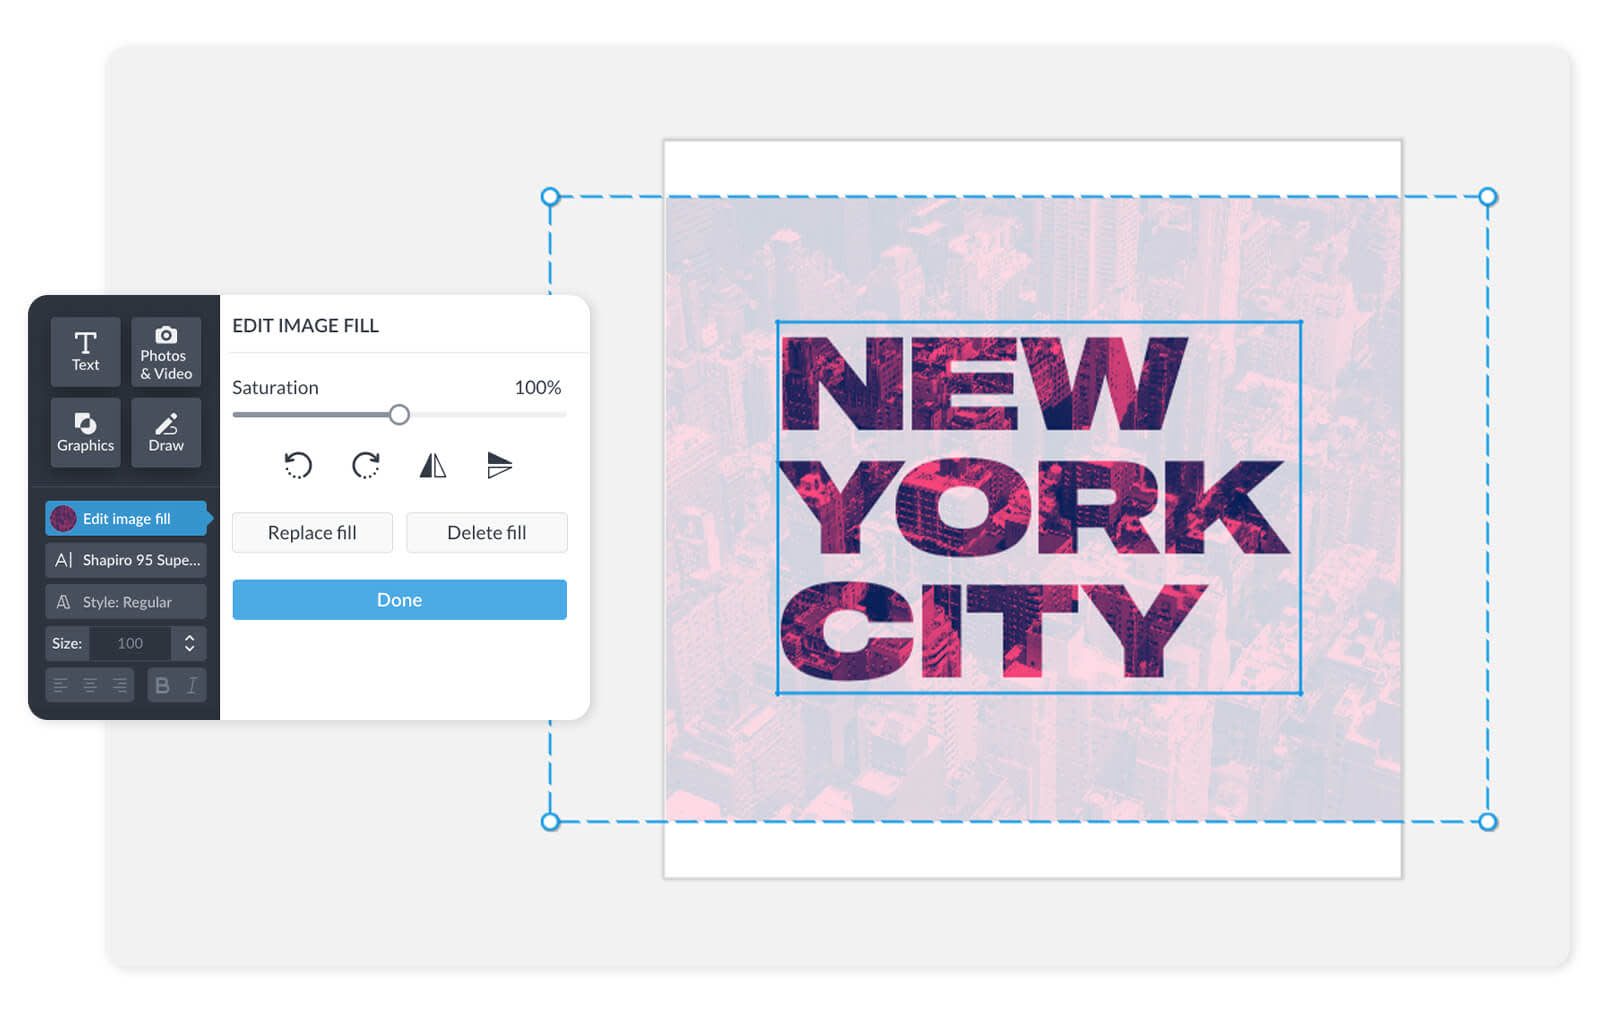
Before you finish applying your mask, you can transform it by rotating it, flipping it, changing its size, and moving it around within the confines of the shape mask. Move the Saturation slider to make your mask more or less colorful.
Add additional image masks to different layers
Why stop with just one image mask when you don't have to? Select another layer of your design, like a shape graphic, and repeat the exact same steps above. If you put an image-filled layer on top of another one, play with the Blend Mode to experiment with different looks.
Edit your layer post-mask
Once your mask layer is applied, you can continue to edit the text or graphic layer just like you normally would, including cropping, resizing, adding a shadow or outline, or erasing parts off.
To replace or delete the image fill select the layer you want to modify, click Edit image fill on the Text Tools panel or Graphic Tools panel. You can select a new image to fill your layer, or just delete the existing one.
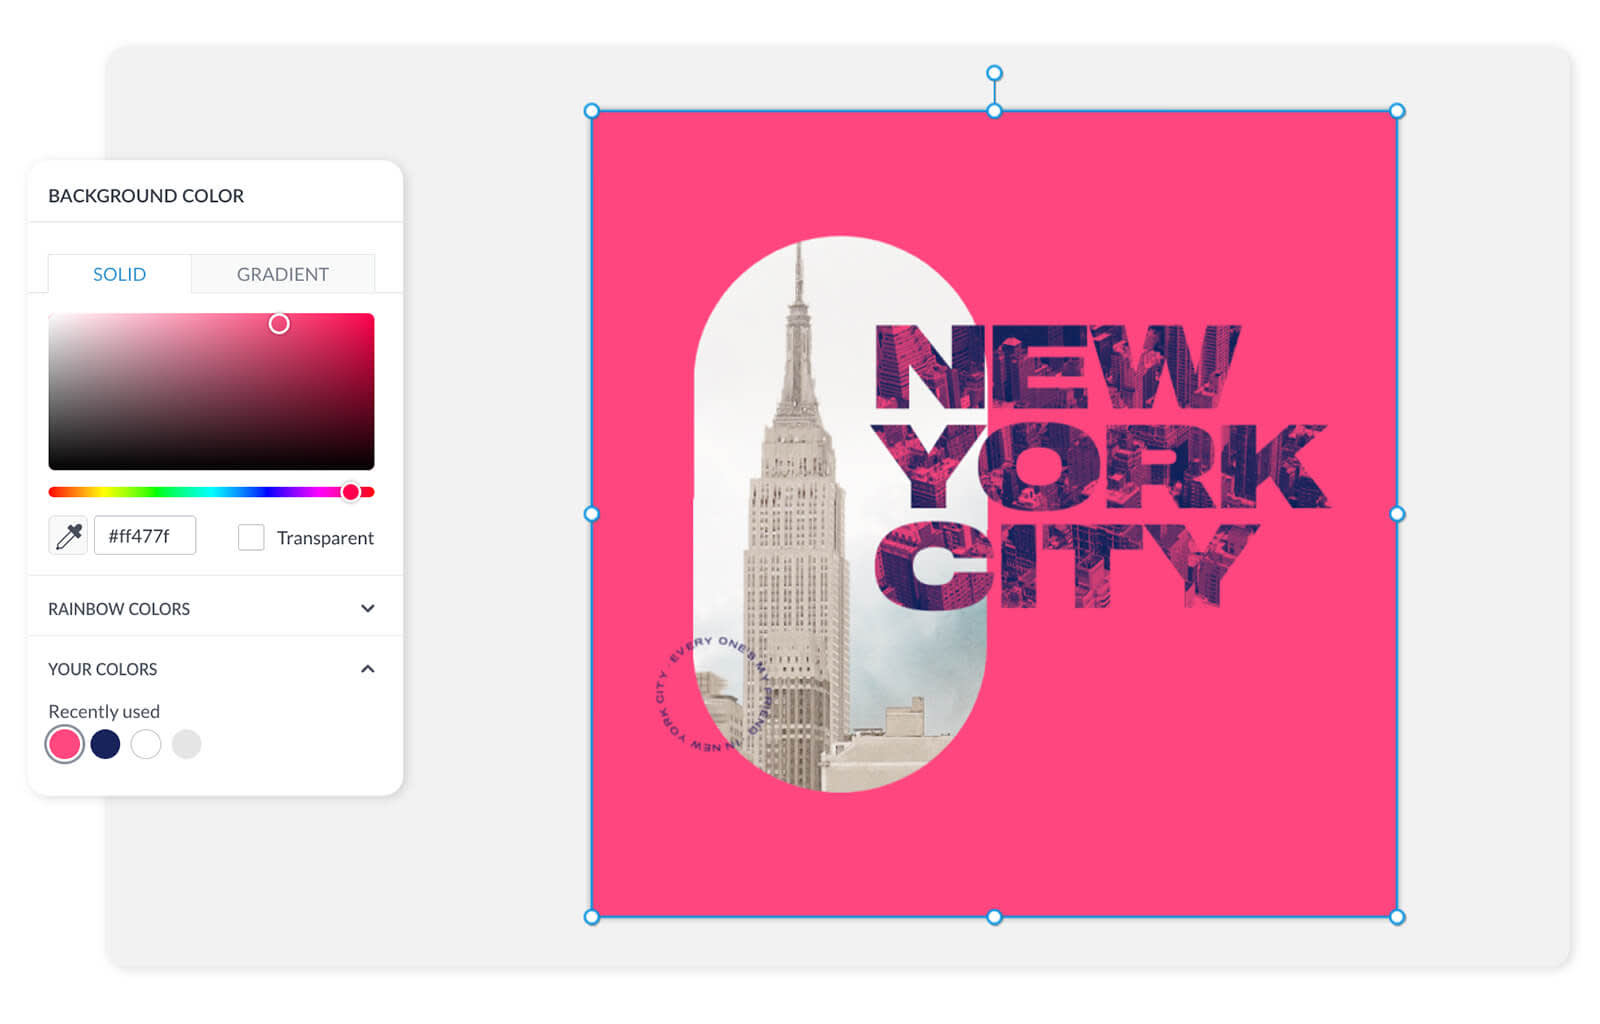
You can also alter other elements of your canvas, like its background. To change the color, select your canvas layer, then click Background color on the left tools menu. Choose from a variety of preset swatches, or input your own hex code to find a specific color.
Thirsty for more masking? Check out these examples to expand your mind about what’s possible:
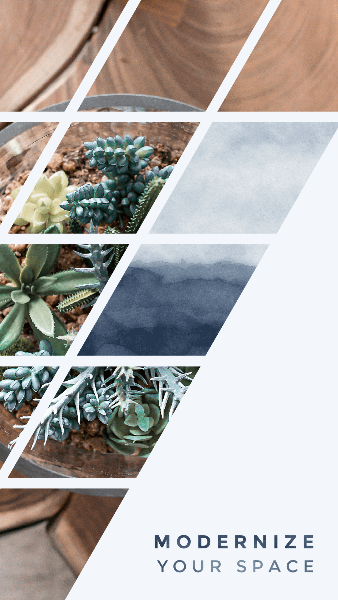
One image, masked across multiple shape graphics.

Text masking with PicMonkey’s own glitter texture.

Text masking plus erasing creates a nice multi-dimensional look. Learn more about text erasing in this tutorial.
