Valentine’s Day cards come in all shapes and sizes: Some are crafted from construction paper and doilies. Others feature fancy schmancy cardstock and make you wonder when the price of greeting cards went up to $10. And then there’s our personal favorite: Valentine photo cards. They're personal, letting you share your favorite lovey-dovey memories, and best of all they're specially made by you for the one you love.
You could simply add text to a photo and seal it with a kiss, but why would you do only that when PicMonkey has so many lovely graphics, effects, templates, and ideas for how to put them all together? Start designing your heartfelt message with these eight creative ideas that are sure to make your sweetie swoon.
1. Make Valentine photo cards with collage
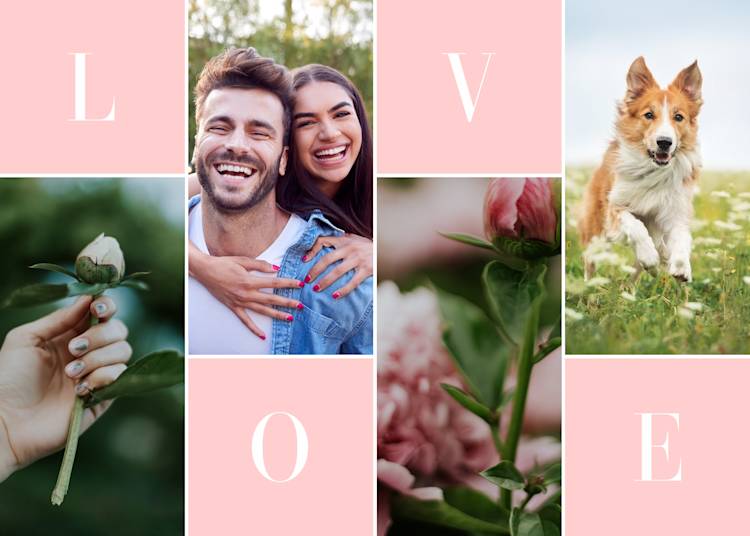
Customize this Valentine photo collage template and swap in your own pics
Because you have more than one perfect pic you want to use for your Valentine’s Day card and because we love helping you present them artfully, we made a bunch of gorgeous collage templates so you can feature all your favorite images in a single card.
Collage cards are the perfect visual patchwork for telling the story of your past year of love (or week, because love at first sight). You could also make a sweet compilation of your fam’s latest and greatest moments to send to the grandparents. Mix up photos, graphics, and text, throw in a few hearts and you’ve got yourself an original & collaged Valentine photo card — all with no glitter to clean up afterward!
To make a collage in PicMonkey:
Click Templates on the top nav bar and choose your fave, or go directly to the Collage tool.
Replace the sample photos with your own.
Add in words, graphics, effects, and textures to pull it all together.
Spread the love by sending a printed or a digital copy.
2. Make a Valentine’s Day double exposure

Double exposures are nothing short of stunning, and since they merge together two photos, they’re kinda perf for conveying that whole two hearts beat as one thing. Or, use double exposure to craft an impressive Galentine’s Day card for your besties because you know they appreciate beautiful things. Whatever floats your boat. You can also easily create a double exposure look with our trendy Pro effects.
To make a double exposure in PicMonkey:
Open a photo and head to the Textures tab.
Apply a texture (which can also be a second photo) and adjust the fade, saturation, and blend modes until you like how both images look on your canvas.
To adjust the translucence of your texture, use the Paint palette: set Brush strength to about 50 and erase over the parts of your original image you’d like to come through more clearly.
3. Add some romance to your Valentine’s card with bokeh

Nothing screams, Best Valentine photo card ever! like bokeh. Give your sweetheart a bunch of beautiful, glowy, fairy-magic bokeh vibes along with their bouquet of flowers this Valentine’s Day.
Bokeh adds pure mood with little bubbles of twinkle light that you can paint onto the background of your image – not unlike viewing the world through a glass of champagne. C’est romantique! Check out our bokeh effects article for more inspiration.
To add bokeh textures in PicMonkey:
Open your photo.
Head over to the Textures tab on the left, and select Bokeh.
Use the controls on the Paint palette to paint on or erase your bokeh from different parts of your image.
4. Make your photo into a heart shape

What could be more Valentine-ish than cropping your photo into the shape of a heart? Nothing. Really, we checked and this is the most super mega ultimate Valentine’s thing ever. It’s so easy to do and we have sooooooo many heart shapes to choose from so you can really love up your photo card.
To make a heart-shaped photo in PicMonkey:
Open a blank canvas.
Head to the Themes tab on the top toolbar and choose Sweethearts, or go to Graphics > Basic and pick a heart, any heart.
Go to Textures, click Add your own texture and choose your photo.
Boom! Your photo is now heart-shaped! You can move it around, resize it and apply effects or words. Or make your heart-shaped pic part of a larger design like we did in the example above.
5. Erase the background of a photo to use in a layered design

Erasing the background of your Valentine photo card is a perfect way to show that the two of you are definitely cut out for each other. This layered card is blooming with trendy design ideas: curved text, gradient effect, and layered photo elements. The good news is that you can easily achieve this lovely look, and the bad news is that after you debut your creation you’ll be asked to design cards for everyone, all the time.
To erase the background of a photo in PicMonkey:
Open a blank canvas, then add your own image from the Graphics tab.
Using the Graphic Tools menu, crop out as much of the background as possible.
Also in the Graphic Tools menu, select the eraser to remove the rest of the background.
Zoom in on your image and continually adjust the size, strength, and hardness of the eraser as you start getting into the final nooks and crannies.
Save your finished image with a transparent background as a PNG.
6. Mix up black and white with a pop of Valentine’s Day color
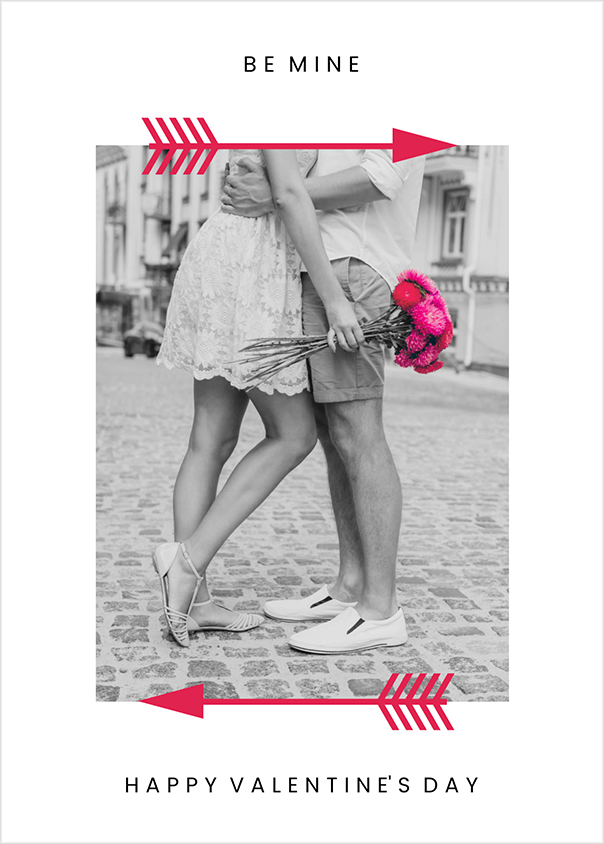
For these types of sporty and oh-so-cute valentine photo cards, we started with a blank canvas and added in a color popped pic. Making a color pop photo creates a dramatic contrast, highlighting just the part of the photo you want in color, while the rest is black and white.
How to make a color pop photo in PicMonkey:
Open your color photo.
Choose a black and white effect in the Effects tab.
Click the paintbrush square at the top of the menu. This makes the Erase & Brush palette appear.
Select the eraser and swipe it over the part(s) of the photo you want to be in color. Done!
7. Use a text mask to turn a Valentine’s message into a work of art

We crafted this bold, but simple, look by adding a text mask image to a blank canvas. When creating this look keep in mind that you want to use a fat font to let your texture/image show through, and the shorter the message the better for maximum effect. Think: LOVE, or YOU + ME, or even US if you’re really going for a minimalistic vibe.
How to make a text mask in PicMonkey:
Pick an image or texture you want to fill in your text.
Open a blank canvas and make it white.
Add text (Text tab) and make sure it’s selected before applying your image as a texture.
Head to the Textures tab and use the Add your own texture button to open your image.
Play with the blend modes and Fade slider on the Textures panel to find the right look.
See all that good stuff mapped out in PicMonkey's text mask tutorial.
8. Marry graphics and pics for a perfect union
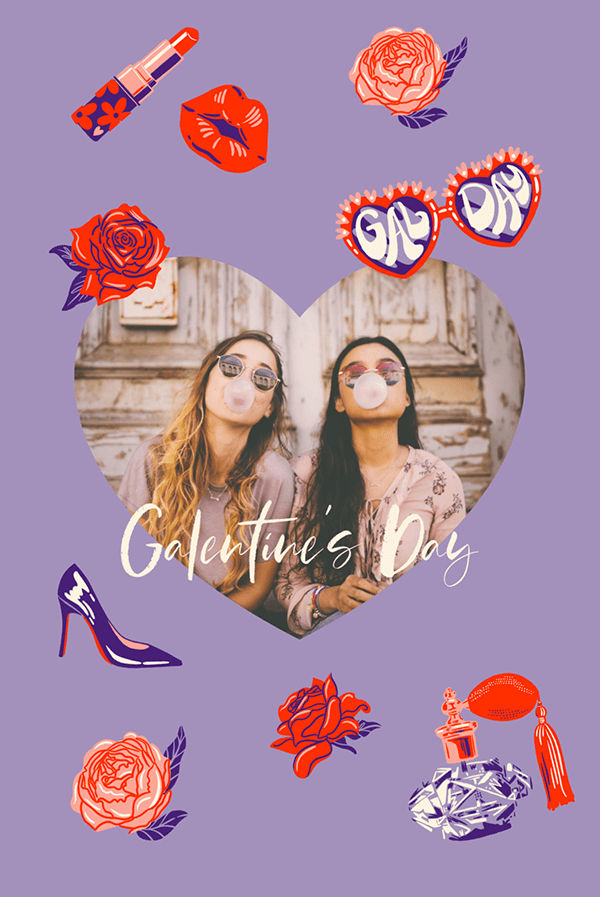
Love this look? Make it yours with our super sweet folder of Valentine photo cards graphics. Of course there are roses, hearts, cupids, kissy lips, and champagne — all of which you’ll find in Themes > Sweethearts. But go ahead and think outside the box (of chocolates), too, and browse our other bazillion overlays from the Graphics tab for speech bubbles, dogs, bicycles, zodiac symbols, and tacos – because who doesn’t love tacos?
How to add a graphic and photo overlay in PicMonkey:
Open a blank canvas.
Click the Graphics or Themes tab to add overlays.
Click the graphic to add it to your picture.
Use the Graphics palette to adjust its color, size, and fade.
To add your photo to the card, choose Add your own image from the Graphics panel.
