
For many families and friends, taking an annual holiday photo is a beloved tradition. The pic is a capture in time and a great way to send your greetings to loved ones all over the world via another cherished tradition: the photo Christmas card. Because PicMonkey is a dual wizard at both photo editing and graphic design, we'll show you how to make a Christmas photo card for the (holiday) ages.
In this tutorial, we'll cover:
Adjusting your photo and applying edits
Choosing a holiday card template
Swapping your edited photo into a template
Customizing the template with text and graphics
1. Edit and adjust your photo before making the card
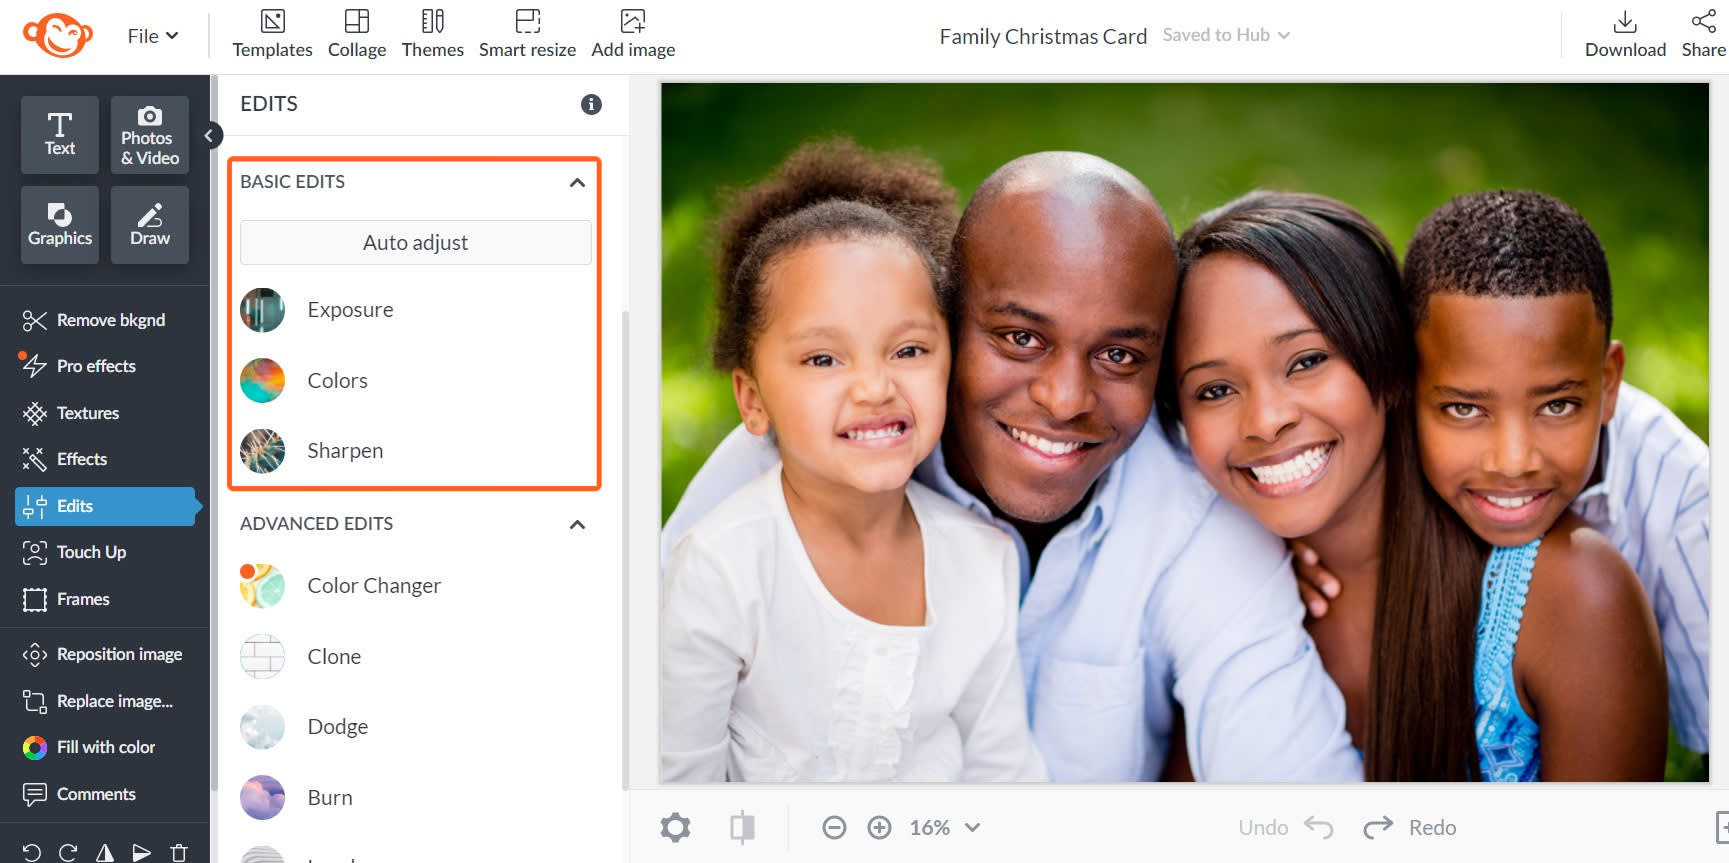
Select a photo you’d like to turn into a photo card and open it in PicMonkey. From there, skedaddle to the Edits tab or the Touch Up tab to fix any stray hairs last-minute. You may wanna make some other essential edits—like adjusting the contrast or sharpening—while you’re at it, too.
You can click the Auto adjust button under Basic Edits to let PicMonkey adjust your photo for you. If you don't like the look, just click the Undo button on the bottom toolbar.
Each editing tool also comes with its own sliders if you'd prefer to DIY.
2. Pick out a holiday card template
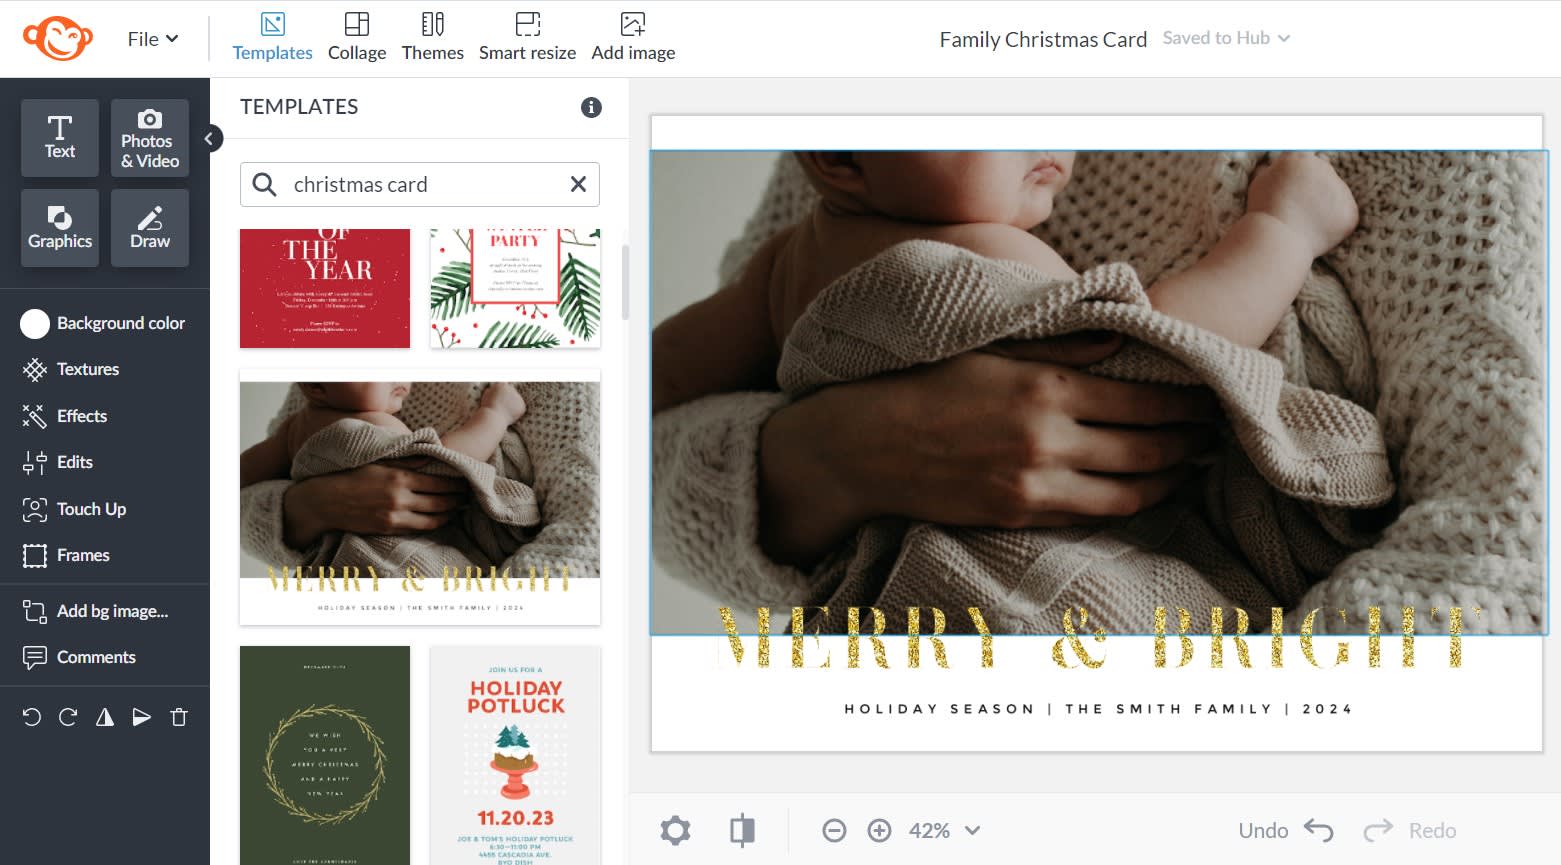
Browse templates while you in are in PicMonkey and click the thumbnails to see them larger on the canvas.
Look for a template that will best fit with your photo's orientation (horizontal or vertical), consider the space you want for a message, and choose one that suits your family's style. PicMonkey offers templates ranging from classic red-and-green Christmas, to sparkly gold holiday, to blue Hanukkah, to a bevy of other holiday styles.
3. Swap your photo into the template

Now it's time to customize your card! First, select the existing image on the template (don't delete it), and click Replace image on the left Image Tools menu to choose the location of your edited holiday photo. We stashed ours in PicMonkey's cloud storage, Hub, so we'll grab it from there.
Your photo is now replacing the existing photo, situated exactly like its predecessor in the template. That doesn't mean you can't still move it around if you like — you can crop your pic, rotate, edit, adjust — pretty much anything you already did in step one...it's just easier to edit the image beforehand so you can focus on your card's design moving forward.
4. Customize text, fonts, and the message on your card
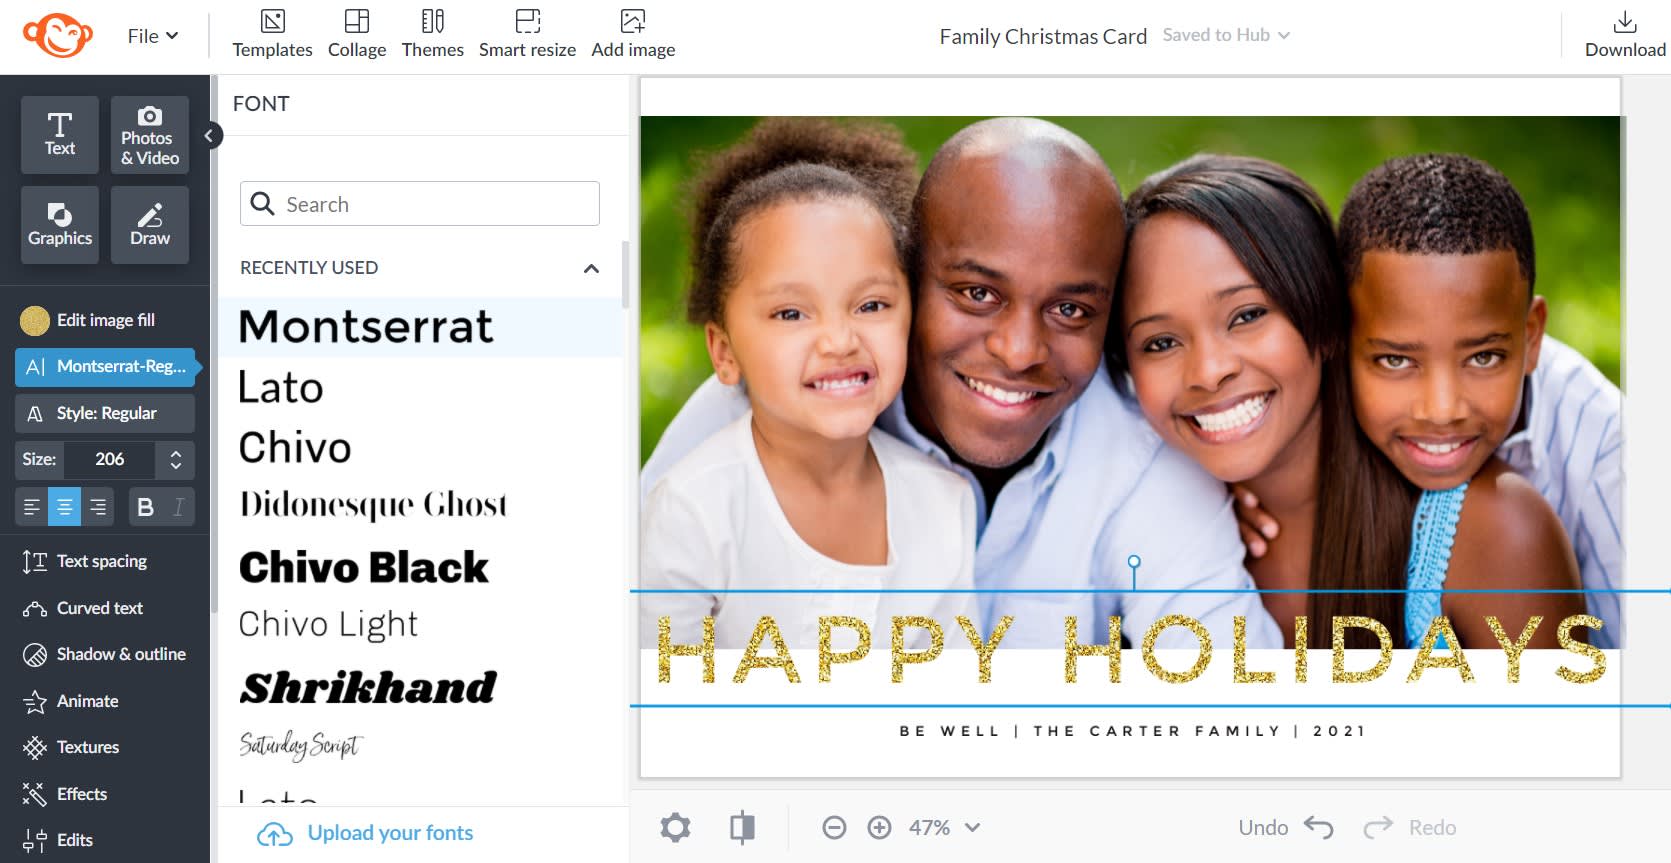
Click on the existing text in the template, highlight and type your own message. Use the Text Tools menu to customize the font — we chose a thicker one to stand out more against the photo — and to adjust the size, spacing, and more. You can also add text effects like curved or circle text, drop shadow, and outline.
Check out these tried-and-true font pairings for easily adding complementary text to your design.
5. Add a festive graphic to your holiday card design
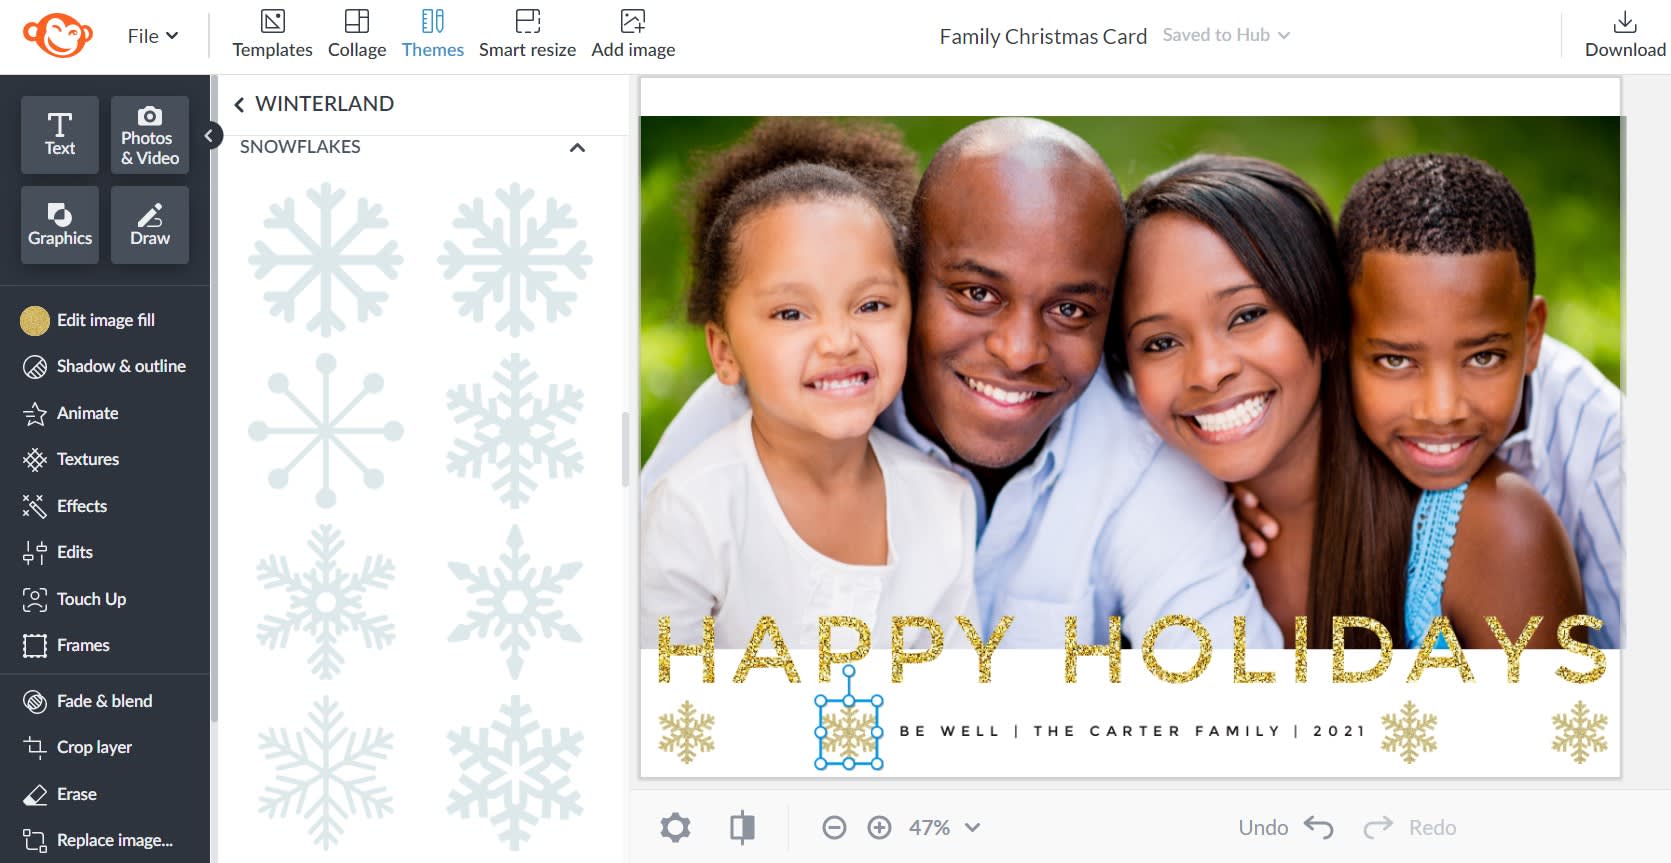
To put the finishing touches on your photo holiday card design, you can add seasonal graphics like snowflakes, wreaths, and gifts. Browse our Seasonal category in PicMonkey, or click Themes on the top toolbar and choose holiday graphics from Santa Land or Winterland theme sets. Use the Graphic Tools menu to adjust the look of your graphic(s).
6. Account for bleed space to ensure a quality print
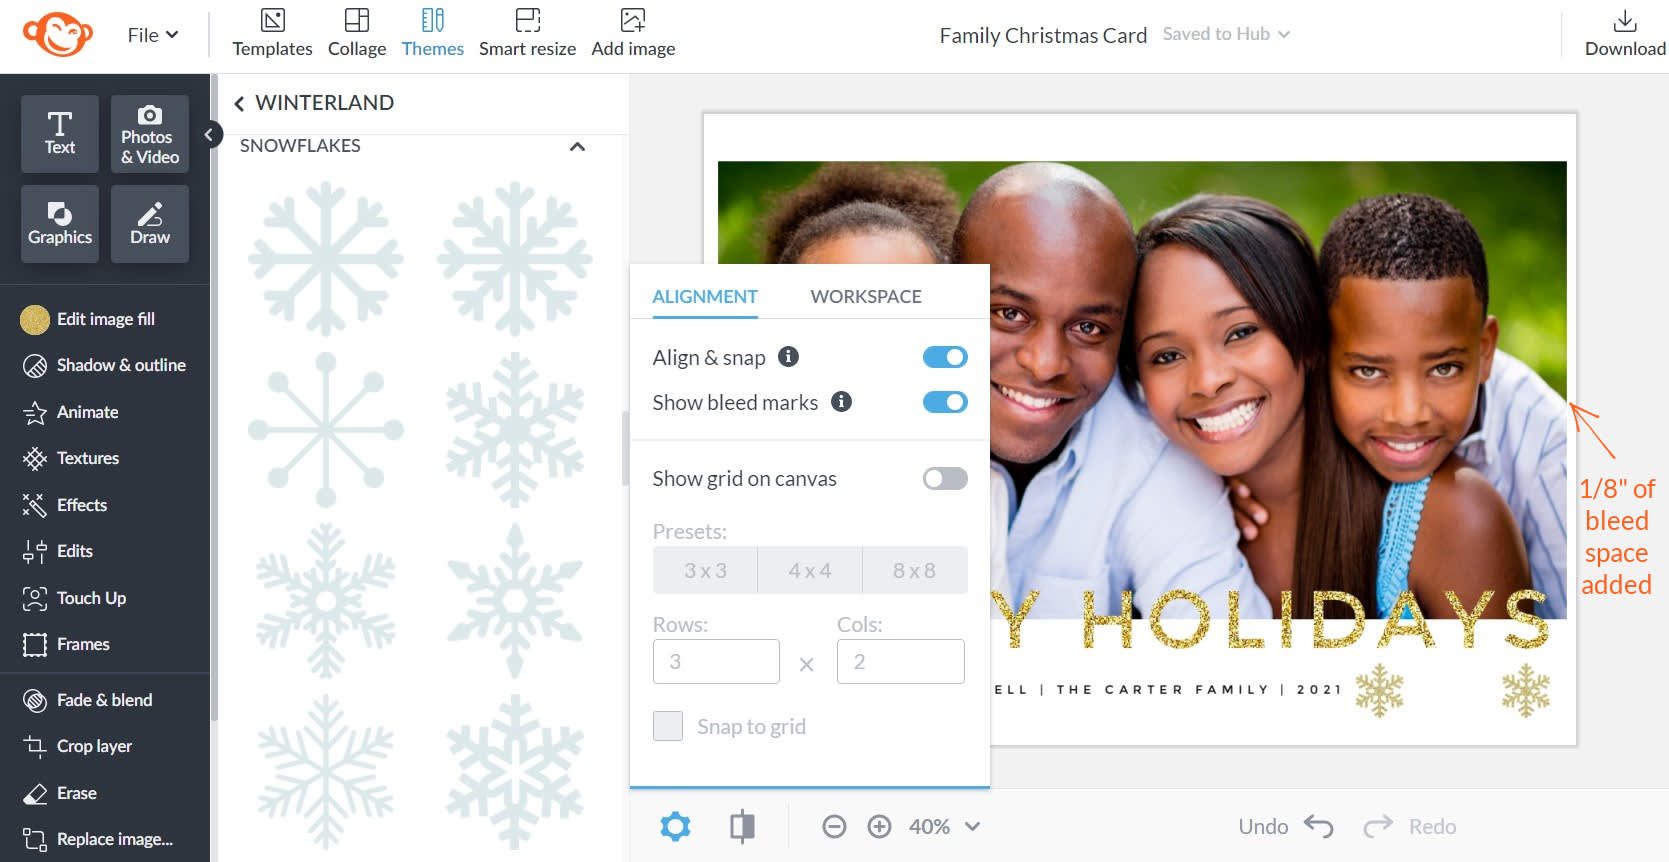
Printers can't print to the exact edge of a document, so bleed marks add extra pixels to the edge of your canvas in order to prevent your design from printing with white edges.
If you're planning to send your design to a print shop, accounting for bleeds beforehand is recommended. Just click on the Alignment palette on the bottom toolbar, then select Show bleed marks.
This adds an extra 1/8" to your canvas. In our example, our image doesn't extend into the bleed area, so we run the risk of our card printing with white edges. That's okay for this design — we actually want them that way, but if you don't, bleeds show you where to extend your design (especially if you're using a solid colored background).
Once your card is finished, click Download on the top toolbar to export your design as a JPG or PNG file (or GIF/MP4 if you've opted for a video or animation-centric digital holiday design).
Now go make people smile with this year's family holiday photo card!
