Zoom in on an image and it becomes a collection of squares. Those squares are pixels.
A poorly printed photo deems the whole thing useless, which is why high resolution images are so important. There’s a lot to know about making a high resolution photo so that they print or display properly on a web page. Like, what is 300 DPI and why is it considered the epitome of high resolution? Are there specific high resolution print sizes? And, what’s the difference between DPI and PPI?
Don't worry, we're here with answers, solutions, and tips.
Need quick pics for your designs? Check out our massive stock photos & videos library.
What is a high resolution image?
A high resolution image is one that's at least 300 DPI, or "dots per inch." As in – the printer spits out 300 little dots of ink for every inch of your photograph. We use DPI when talking about the resolution of printers, but when we talk about monitors, we switch to PPI, or "pixels per inch." This is because monitors don't deal in dots of ink (surprise, surprise); instead, they have pixels that light up to create your image on a screen.
In order to print a maximum high-res image, your file needs to contain the same number of pixels per inch that your printer is going to be printing per inch.
What is the difference between print and web images?
Monitors and screens use pixels much more sparingly than printers. While a printer gobbles up 300 of your hard-earned pixels, your miserly monitor might only use 72. That means a 2400 x 3000 pixel image used to create an 8 x 10 inch print would display at about 2 ¾ feet (yes, we’re talking feet here, folks, not inches) on a 72 PPI monitor.
Sizing for the web would be pretty easy if all screens were 72 PPI. Trouble is, they aren’t—not by a long shot. They used to be, and 72 PPI is still used as a reference for designers, but most modern PC monitors are 96 PPI. Retina displays can be around 220 PPI. This complicates selecting an image size for the web.
How to optimize your image sizes for the web
When saving images for a website or blog, the site layout will often dictate how many pixels high and wide you need to size your image. On our blog, for instance, the images within the posts are around 600 pixels wide. Header images that span the entire page might be larger—in the neighborhood of 1200 pixels—which leaves it up to the browser to stretch it if the browser window is larger.
If you over-accommodate large displays with big image sizes that take a long time to load, you’ll end up serving images that slow down your site. It’s a balancing act. You want the smallest file that works for your purpose. When you’re not matching an image to a particular layout, you can be fairly loose with the size. Most people consider a “high resolution” share on the internet to be in the neighborhood of 1200 to 1600 pixels wide.
How to make a 300 DPI file
Unless you’re printing something huge like a poster, tradeshow banner, or billboard, you’ll almost certainly be printing on a 300 DPI printer, simply because this is the resolution of most printers.
Since we now know the printer will print at 300 dots per inch, all we need to do is figure out how many pixels to give the printer.
To do that, just multiply 300 by the number of inches the print is going to be. That means in order to create a 4 x 6 print on a 300 DPI printer, you want 1200 x 1800 pixels.
If math is your nightmare, you're not alone. Here’s a handy table to help:
Pixels to Inches Conversion Chart
| SIZE IN INCHES | SIZE IN PIXELS |
|---|---|
| 3 X 5 | 900 X 1500 |
| 4 X 6 | 1200 X 1800 |
| 5 X 7 | 1500 X 2100 |
| 8 X 8 | 2400 X 2400 |
| 8 X 10 | 2400 X 3000 |
| 8.5 X 11 | 2550 X 3300 |
| 9 X 16 | 2700 X 4800 |
| 11 X 14 | 3300 X 4200 |
| 11 X 16 | 3300 X 4800 |
Creating high resolution photos in PicMonkey

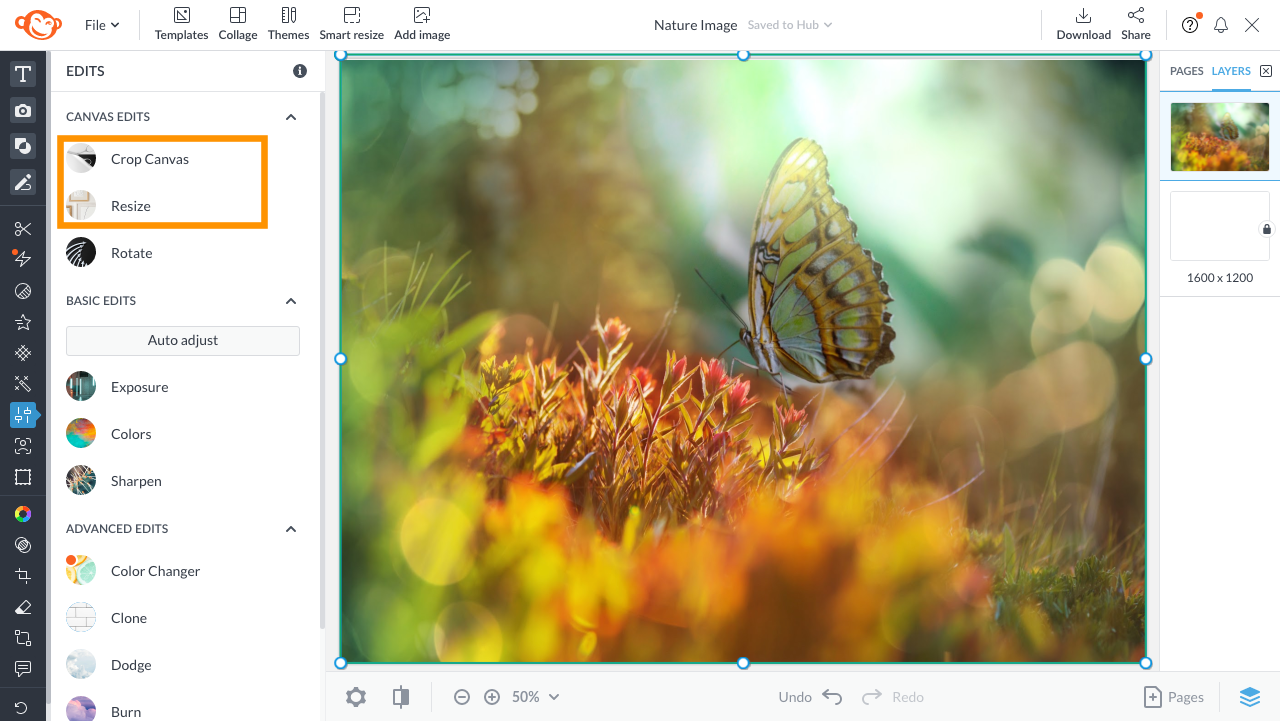
You can use PicMonkey's tools to size your images correctly for printing or web use. Note that your image needs to be the same aspect ratio (shape) as the paper you’re printing on, otherwise things get either distorted or cut off.
If your image is already the same shape as your paper, use our Resize tool. More often, your image is a different shape than the print you plan on making. In that case, defer to Crop Canvas in the Edits tab (as shown above) to select a preset crop proportion.
Achieve high resolution photos in 5 quick steps

Notice how our blank canvases do the math for you. We like to set folks up for success.
Open up a blank canvas. Select your preferred print size and click Make it!
Click on the Photos & Videos tab on the left toolbar.
Scroll through our infinite stock photos or upload your own by clicking Add photo or video.
Customize your image in the Edits tab with basic or advanced options.
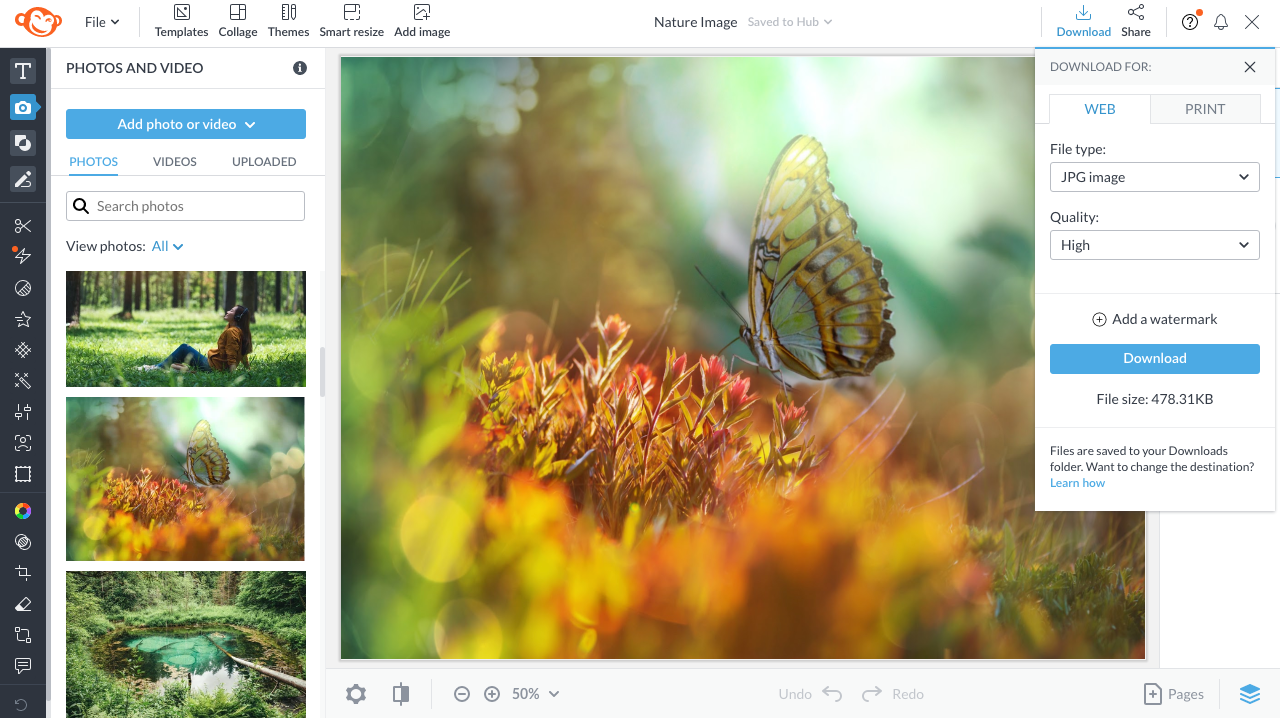
Download your web or print version and share your masterpiece!

More tips: For web versions, always select high resolution and choose your file type – PNG or JPG, or PDF for Pro subscribers. You'll also see how large the file is.

For print versions, you'll be shown the inches, pixels, and the file size. Plus, our trusty 300 DPI reveals itself. Ah, victory's never felt so good.
Now that you're well versed on all the lingo, you can spread the knowledge to others still wondering, what is a high resolution photo? Good thing you can't unknow what you know. Enjoy your creations!
For more on quality images, see: How to Resize an Image Like a Pro
