One of the most important parts of your Facebook profile is your cover photo. Since this image takes up so much real estate, it’s essential that it looks good—and part of making it look good is making sure it’s the right size.
There are three main types of Facebook cover:
They are each a different size because social media only makes some parts of your life easier, but not all. Fortunately, we have made pre-sized templates for each style and you’ll find them all in our template library.
Facebook personal cover vs. page cover — what’s the difference?
You’re probably wondering: “What’s up with all these cover styles, and what exactly is the diff between them?” Personal covers go on your own personal profile page. Page covers are for a non-person or business page, like the PicMonkey Facebook page, for instance. Group covers are for pages designed not for people or business, but for clubs or the like. And, finally, Event covers go right at the top of a page made to promote a party, gathering, etc.
For more Facebook image size info, check out: Master Facebook Images Sizes Right Now.
Making Facebook cover images in PicMonkey: 4 ways!
There are all kinds of ways to create a custom Facebook cover photo in PicMonkey. Here, we’ll look at how to upload an image and crop or resize it to the right dimensions, and how to design a cover photo the easy peasy way with Templates or using a blank canvas.
1. Crop a photo to the right size Facebook cover

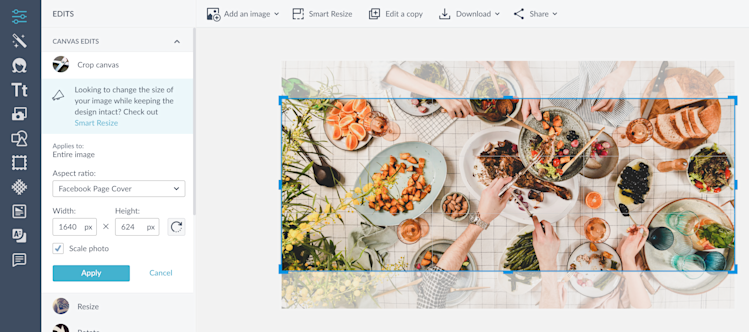
Open a photo that you want to use as your cover banner. Use Crop in the Basic Edits tab to crop your photo into the exact size you want. Scroll through the options in the dropdown menu until you find Facebook Page Cover (or whichever cover type you seek). A grid will hover over your photo. Adjust it by clicking and dragging the corner handles, and moving the grid into place. When you’re finished, click Apply.
2. Use Smart Resize to create multiple Facebook Cover images

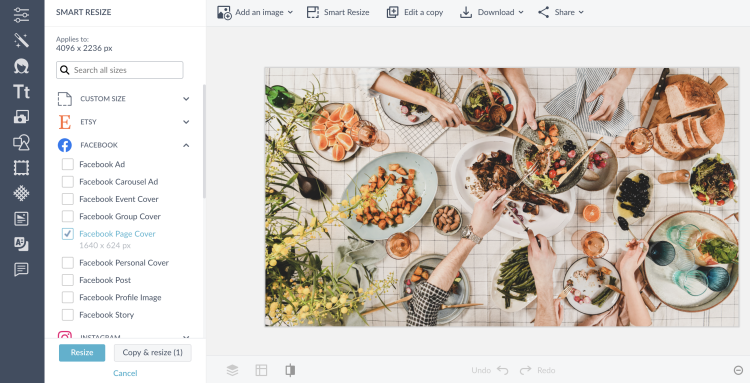
Pro subscribers can use Smart Resize to create multiple versions of a single design. Just select the channel and the format, and then click Copy & Resize to instantly create all the new versions which are stashed in your Hub.
3. Make a Facebook cover from a blank canvas

If you want to start your cover design from scratch, start with a pre-sized blank canvas. Browse a number of blank templates and choose one of the Facebook Cover templates to create your design. Click it to open, then add photos, graphics, text, or upload your own logo. When you're finished, download your image to your computer, then upload to Facebook.
4. Make a Facebook cover from a design template

Browse all Facebook templates.
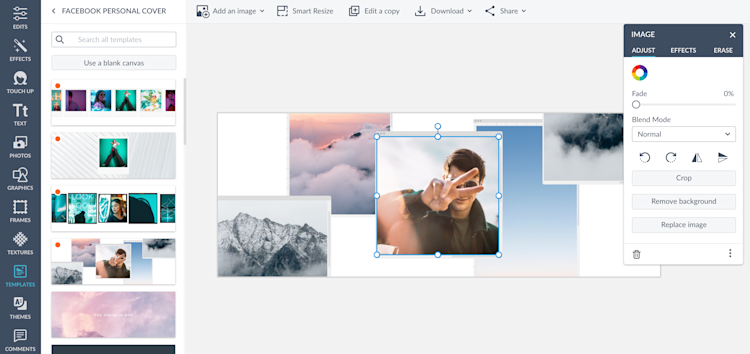
If you’d prefer to begin your cover creation using a ready-made design that you can tweak, select Templates and search or browse until you find a design you’d like to start with. Click as many as you like to preview them larger. Once you've found a winner, start customizing the template by by swapping in your own photos, words, and graphics. Take a look at the Intro to Templates tutorial to learn more about customizing templates.
Putting your cover photo on Facebook
When you’re finished with your design, Export it to your computer. It’ll automatically save in your PicMonkey cloud storage as you work, so if you want to edit it later you can. Head to Facebook and log in. You’ll see a camera icon in the corner of the cover image field. Click it, then click Upload Photo to upload your new cover image from your computer. Presto! Your new cover photo is up and running.
