Like the old saying: “If a tree falls in a forest but nobody’s around to hear it, does it make a sound?” We ask: “If a business doesn’t have a website, does it actually exist?” For some people, the web is a primary way of finding out about the products and services they want to buy, so not having a website could take you out of the game for a significant portion of the consuming public.
Small-business owners are often intimidated by the prospect of having to create a website, but they needn’t be. There are multiple ways to establish a robust web presence, from traditional websites to blogs to online stores. What’s more, there are many inexpensive, high-quality service providers to help you create your web pages quickly and easily.

The first thing you should do is decide what type of online presence you want to establish:
Traditional website: Creating a website from scratch is usually a laborious, potentially costly effort. If you don’t know how to code and design yourself, you’ll either need to hire a web designer or ask a friend to do it. However, if you do have the initiative and the budget, creating a website from the ground up can yield something impressive that totally reflects your creative vision.
Use a website builder: Publishing platforms such as Wix, Squarespace, Weebly, and Jimdo offer easy-to-use, drag-and-drop tools to create a great-looking website quickly. Each one has its pros and cons, so do a little research to figure out which option is right for you. WordPress is a popular free service that offers a wide variety of themes (or templates) to choose from and allows you to include a blog on your site.
Build an online store: Many businesses use their online store as their primary web presence and choose not to have a separate site as well. Etsy, eBay, and Amazon allow for varying levels of customization, so you should check out your options before committing. Etsy currently gives sellers the option of turning their store into a website with its Pattern tool.
Before embarking on the actual construction of your website, you’ll need to create and gather your web assets, or the components that make up your site. Web assets will differ according to the product or service you’re offering and the type of website you’re creating. We’re going to base the following list on our imaginary cactus shop, Prickles & Pots.
Profile picture

Depending on the type of business you have, you’ll probably either use your logo or your own photo as your profile pic. If you are front and center in your business (say you’re a writer or a personal trainer or a life coach) you should use a photo of yourself. Besides using this for social media sites, you could use it for your bio on your website, your blog photo, or anywhere else that requires your picture. This image is going to pop up in lots of places, so be sure it’s a good one. Here’s how to bring out the best in your profile picture:
Hover over Edit at the top of the PicMonkey homepage, click the place where your photo is stored, then select your photo.
Click Crop in the Basic Edits tab. Click the drop-down menu and select Square.
Click the square grid to position it where you want it. Drag the corner handle of the sizing grid to crop the photo and cut out any parts that you don’t want to appear. Click Apply when you have it just the way you want it.
To perform some mild touch ups to your photo, click Touch up on the left-hand side (the head icon). Experiment with some of the tools such as Teeth Whiten, Eye Brighten, and Lip Tint, being careful not to make your photo look too worked on. Get more advice in our Touch up tips article. Or check out these tips on using the makeup tools in Touch up.
If you want to apply one of our more subtle effects, click the Effects tab on the left-hand side (the second one from the top). Give Intrepid, Urban, and Tranquil a try, or experiment with some of our other effects.
Add to Hub so you can easily access your profile pic and re-edit it anytime you want.
Homepage hero

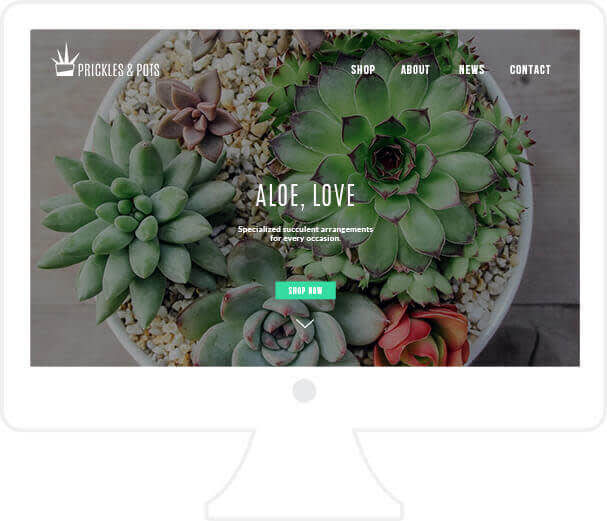
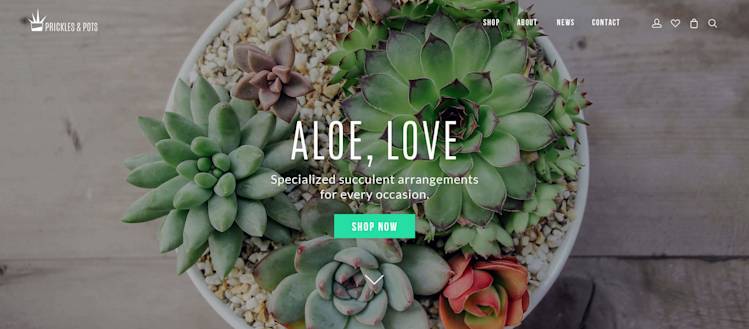
One of the most popular trends in web design is the hero image. Placing a large, striking image on your homepage is a great way to draw people in and establish your look and feel from the get go. If you’re selling products, your hero image should promote one of your signature items. If you’re selling a service, you could consider an image of yourself or an image that relates to the work you do. A life coach would likely put a picture of themselves, while a copywriter might choose to feature a desk with papers on it or a bookshelf filled with books. The web is full of sites that offer free stock photos, but you do have to make sure that you’re allowed to use them for business purposes.
The size of your hero image will depend on what type of website builder you use. Therefore, we recommend creating an image to start with and then refining and resizing depending on your needs and choices. Here’s how to create your hero image:
Hover over Edit at the top of the PicMonkey homepage, click the place where your photo resides, then select your photo.
Click the Basic Edits tab on the left-hand side (the top icon) and click Crop. At this point you can either input your own dimensions or click the dropdown menu and select one of the prepopulated proportions. The 2560 x 1600 desktop is a good one for a hero image. Position the grid where you want to crop your photo and then click Apply.
If your image already looks great, leave it as is. Or you can play around with our effects to give it added depth or a more unusual look. Just click the Effects tab on the left-hand side (the second one from the top) and give them a try.
Section icons
Creating icons for your website isn’t necessary, but it’s a good way to make your site look professional and help with navigation. Our Graphics section has a wide variety of images that you can use as icons. For example, a plant or flower shop could find potential icons in the Nature group. There are also lots of sites where you can find free clip art.
The section icons we created for Prickles & Pots were made with the geometric shapes in the Graphics section. Be sure to put them on a transparent background so they can be used on your website.
Product photos

High-quality photos of your products are the most important elements of your website because they’re what will ultimately convince your potential customers to make a purchase. Attractive product images also go a long way to making your website look visually pleasing and polished. You’ll want to make sure that all of your product photos have a unified look and feel so that your website and your business come off as cohesive. Mismatched, random photos will inspire distrust and raise questions about your business.
Blog post images

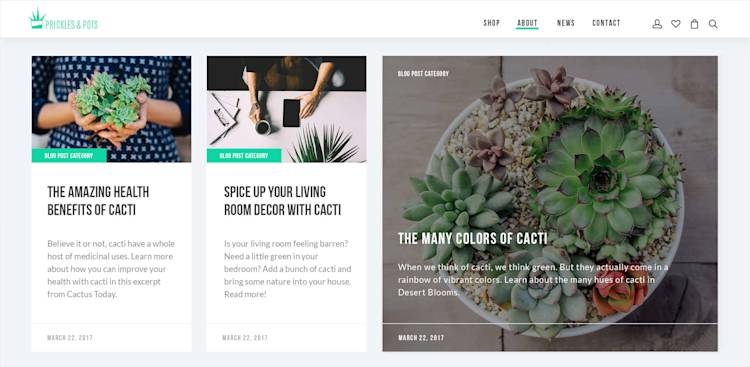
If you use a website builder such as WordPress, you’ll be able to have a blog on your website that you can update regularly. Rather than just using images of your products, you could gather some new and interesting images from a free stock photo site. Next, consider giving all of those images a similar style by using a standard effect on all of them. You’ll find a whole bunch of cool effects in the Effects tab on the left-hand side of the Editor. Another thing to keep in mind is the kind of text you use on top of your images. Choose a color or effect (such as Drop Shadow) that will ensure that it’s readable. You’ll also want to use one of your branded fonts.
Favicon

Favicons are the small images you see next to a website’s name in browser tabs, in front of URLs in the address bar, in bookmark lists, and other places. While favicons are a small detail in the grand scheme of things, they often come to represent your brand in many places throughout a person’s online experience. A catchy, well-designed favicon will give your business an added promotional boost and help people more easily identify you in a sea of competing websites.
Businesses usually use a pared down version of their logo as their favicon. You can create this 16 x 16 image as a PNG file, but ideally you should create an ICO file so it can be supported by Internet Explorer. There are online favicon generators that can help you create an ICO file from PNG, JPG, and GIF files.
About section, descriptions, and testimonials
Having an About section on your website provides potential customers with a clear, succinct summary of what your business does and what products or services you sell. You can use the text in your About section to describe your business, tell your story, introduce yourself, and/or present your mission or vision.
When describing your products, be both informative and convincing. If you’re selling handcrafted jewelry, tell customers what makes your pieces unique and how they’re made, but also include essential details about things such as size, shape, and materials used. When it comes to length, give enough information to make customers comfortable with hitting the buy button, but not so much that they feel exhausted after reading it.
Testimonials from actual customers are very effective at getting customers to trust your business and purchase your products. If you have an online store on a large marketplace site, you’ll have user reviews built into it. But if you also have a website, it’s a good idea to highlight a few customer comments to make the case for your business.
Once you create a winning website, you’ll want to design a strong social media presence to drive traffic to it.
