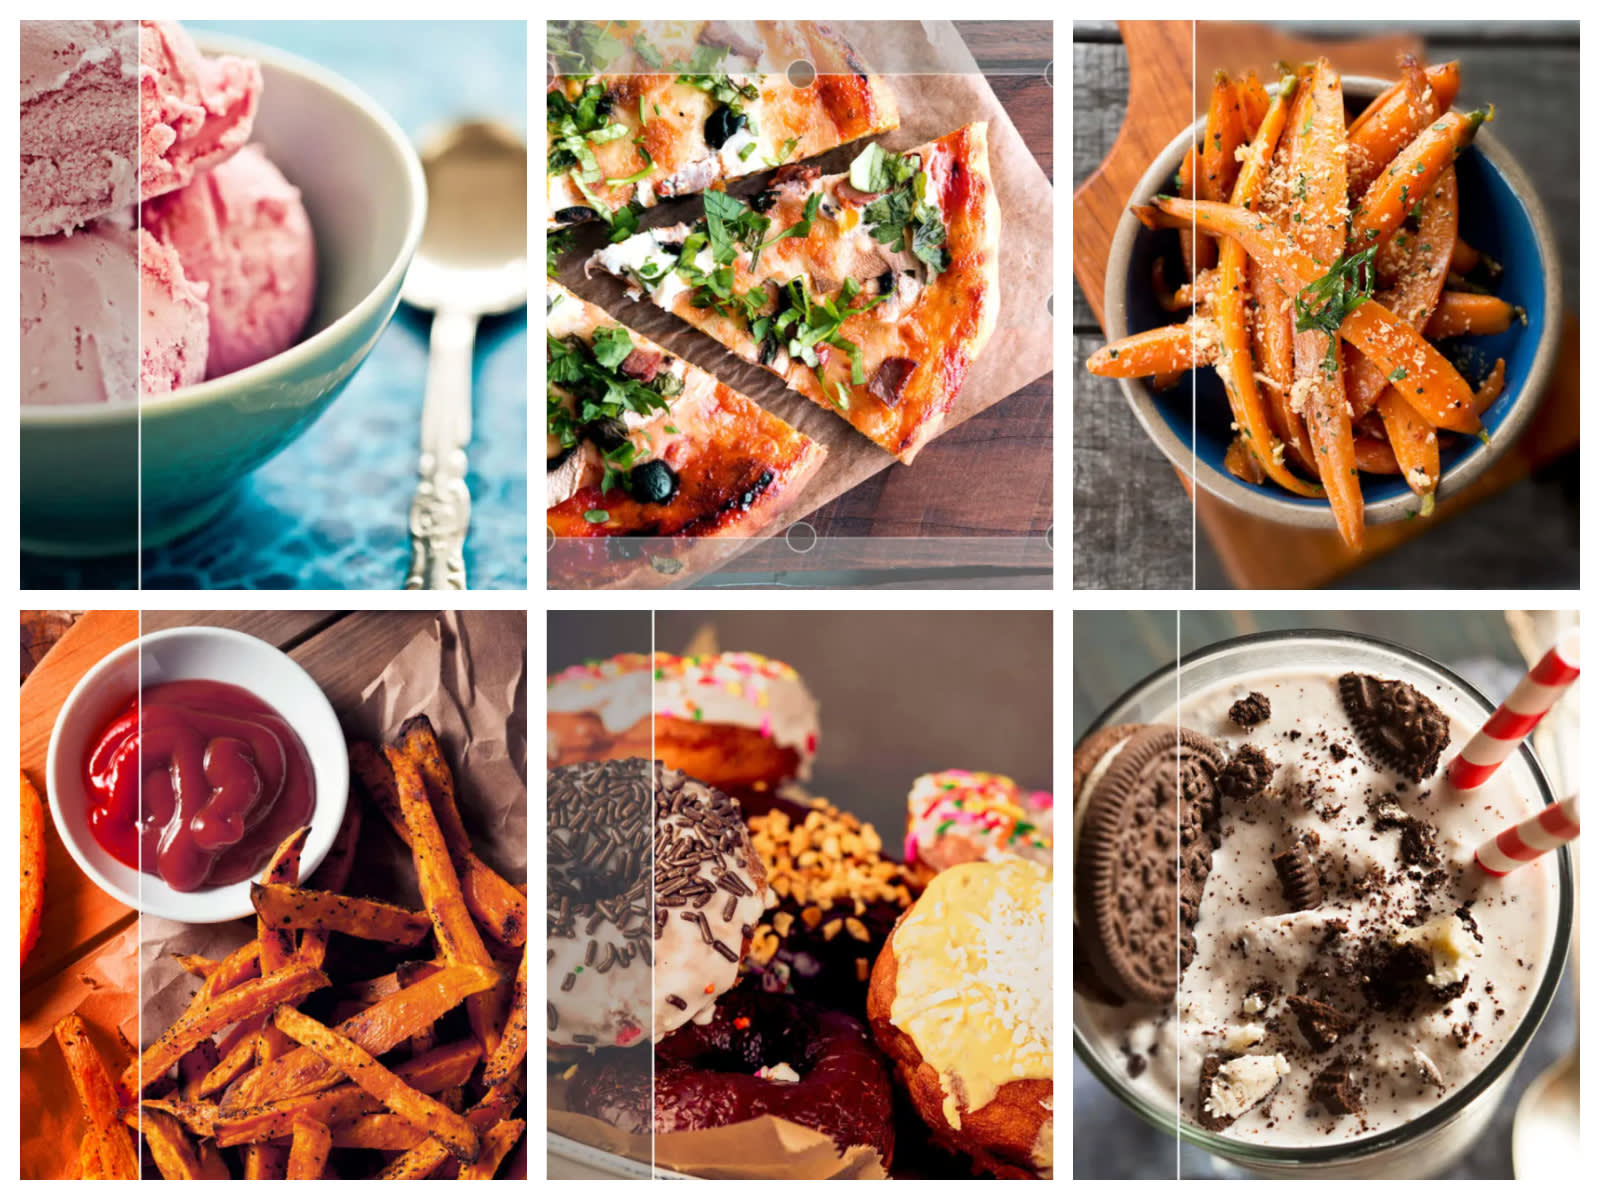
Whether you’re a food blogger, restaurateur, or just wanna rule at #foodporn on Instagram, one thing’s for certain—you’re crazy about cuisine. So much so that you need people to see what’s on the plate in front of you. Here’s the good news, foodie friends: you don’t need fancy cameras or mad skills to get great pics of your grub. We’ll run through some shooting quick tips, then take a look at how to edit your food photos with the PicMonkey mobile app. Don't have the free PicMonkey mobile app yet?


Food photography shooting tips
As food photography pro and Swerver founder Michael Biesemeyer told us, three things are key to getting great food photos: angle, lighting, and color. Here are some quick tips for each:
1. Angle: Detrmine what’s best for each dish. As EJ Armstrong, author of “Bacon 24/7,” says, “Everyone’s doing overhead shooting these days – and you know, it looks great, nothing wrong with it – but it doesn’t work for everything. If you’re shooting a sandwich, you kind of need to get in there and see what’s in it. What you want to do is assess the situation and do whatever you need to flatter the subject.”
2. Lighting: Natural is the way to go, if possible, and avoid using flash. Windows are where it’s at. If you wanna get real tricksy, employ a makeshift reflector like a piece of foam board, and briefly cover up too-harsh light bulbs if needed.
3. Color: Make sure your hues stay natural-looking. Anyone who eats knows what food is supposed to look like, so be sure to edit out any color casts that creep into your photos.
Other things to keep in mind include making sure the area around your food is clean (no gross dirty napkins!), taking your time to compose your shot, and keeping your background and dishes simple. Many food bloggers use vinyl backgrounds, but crisp tablecloths, wooden tables, and countertops are also great options.
How to edit food photos on your phone
Editing your food pics the right way can take them from mouthwatering to positively drool-worthy. Here’s your recipe for cooking up fantastic food photos with the PicMonkey mobile app. No need to go right in order—start where you want to, and revisit edits a few times if you want to. The just-right editing recipe is different for every photo.
Crop and straighten
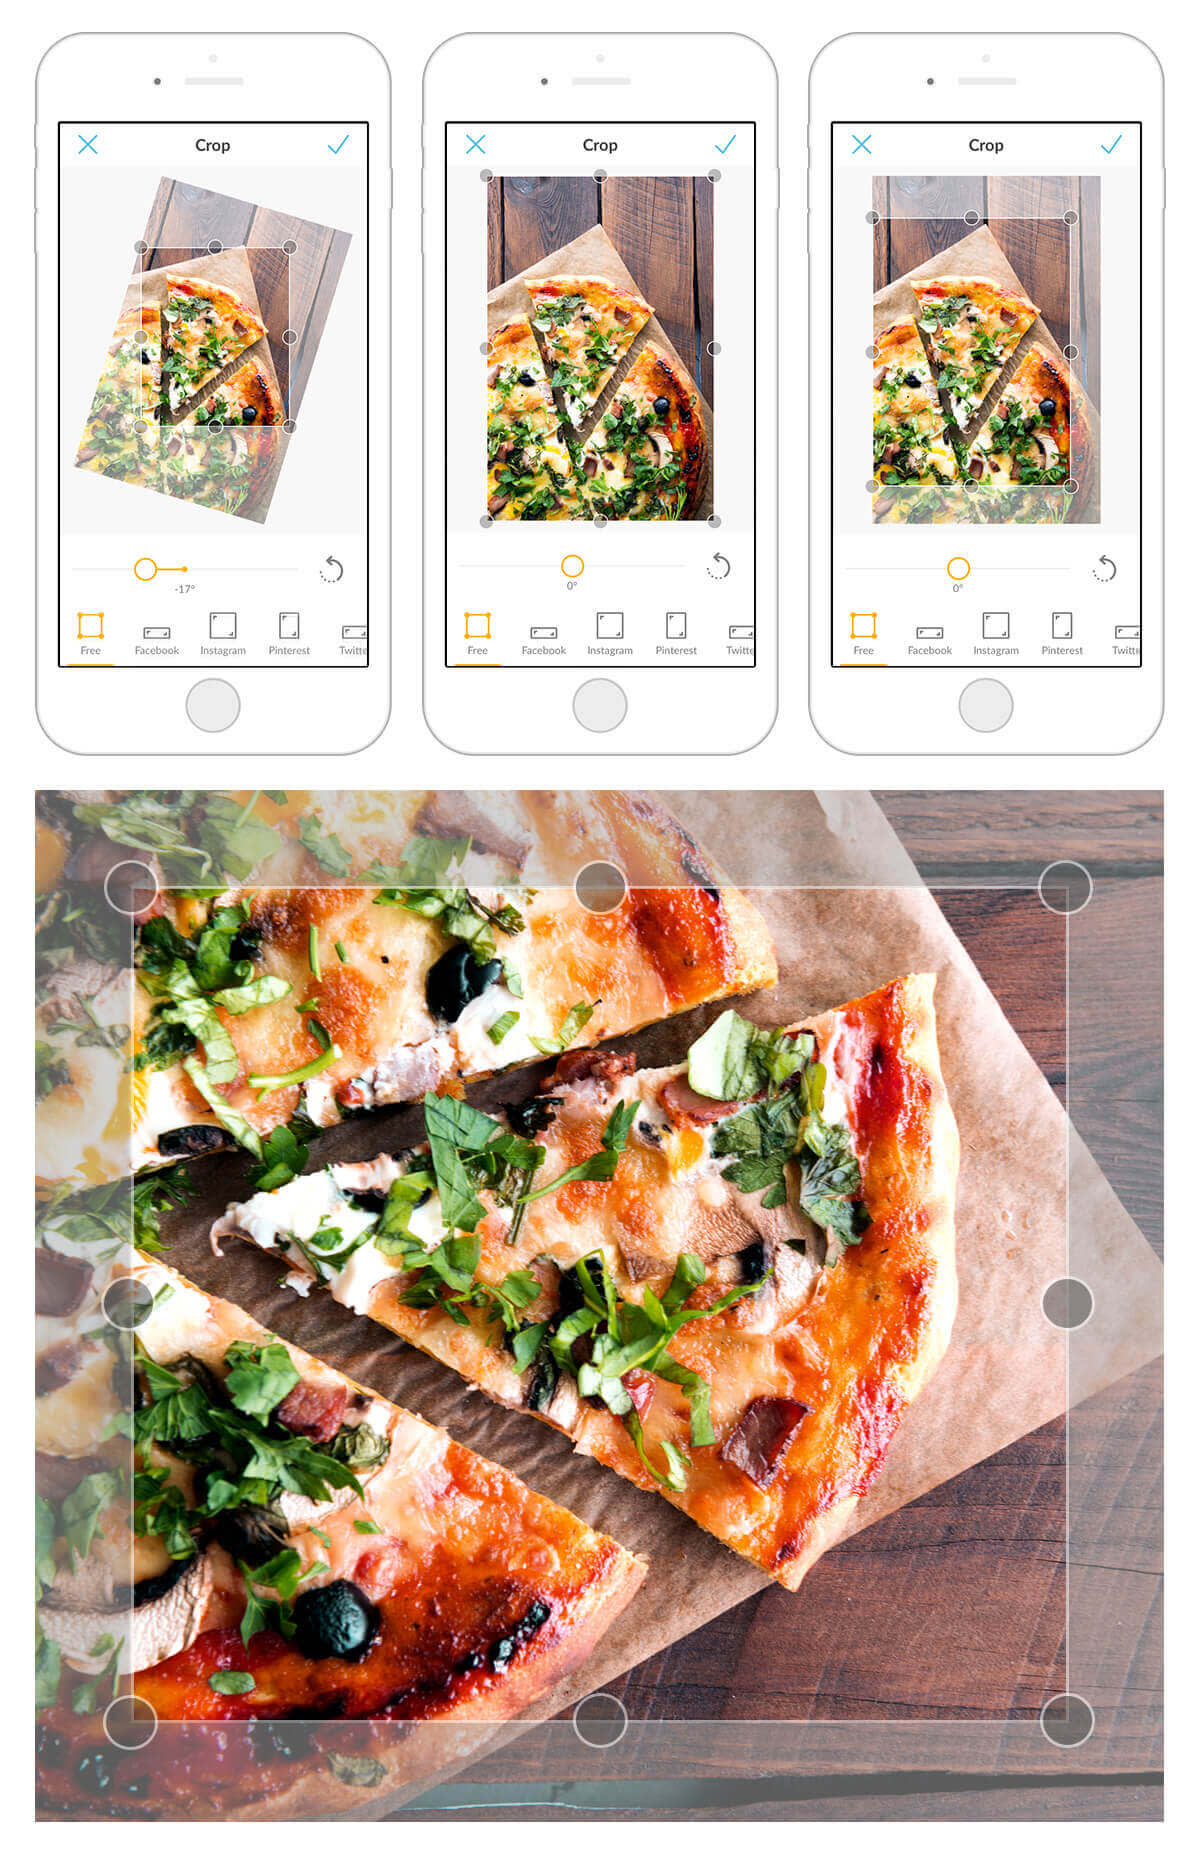
How do we love crop? Let us count the ways: Actually, no, we don’t have that kind of time right now! Crop is one of the four essential edits because it can quickly remove distracting image elements and put the focus where it belongs—on your yummy food.
Tap Crop in the PicMonkey mobile app, then use your fingers to adjust the crop area. You can also rotate and straighten an off-kilter image using the slider, and move your image a quarter turn by tapping the arrow next to the slider. Tap the check mark once you’ve gotten rid of any surplus background.
Adjust your colors
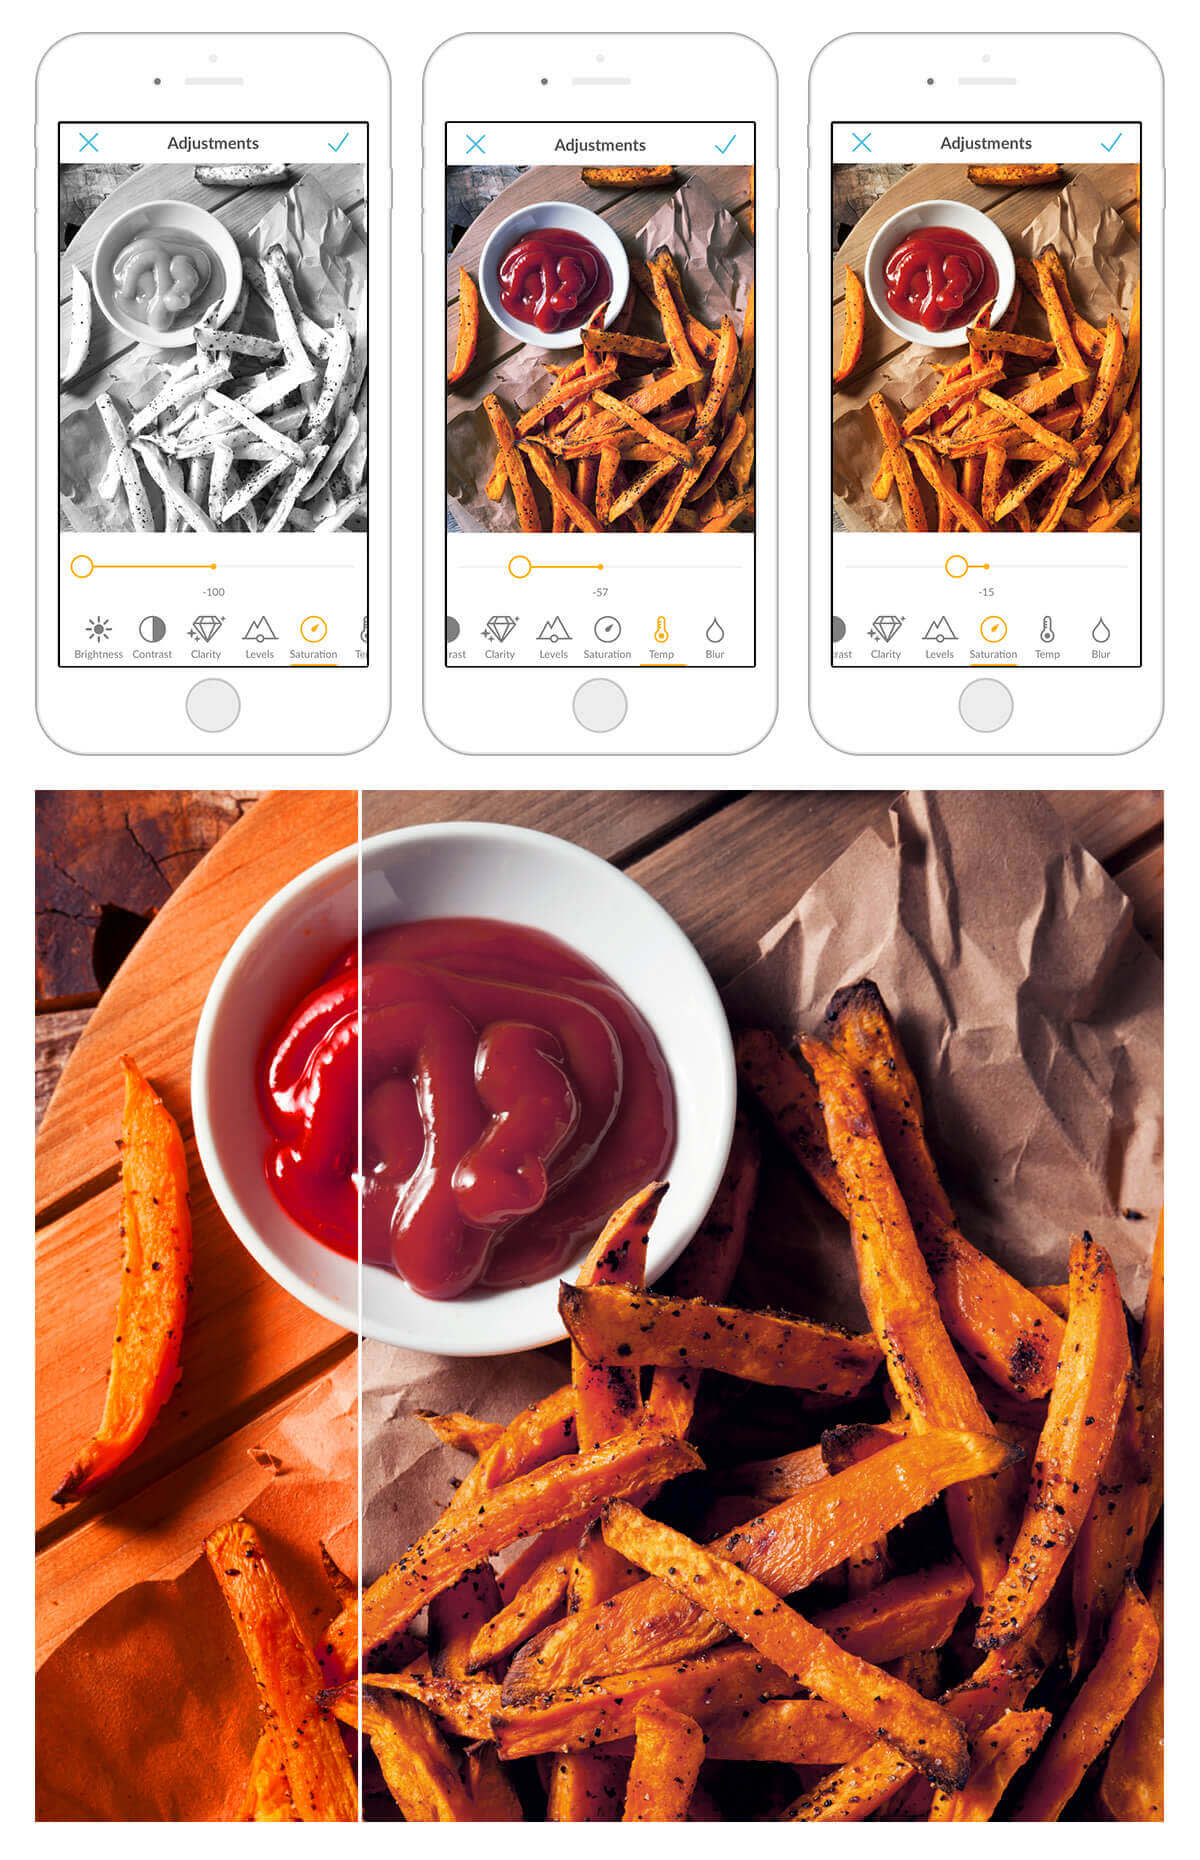
If your food is looking a little less luscious in pics than in person, adjust the saturation to amp up those colors.
You’ll find the Saturation slider under Adjust. Slide it all the way right to get an idea of what it does, then slowly move it left until it looks juuuust right. If your image is now looking a little too warm or on the chilly side, play with the Temp slider—move it to the right to warm it up, and to the left to cool things down.
Play with contrast
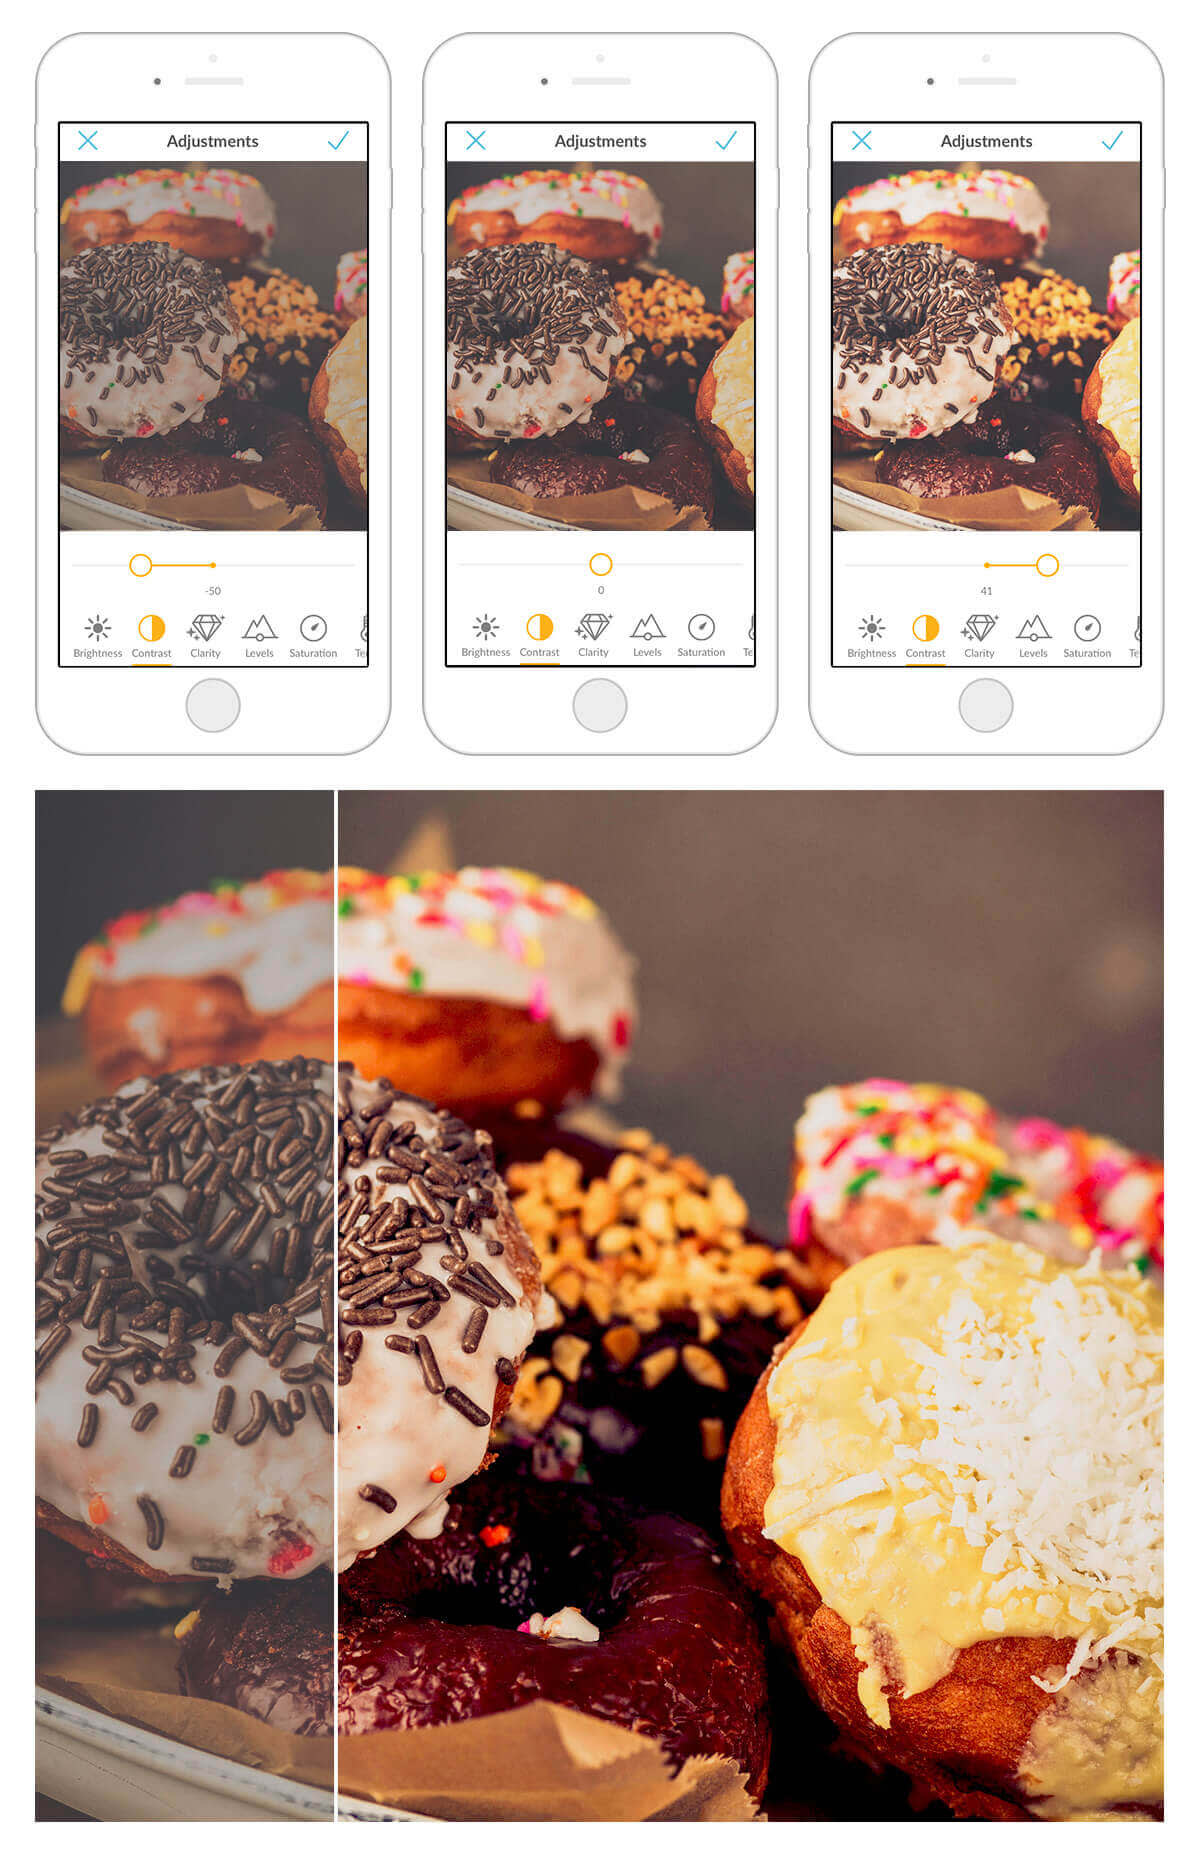
The contrast tool deals with the difference between light and dark tones in your image. When you adjust the contrast in an image, you’re pushing your dark tones more toward black and your light tones more toward white.
Head to Adjust and move the Contrast slider to cure your image of the blahs. To get a good idea of what the slider does, convert your image to black and white (in Effects) and then play with the Contrast slider.
Contrast has a pretty big impact on your image’s saturation, so if you’re looking to make a subtle adjustment to a slightly under- or over-exposed image, you may wanna give the Levels slider a try. And if your pic is too dark or too light overall, the Brightness slider is probably what you seek. It’s all about experimentation, but basically you’re striving for a just-bright-enough image that really pops.
Make it crystal clear
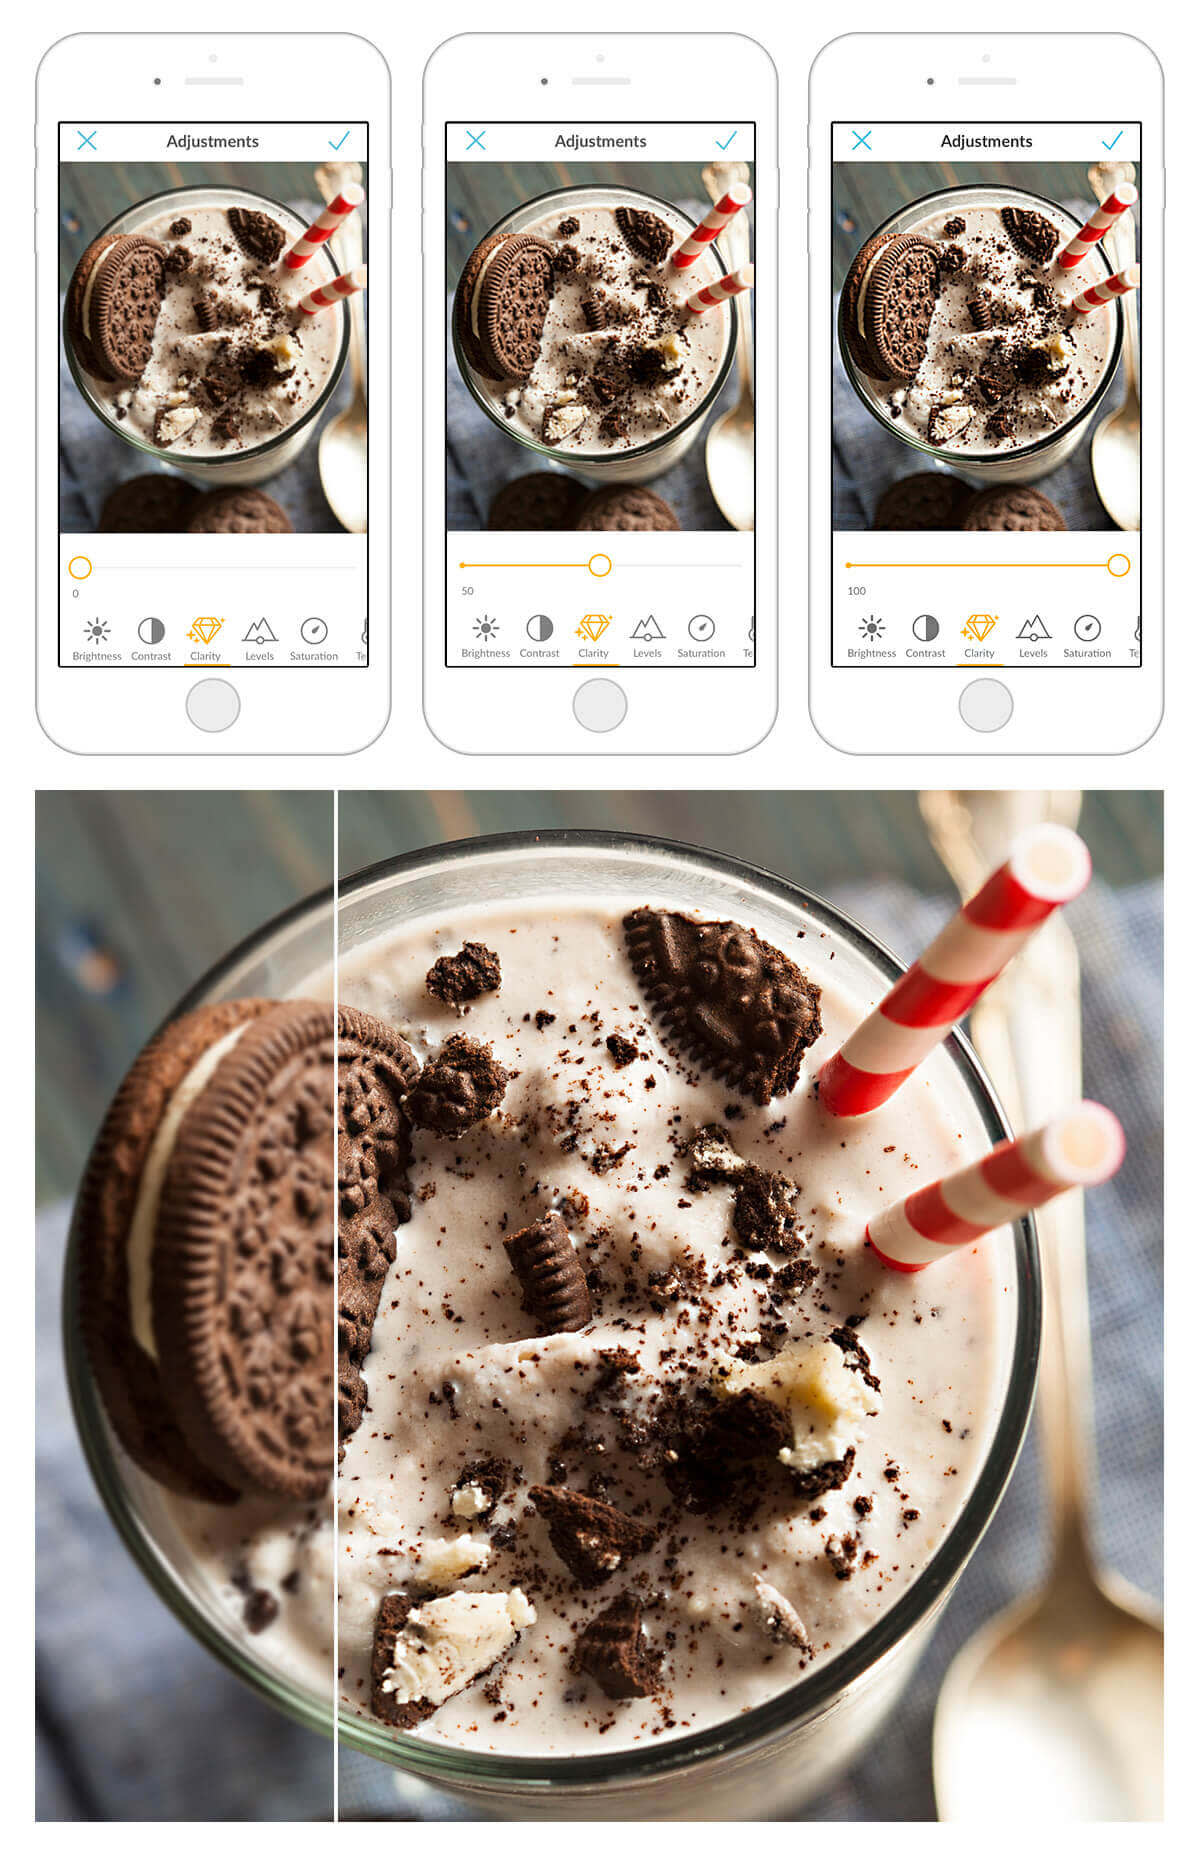
Amp up your image’s texture and rid it of unwanted murkiness by adjusting the clarity, with the Clarity slider in Adjust. If you’re thinking, “Um, excuse me PicMonkey, but what the hot fudge is clarity and how is it different than sharpening?” Check out our photo editing terms article.
Optional: Boost
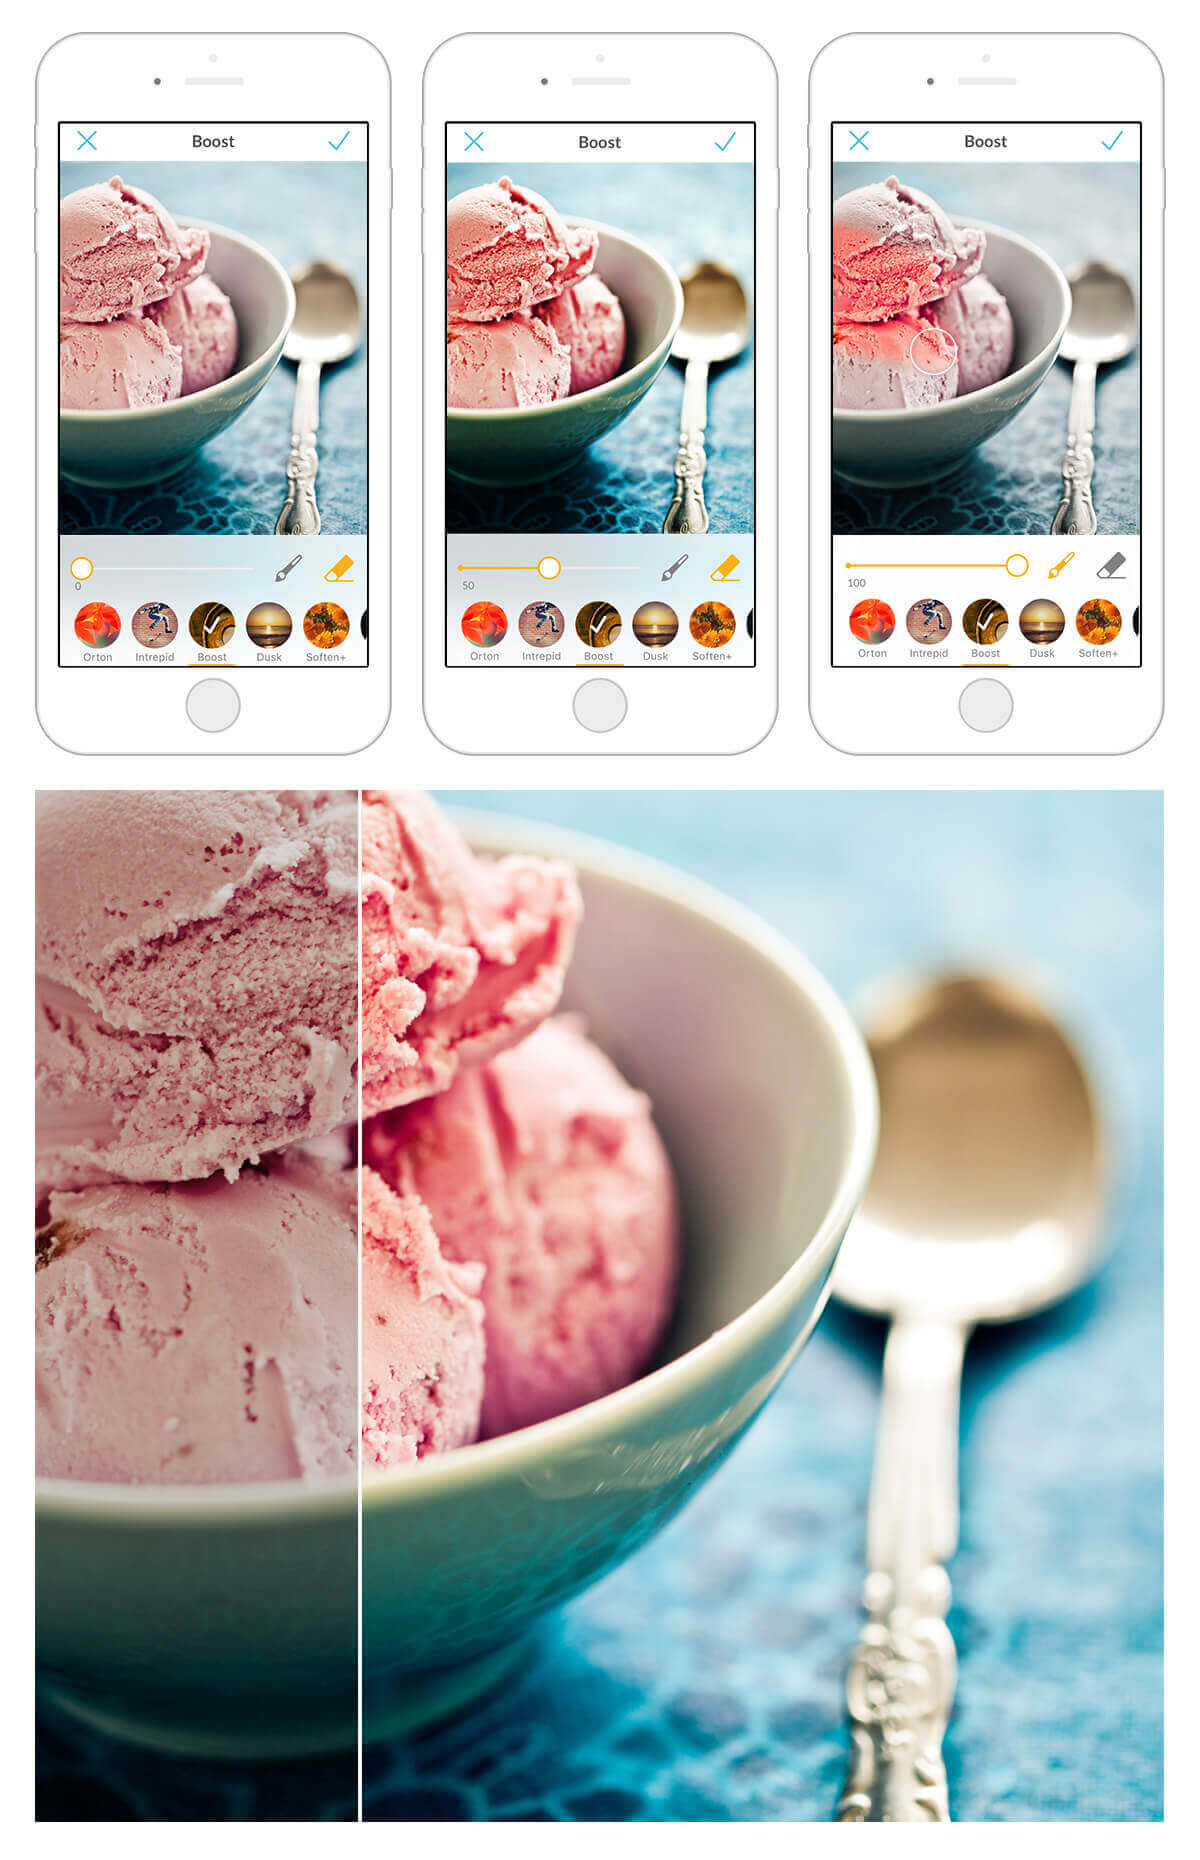
Boost is a magical wonder, and quite accurately named. It gives everything it touches a little extra, well, boost. Try painting a bit of it on the food in your photo by tapping Effects, Boost, then the paintbrush icon. Use your finger to apply it to your photographed fare, and notice how it instantly looks more delicious.
Optional: Blurrify
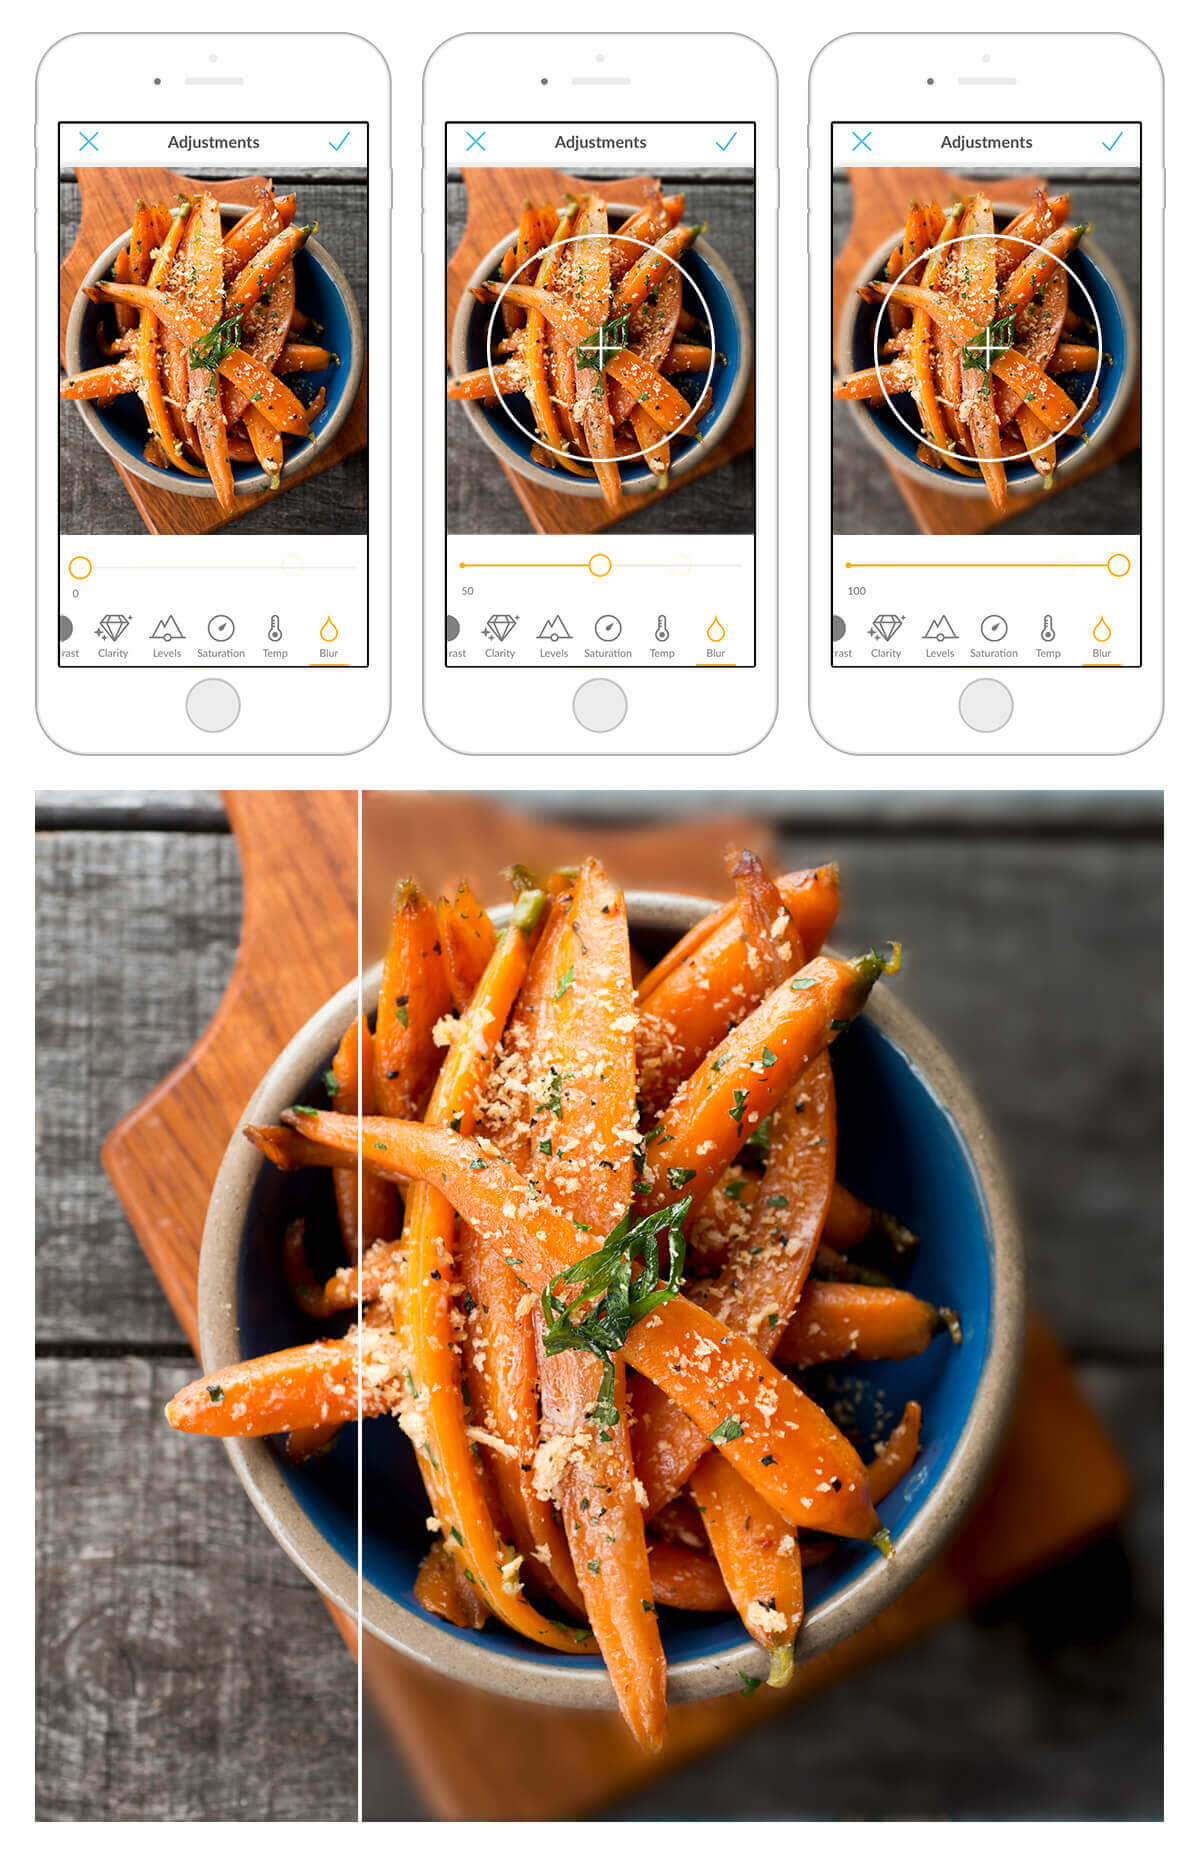
Artistic blur is all the rage, because it puts the focus on your subject and looks high-end. Try it with your food photos and tell eyeballs exactly where to go.
You’ll find Blur under Adjust. Spread and pinch your fingers to adjust the size of the focal target that hovers over your image, and move it around until it covers your subject. Then adjust the slider until your background has the right amount of fuzziness.


