We’ve said it before and we’ll say it again: designs with video get the most clicks! Of course they do—a moving screen is hard to look away from and amidst all the noise and scroll this translates to more eyeballs on your posts, ads, or in your online store.
When you use a readymade video template to get your designs started fast, you can make beautiful visuals quick and get back to your busy life. Or you can add a video clip to any of our design templates Either way, you’re off to a great start! Now, let’s get to the details of customizing your template with video.
How to use a video template

1. Click Create new on the PicMonkey homepage. Choose Templates.
2. Choose a template from the video templates group or start with any template.
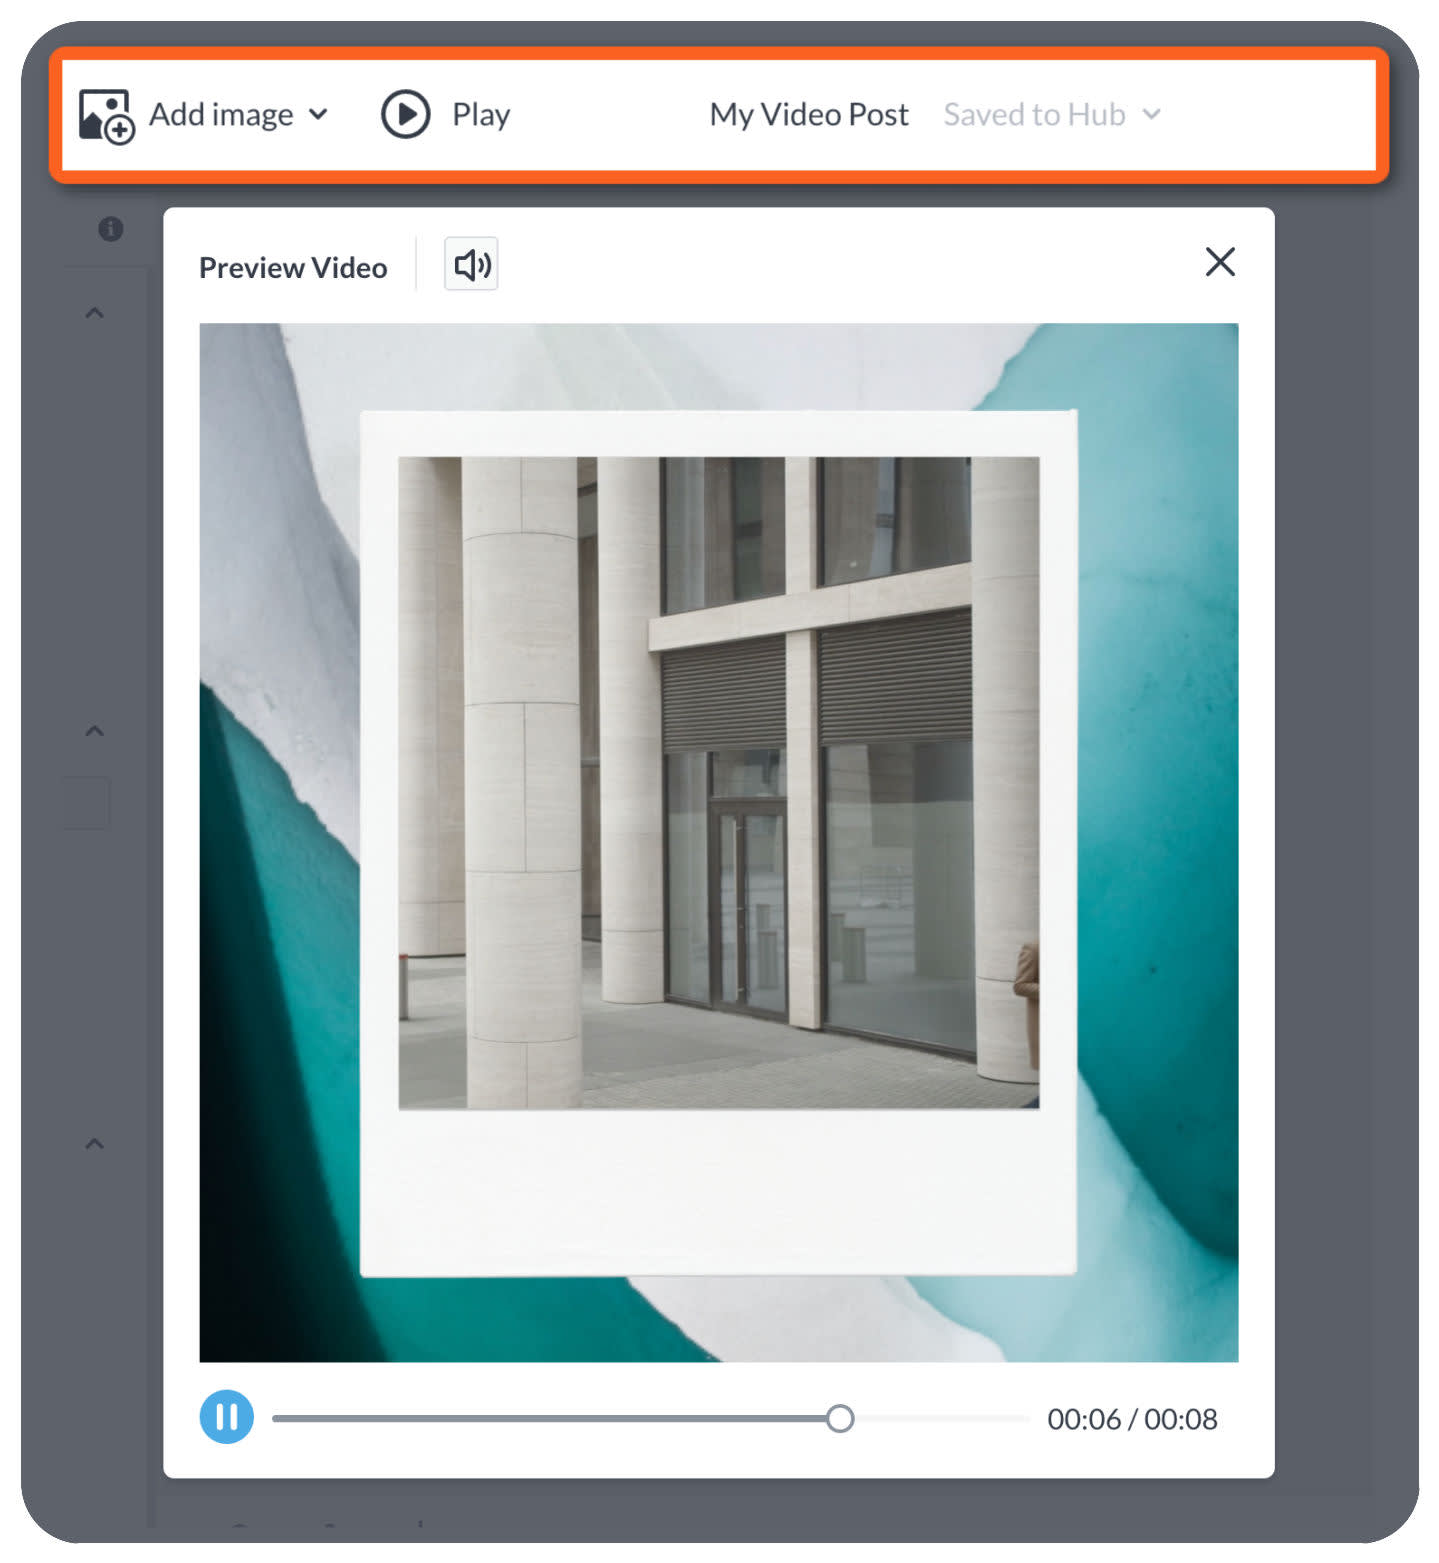
3. To watch the video in the template, click Play on the top tool bar:

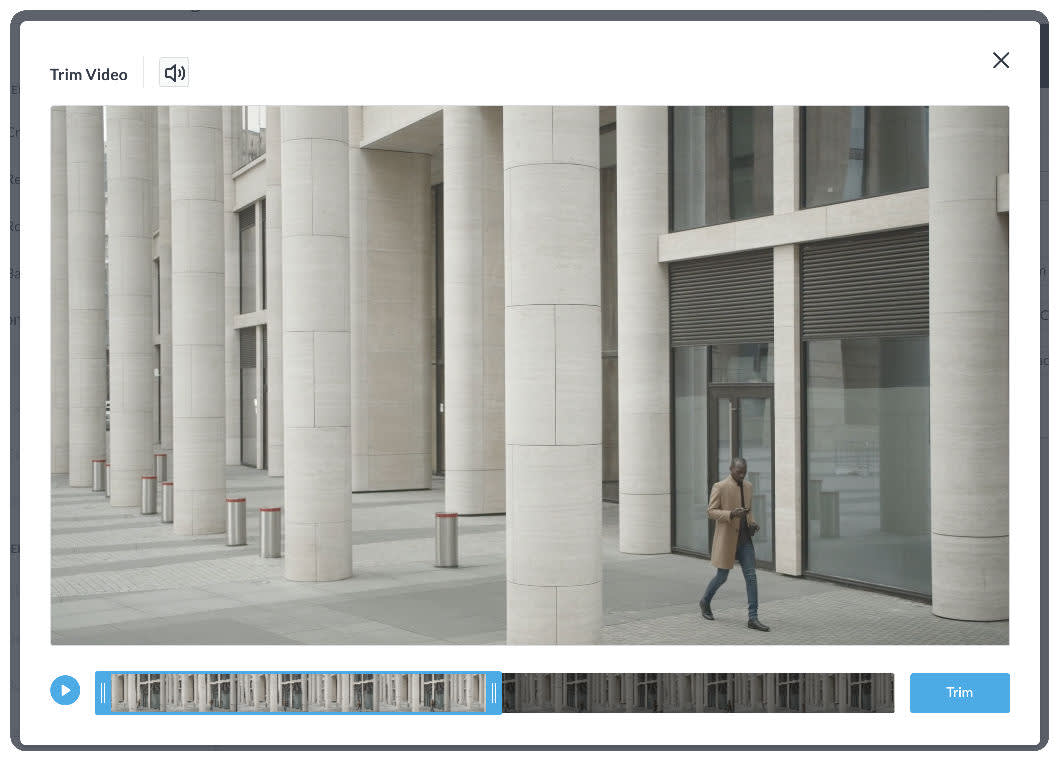
4. To trim the length of the video, select it, then click “Trim Video” in the Video palette that appears to the side. In the trim window (see below), slide the handles to shorten the clip from either the beginning or the end, or both. If the video has sound, you can also adjust the volume here:

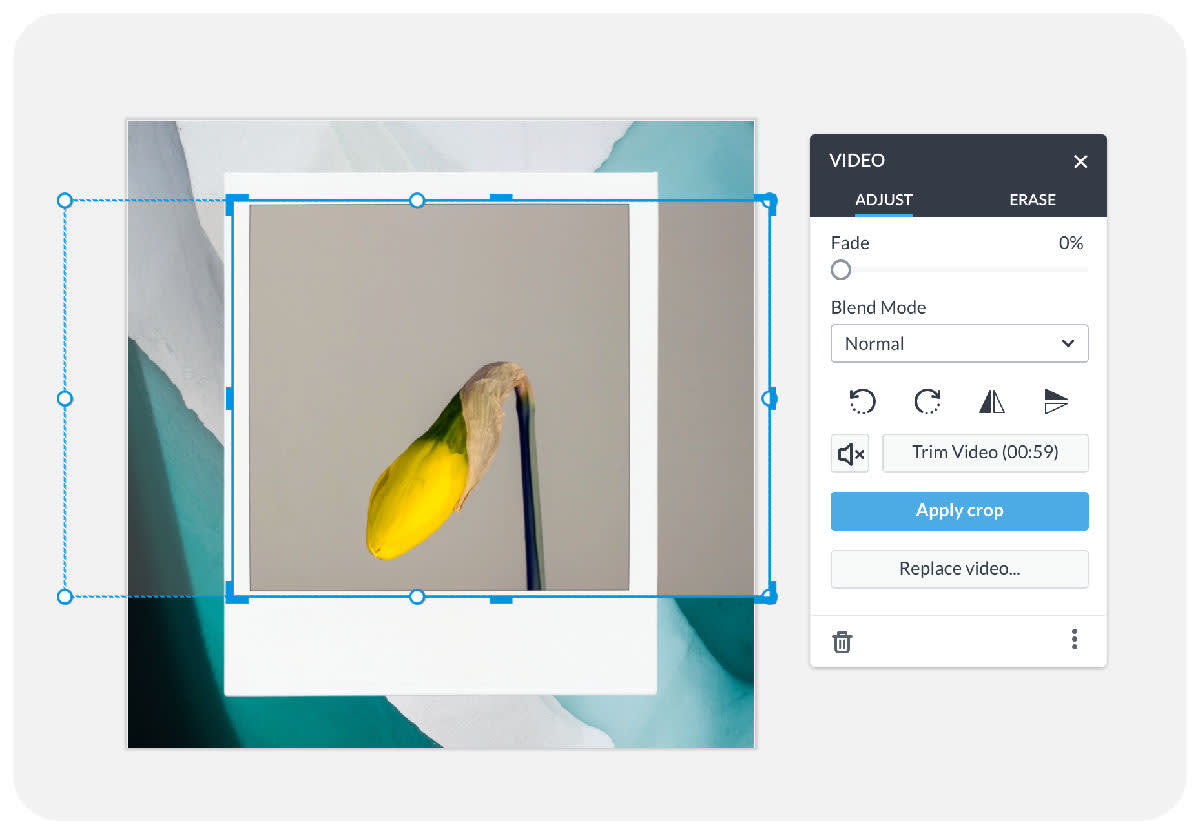
5. If you’d like to change the dimensions of a video, use Crop on the Video palette. You’ll most likely use this function to make your video clip fit into a template (as seen below). Grab the rectangular blue crop handles to adjust, the click Apply crop:

6. Add graphics and text to your design, or use a photo as the background. You can even add another video to your canvas if you want!
7. When you are finished designing, click Download in the top toolbar and choose MP4 video as the format. When your video design is done rendering we will email you the link to access it if it's longer, but if it's a short video it may download quickly to your desktop. Either way, we'll email you a link!
Learn more about designing with video: Bring Your Designs to Life with Video!
Four video template design ideas
There is so much you can do to make your creation stand out using video templates. Use video as a background to a still image, use multiple videos, play with blend mode filters for unique color effects, or partially erase some of the video with the eraser tool.
1. Use video as a background in a social post
While video is pretty flashy and likes to steal the show, sometimes a subtly moving background is all you need for that special "wow factor." For an Instagram post, open a blank 1080 x 1080 px canvas and size/crop your video to fit the background. Alternately, browse the existing Instagram post templates to find one you'd like to customize—open, and simply replace the existing background with a video from our stock video library or with your uploaded clip.
2. Use multiple videos in a Facebook cover
Don't be afraid to be extra—go ahead and use multiple videos if you wanna. Try creating a collage with some photos and some videos to show off your products for sale or your last vacation. Create a Facebook page cover for your event or business using one of our existing Facebook templates—just crop, resize, and replace to make it your own.
3. Play with blend mode filters for unique color effects
To create a colorful collage-look like this:
Start with a four-squared template like this one or this one.
Replace each of the square images with a basic square shape graphic.
Change the color of each square—we opted for blue and pink.
Add a video on top of a square, and crop to fit the shape.
With the cropped video selected, choose a blend mode from the Video palette. In this design we used "Screen" blend mode.
Repeat steps 3-4 for each additional square!
4. Try partial erasing on your video for an ethereal vibe
To make an Instagram post (or any sized design) like this:
Start with a photo background.
Add a film strip graphic to your canvas and size it how you want.
Add a video and resize/crop it to fit in a film strip cell.
Use the arrows on the Layers palette to move the video back a layer so it's underneath the film strip graphic.
Set the Fade slider to 5% on the Video palette.
Select Erase on the Video palette, move the Hardness slider to 0%.
Erase over parts of your video where you want the photo to peek through.
Repeat steps 3-7 for other film cells!
