If you plan to send your completed design to a print shop, it's imperative to set crop and bleed marks. Since printers can't print to the exact edge of a document, adding these marks shows a print shop where to cut a design, thus maintaining its integrity. Let's look more at what crop and bleed marks are, as well as how to set them in PicMonkey.
What are crop and bleed marks?
Bleeds are extra pixels added to the edge of your canvas to help prevent a design from printing with white edges. When you toggle on bleed marks in PicMonkey, your canvas extends by 1/8" on all sides.
Crops highlight your bleed area and tell a print shop where to cut the final print. When you turn on crop marks, they'll appear as near-perpendicular lines on the corners of your design.
Setting crop and bleed marks in PicMonkey

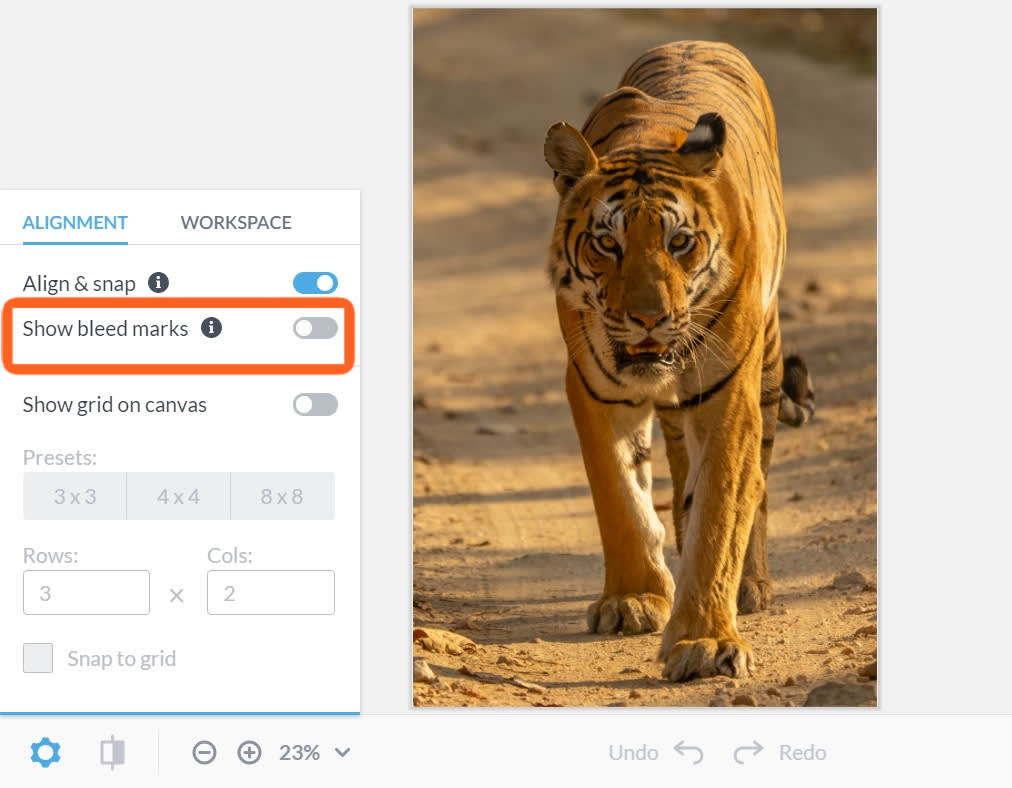
Click Settings on the bottom toolbar (gear icon).
Under Alignment, click Show bleed marks.

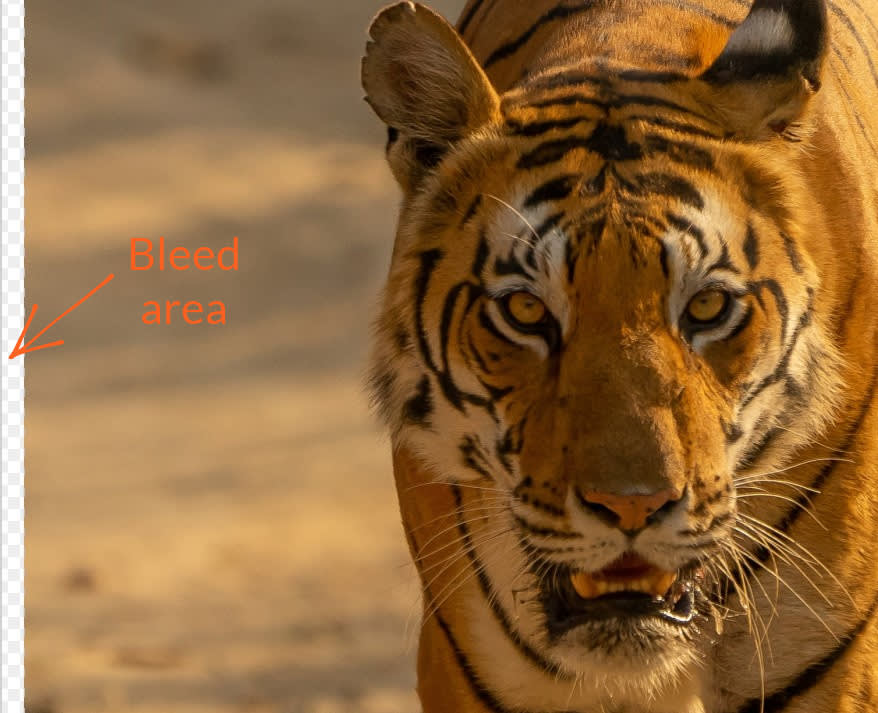
In the above example, Show bleed marks has been toggled on. Notice the area along the canvas edge — this is the bleed area. We would want to extend our image into this area in order to ensure non-white edges upon printing.
If you turn on bleed marks and your background image is smaller than the designated printing area, select your background layer and click Reposition background image to scale appropriately. If you replace a background photo, the new photo will fill the entire canvas (including bleed area).
Exporting designs with crop marks

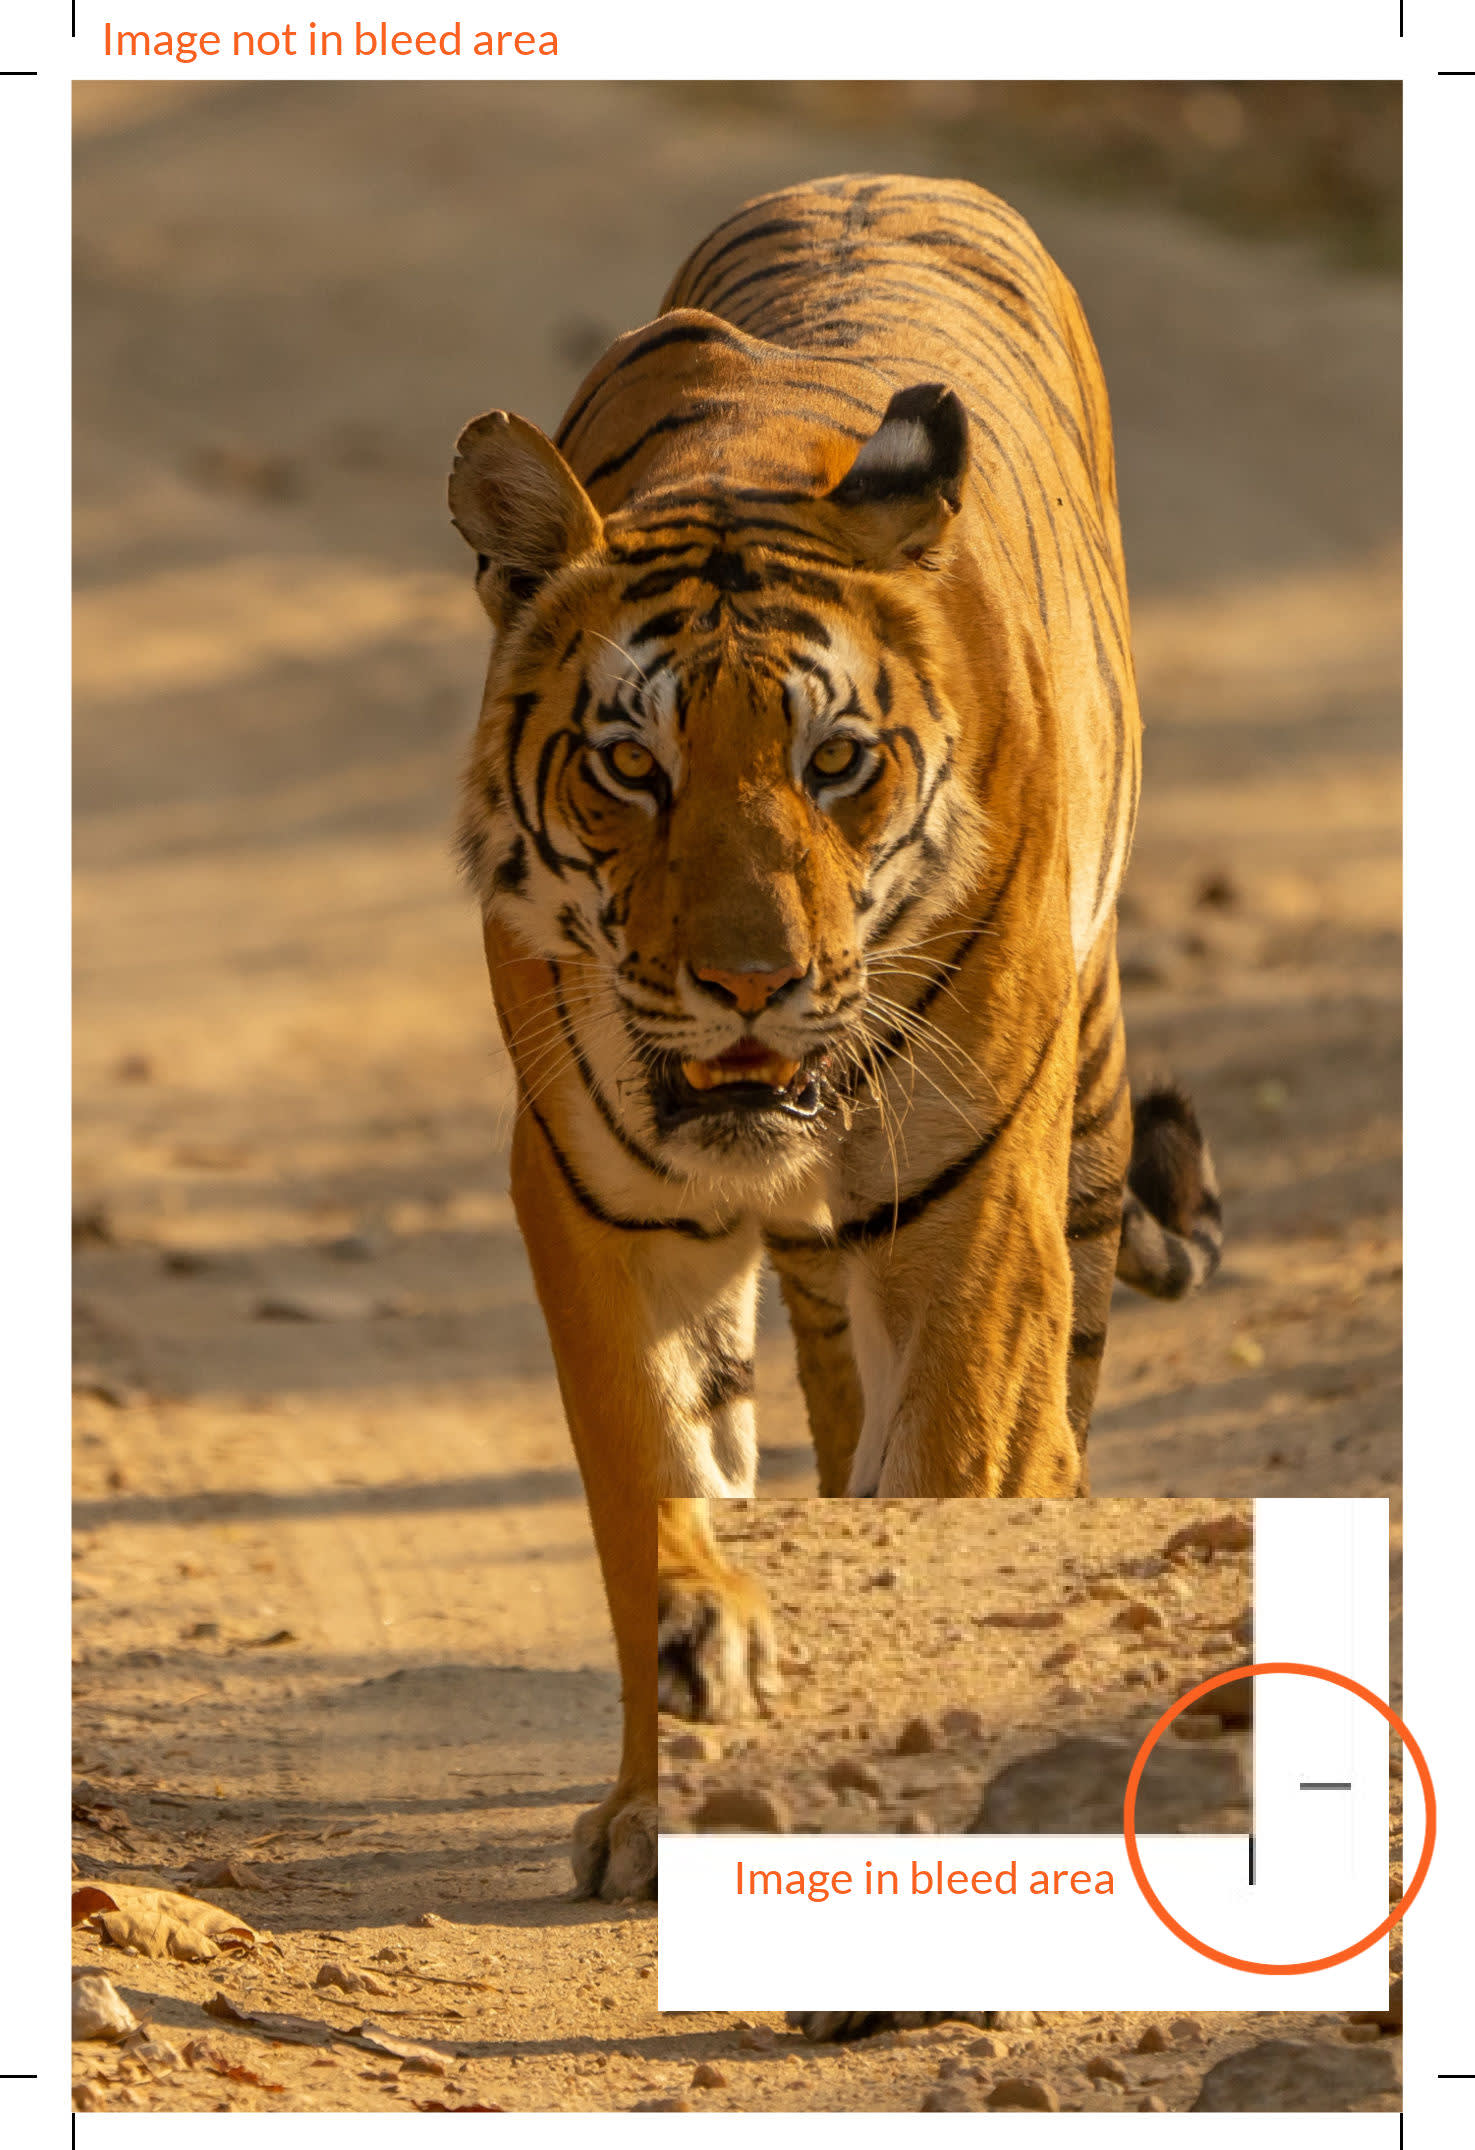
As long as Show bleed marks is toggled on, crop marks will appear on your design file after it has been exported.
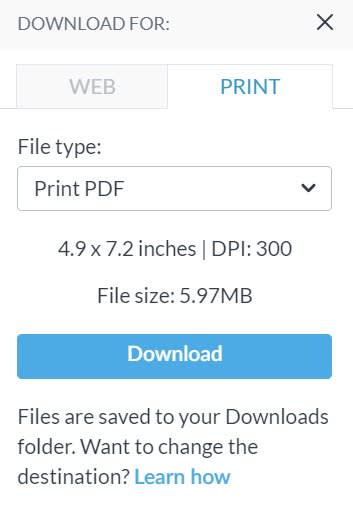
Click Download in the right corner of the top toolbar to open the download box.
Under the Print tab, select your file type from the drop-down list.
Click the Download button that appears below the controls. Your downloaded file will be slightly larger than the canvas in order to show bleed area and crop marks.
Note that most print shops prefer PDF files. If you're a PicMonkey Pro or Business subscriber, select "Print PDF" to download your design as a print-ready PDF file.
How your exported file will look:

Notice the near-perpendicular lines. These are your crop marks.
PicMonkey also has easy ways to crop and resize your photos. See:
FAQs about crop and bleed marks
Q: How much bigger do bleed marks make my canvas?
A: When you toggle on bleed marks, your canvas increases by 1/8" on all sides.
Q: What happens if I don't set crop and bleed marks?
A: This could result in your printed design having white edges.
Q: Why can't I download my design as a PDF file?
Only PicMonkey Pro and Business subscribers can download designs as PDF files.