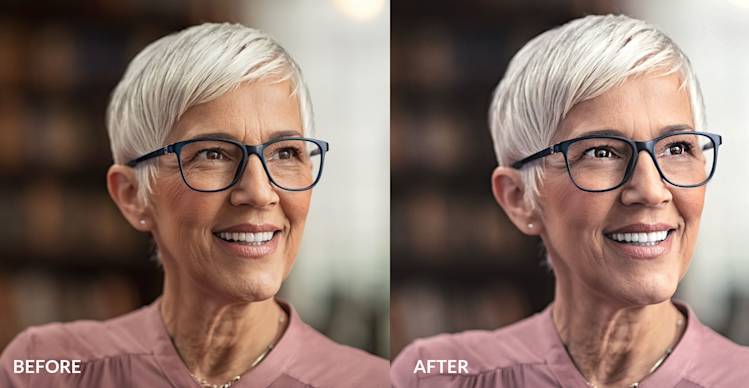
Portrait retouching is tricky—you need to help your subject look their best without looking fake. Fortunately, PicMonkey’s tools make touching up professional portraits a breeze. Let’s walk through some retouching basics and get this portrait looking its stellar best.
Start with great color: White Balance Picker
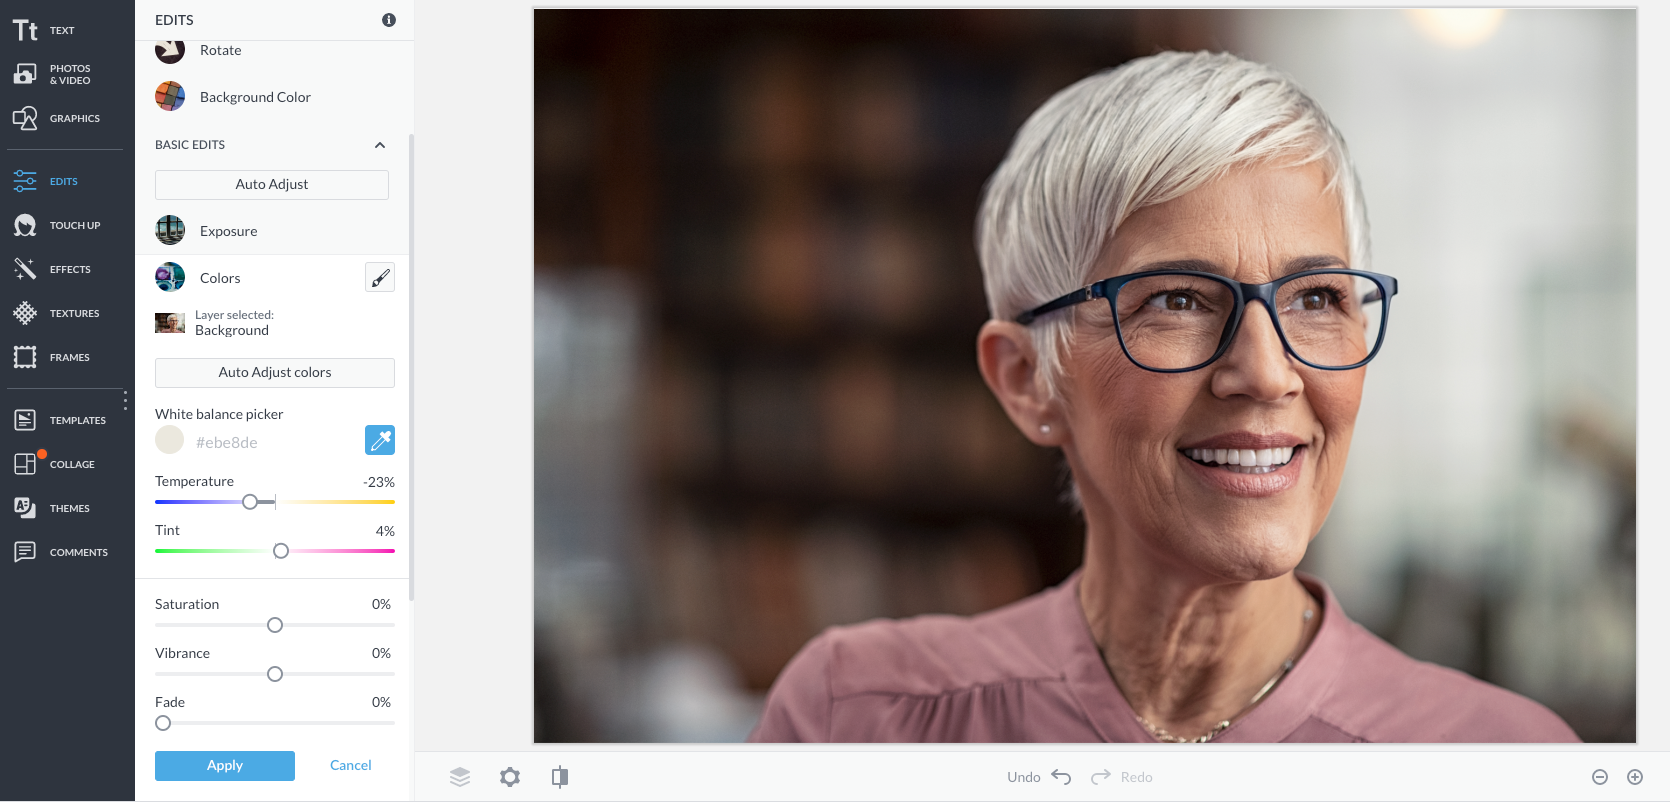
Open your picture in the Editor and choose Colors in the Basic Edits tab. Select the eyedropper tool of the White Balance Picker, then click an area of your image that’s gray or white. The rest of your colors will shift automatically.
Click around the picture to see how it works. If your subject is wearing white or grey, try clicking those areas. Otherwise, try the whites of the eyes. Zoom in so the eyes are large enough to sample from and click on the whites. This will give you a good color base to begin retouching.
Craft the contrast: Exposure
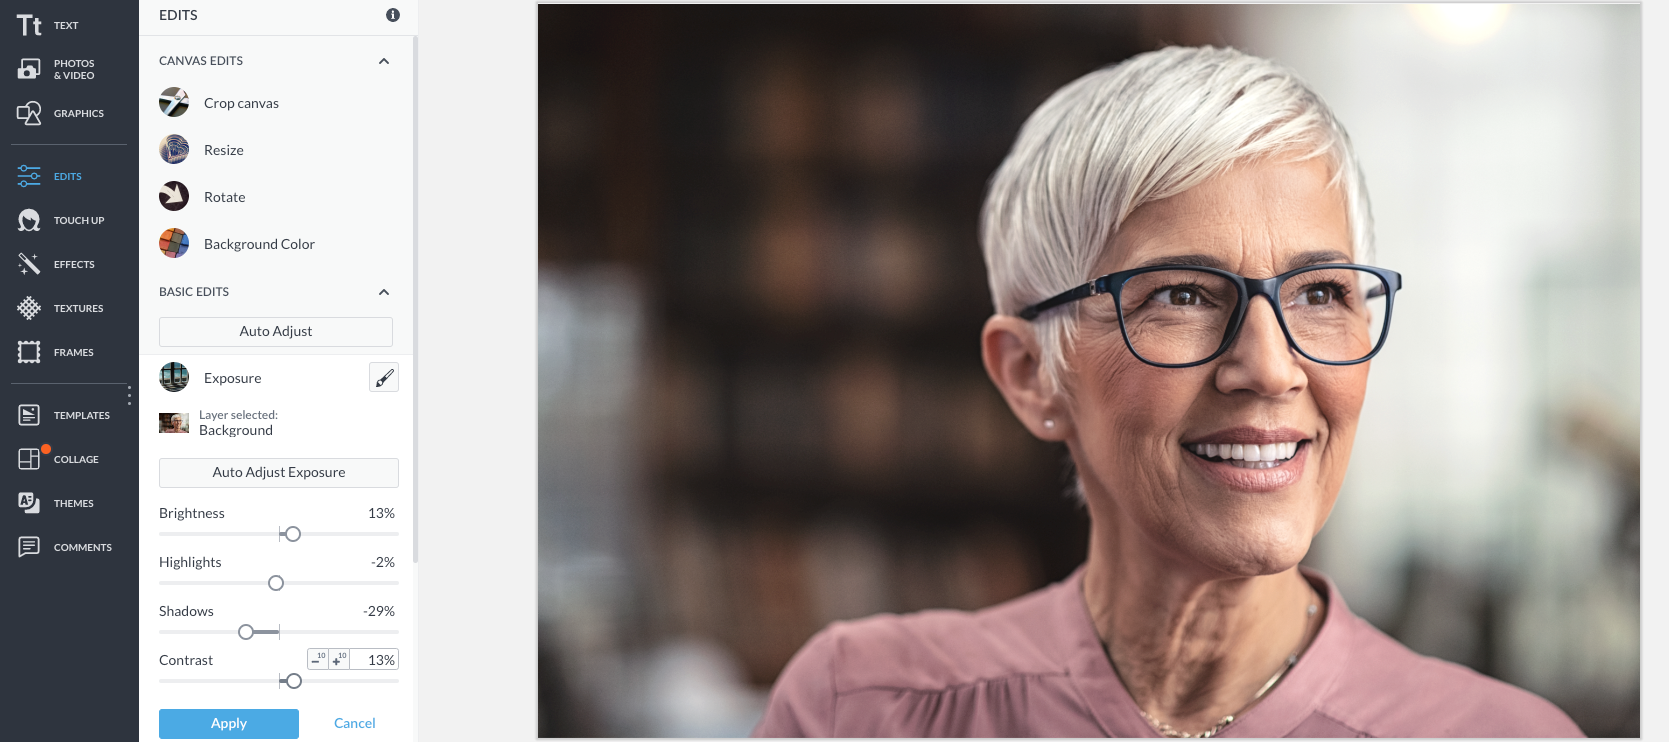
Now choose Exposure to get the brightness and contrast looking good. The Brightness and Contrast sliders adjust the entire picture, while the Highlghts and Shadows sliders only adjust the brightest and darkest tones, respectively. Bump up the brightness, then pull the shadows a little darker. You can play with the Highlights slider as well. Make sure that no area of the skin is so bright or dark that it loses detail.
Rev up the eyes: Eye Brighten

Head to the Touch Up tab and choose the Eyes group, then Eye Brighten. This tool gives the eyes a little punch. Zoom in and size your brush so it’s small enough to paint only the irises. Don’t worry about being messy with this brush; you can use the eraser to clean things up later. It’s often easier to use the eraser to shape the painted area than it is to paint it perfectly in the first place.
After you’ve applied the effect to the whites of the eyes, use the Lighten slider to brighten the color in the irises. The Fade slider can also be helpful, depending on the color of the eyes and how much reflection is showing in them. These eyes responded well to a lot of lightening with the Fade turned up about halfway.
Remove imperfections: Blemish Fix
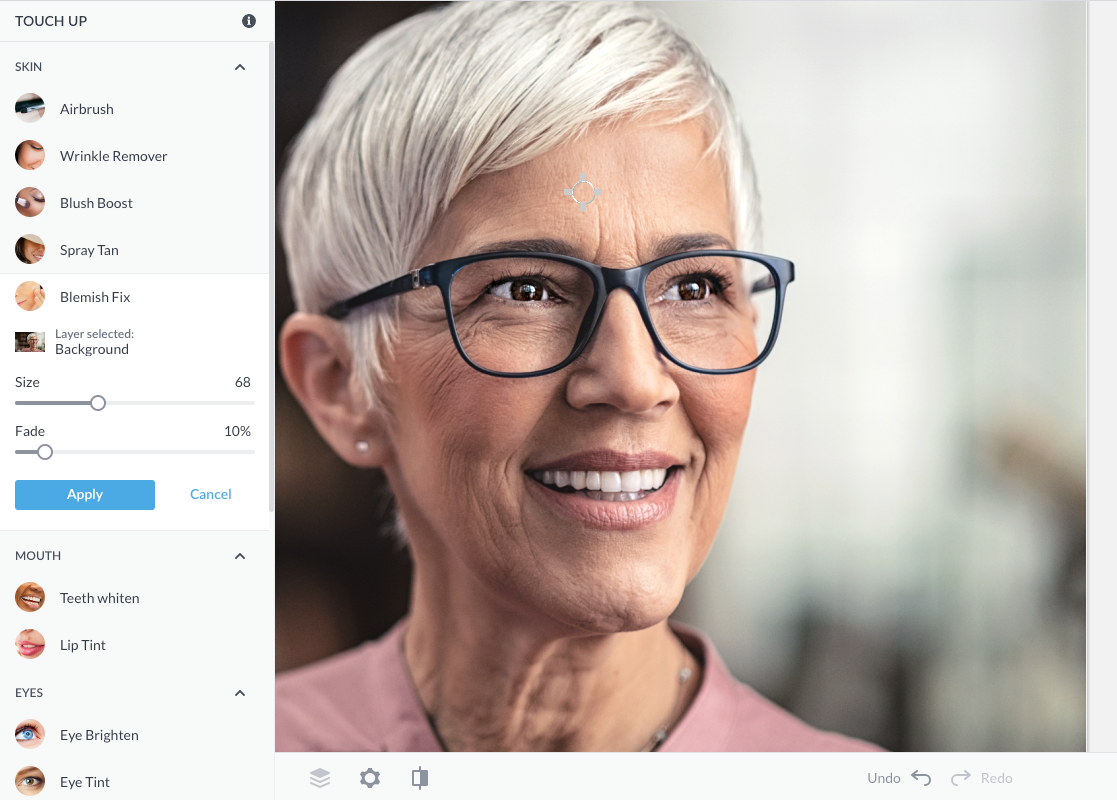
In the Skin category, choose Blemish Fix. This is a remarkable tool because it only affects spots that contrast with the area around them. So a red pimple gets removed in a snap, but it won’t leave a mark if you mistakenly click where there’s no blemish. Zap things like spots on the forehead, or the mole you plan to have removed at some point.
Plump up the skin: Skin Smoother & Airbrush
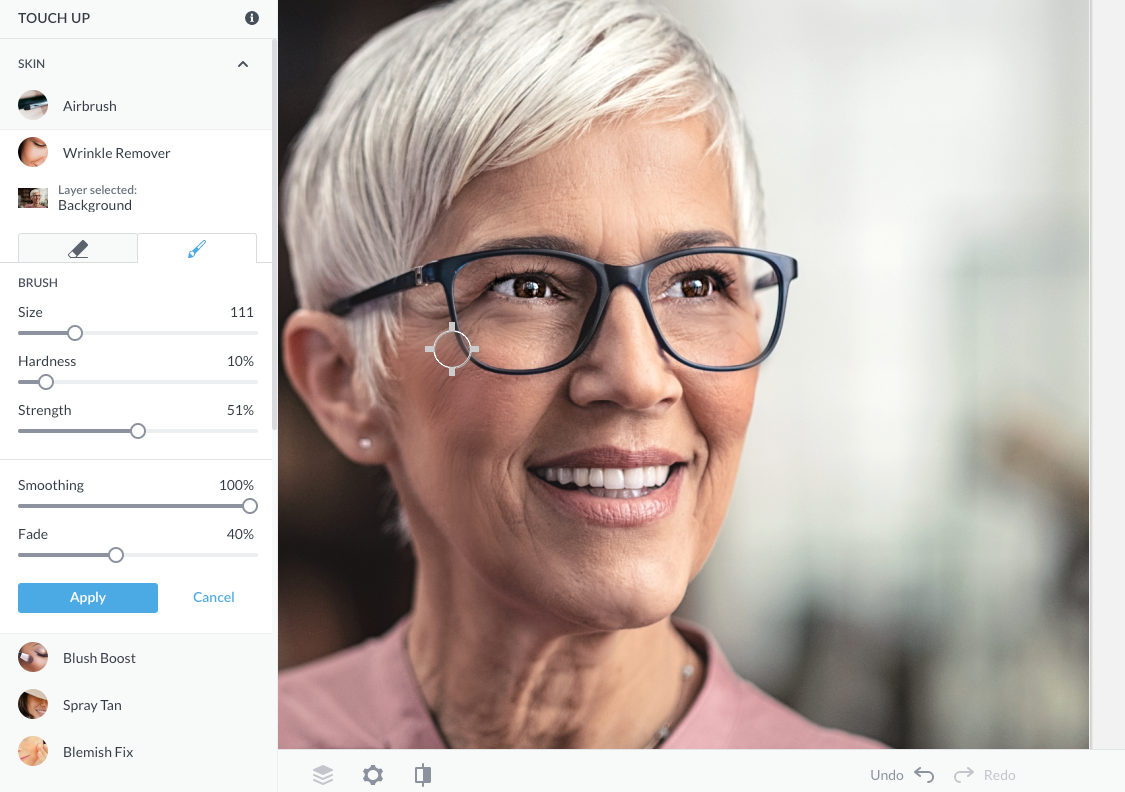
Select Skin Smoother to lightly smooth crinkles and creases around the eyes—go easy, though, you still want to look like you! Size your brush and paint Skin Smoother on the area, then adjust the Fade slider. Subtlety is key here—this tool could remove the crease under the eye completely, but that would look fake. Go light and remove some of the detail of the crease, then use Airbrush to soften the contrast and make it less apparent.
When using Airbrush, keep the fade set pretty high so it’s gentle, and toggle between Natural and Strong to see which works better. This area is an important identifying feature of the face, so don’t go crazy. Apply Airbrush while you’re zoomed in, but view it zoomed out to be sure you’re not applying too much. These light touch ups make a big impact when they’re all combined.
Polish the pearlies: Teeth Whitener
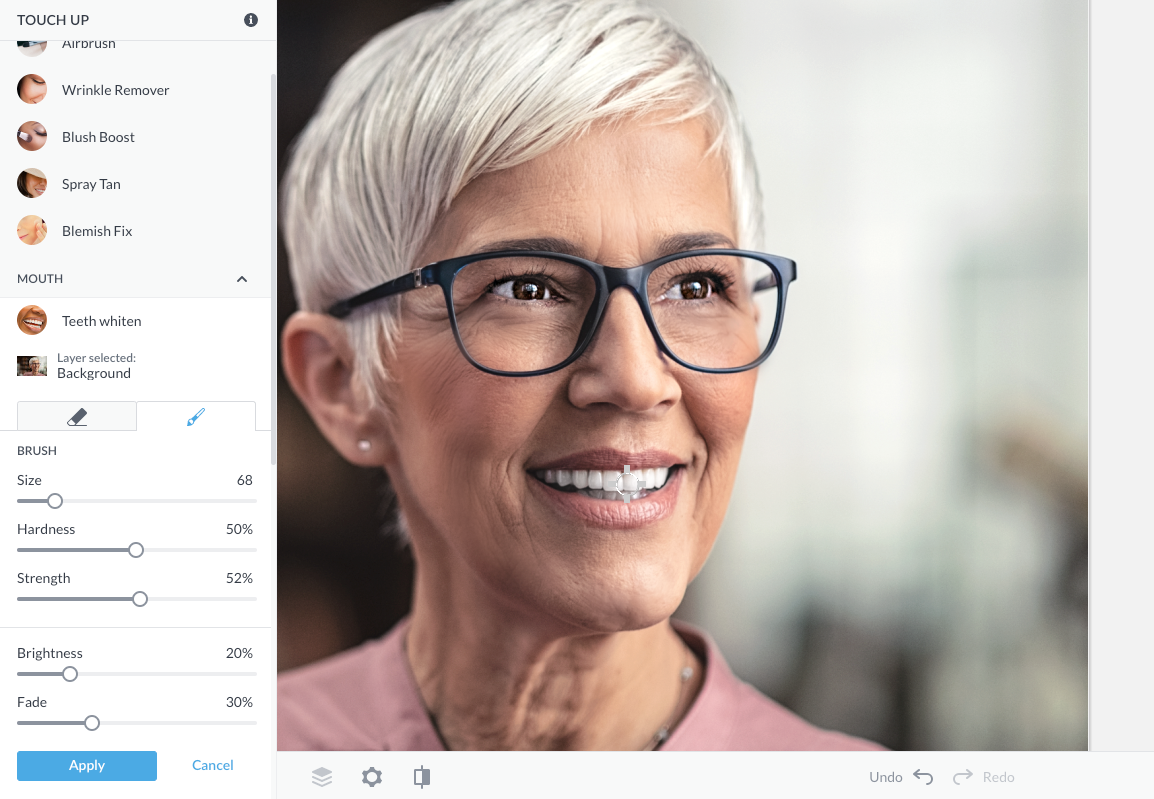
Under the Mouth group choose Teeth Whiten. Zoom in on the teeth, then adjust your brush size and paint on the teeth only. Remember, the eraser is your friend. Adjust the fade to taste, but be light-handed here, too. Use this tool to enhance your subject’s smile without making the teeth distracting or artificial looking.
Finishing touches: Sharpen & straighten

Zoom out and take a look at the photo as a whole. It looks good, so we’ll move on to the last adjustment: sharpening.
Find Sharpen in the Edits tab. Sharpening makes the photo look more polished, but overdoing it can give your photo a crystallized look. Leave the Radius slider set to one, and slide the Strength slider far to the right to see how it changes your image. Bring it back toward the left while paying attention to smaller details like the hair and eyelashes, to make sure they don’t look chunky. Use the Clarity and Fade sliders to further bring your image into perfect focus.
Straighten
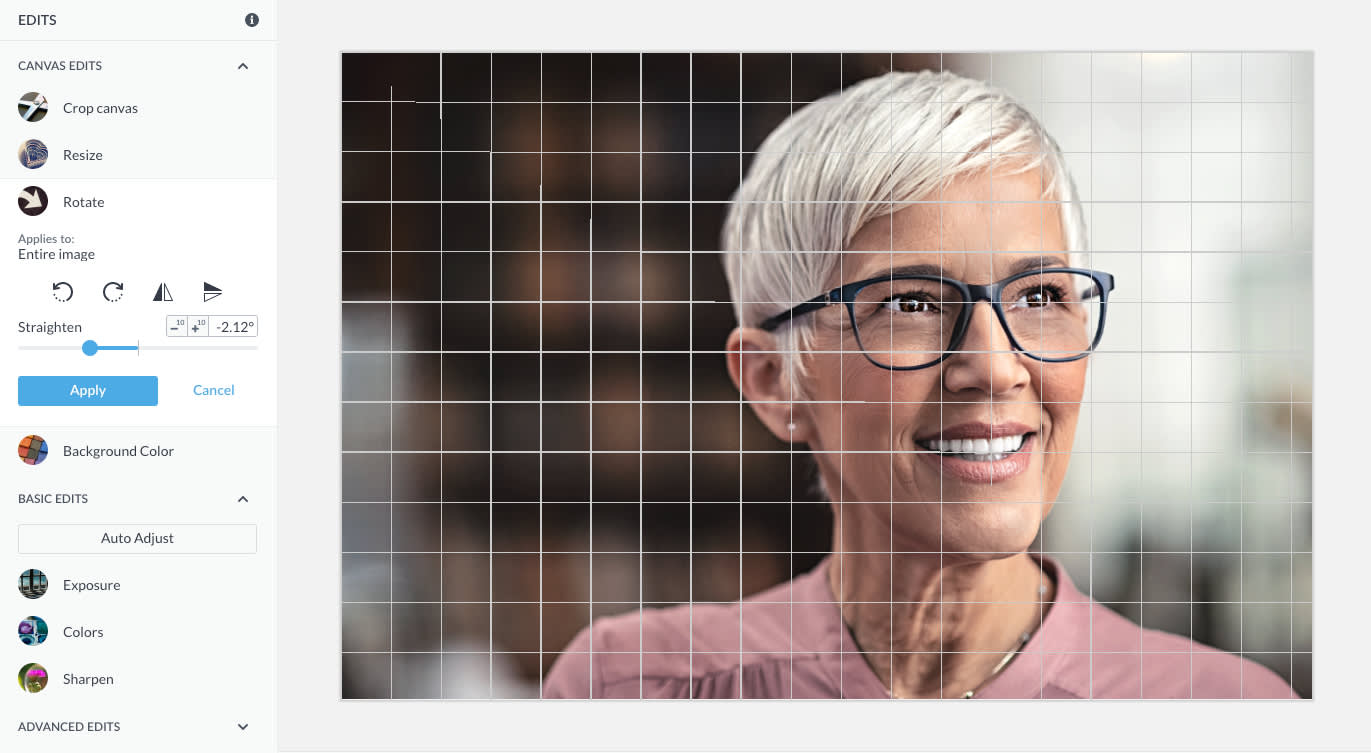
Select Rotate in the Basic Edits tab and use the Straighten slider to align your photo. Use the eyes as your guide and make them line up with the grid lines. This small adjustment alters the entire feel of the picture and makes a person seem more trustworthy and honest. Tilted heads can be coy, cute, or thoughtful, or they may be perceived as sly. A level shot makes all the difference in the viewer’s perception.
Crop at different sizes
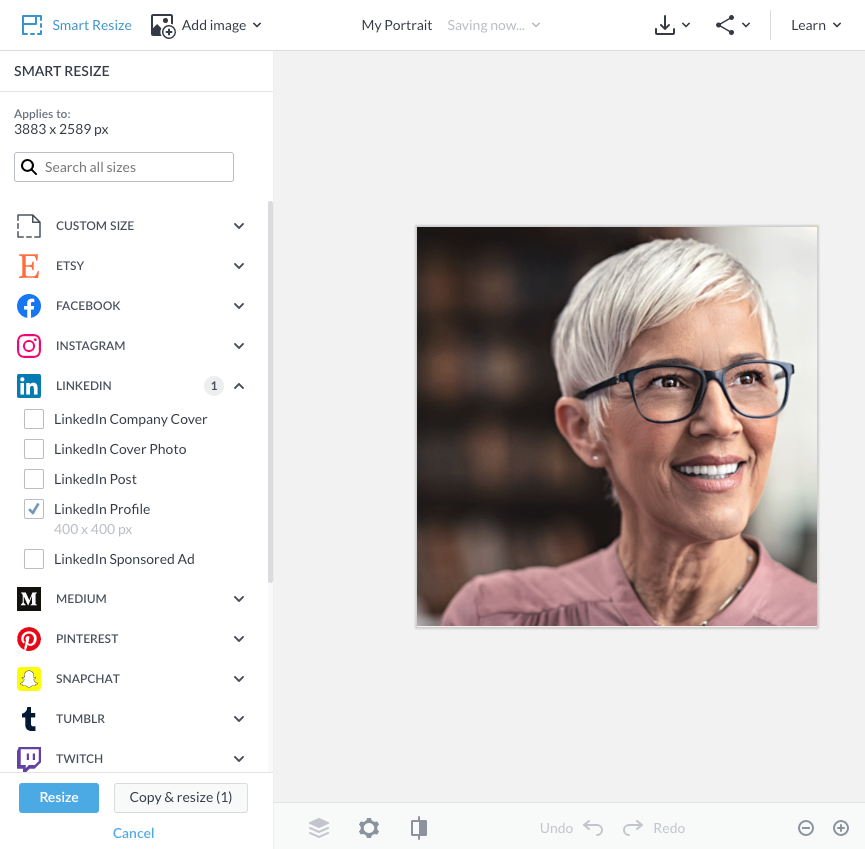
You may want to create a variety of crops for social media pages, like a LinkedIn profile or Facebook profile pic. You may also need the picture for a business card, which usually requires a vertical crop. The Smart Resize tool can handle all these sizes in one fell swoop, or use the Crop canvas tool and the aspect ratio presets in the drop-down menu.

Just a few subtle edits can take your portrait from good to great, while maintaining the realness that is all you. This portrait is ready to roll!
