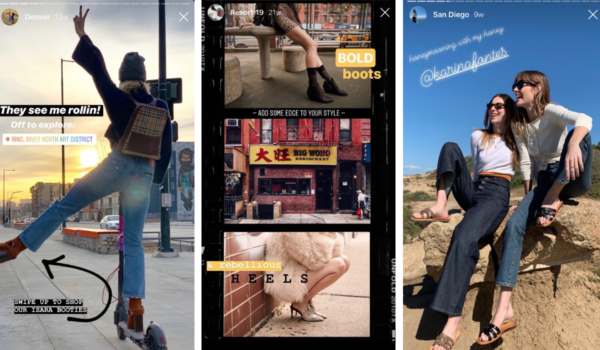
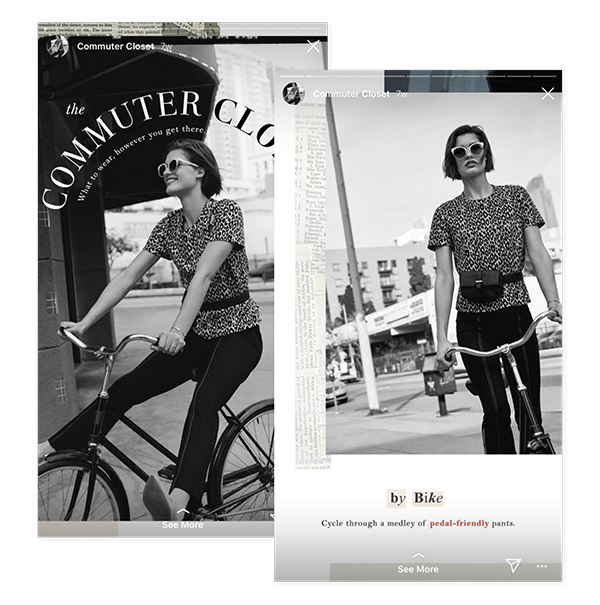
We see brands creating killer Stories all the time, so we’re going to dive into what they’re doing to get these looks and see how you can get them with PicMonkey. But design is only part of the Stories story. Posting and staying in front of your audience is essential, so we’ll see how our pals at Later can help you quickly upload and schedule your Stories for easy publication.
So let’s get started and see how to plan and create memorable Stories with PicMonkey and Later. Because there are 500 million active daily users of IG Stories, and you need to make yours stand out.
Start your Instagram Story design with a storyboard
A great way to start planning your Story is to create a quick storyboard to hash out the details and make sure it flows. To help you get rolling, we’ve partnered with Later to create a free Instagram Stories storyboard worksheet. Just fill it out to create a storyboard and start planning your Instagram Stories strategy. It can save you some time and keep things focused, and it’s a great reference point for creating a winning Instagram Story design. So here are the four steps for getting that worksheet solid.
Step #1: Set a goal for this Story
When you’re creating your Instagram Stories strategy, everything you post should come back to your brand goals. Once you know what your Instagram marketing goals are, you can better determine what types of content to post.
Your goals for each Instagram Story can include things like build awareness, drive sales, or simply letting your followers know you’re listening.
Whatever it may be, the goal of your Story is a great focal point you can refer to when working through the rest of the worksheet.
Step #2: Determine your Story concept
Start with a single idea and build from there. Your concept could be a company update, holiday, product launch, new blog post, or anything else you’d like to share with your followers.
Next, you’ll want to determine how to create a Story around this concept.

For example, if you’re a shoe company and want to share a new product, your Story concept could be something like, “show off people all over the world wearing the shoes in different environments.”
Once you’ve nailed down your Story concept, it’s time to start digging into the details and create an outline for how you’ll make your Story come to life.
Step #3: Outline the beginning, middle, and end
By outlining the beginning, middle and end of your Story, you can make sure that you hit all the points you want to cover and keep your Story flowing naturally.
For example, check out how Topshop creates a natural flow in their Instagram Stories. The Story continues to progress as the viewers keep tapping forward.
In this Story, Topshop’s goal is to build awareness around a new product update and ultimately drive sales. They let followers know they’re listening (“you asked, we listened”) and show a video of the product in action.
Step #4: Sketch the Story
Once you’ve determined your Story concept, outline, and goals, it’s time to sketch out the details of your Story. You’ll want to figure out how you’ll best convey your message and what types of media you’ll need to support it. This can include photography, illustrations, GIFs, videos, or even a mix of them all. Whatever you choose, you’ll want something consistent that speaks to who you are and helps create a recognizable, relatable presence.
Once you’ve completed this worksheet and created a plan for your Story, it’s time to start designing and bring it to life. So let’s look at some winning design concepts you can create with PicMonkey.
Add richness and depth with masking
What is masking? It’s like combining two images in a layer so that one image appears to peek through the outline of the other.
Click Create New on the PicMonkey.com homepage to open a blank canvas or photo. Add a graphic (or text) that has a shape you want another image to peek through. On the Layers palette, select the layer (or layers) with the content you want to use as a mask. On the Textures tab, click a texture you like (or add your own by clicking Add your own texture) to make it appear inside the shape. You can drag the texture around to get the part you want to appear. It’s a great design technique that looks like it’s hard to pull off, but PicMonkey makes it easy.
Create pro-level looks with layers
The layers feature in PicMonkey is simply a way of displaying the objects (photos, text, graphics, background color) you’ve placed in a design so you can manipulate them more easily. If the Layers palette isn’t visible, click the stacked squares in the lower toolbar to open it. You can then see all of the layers of your design, and use the arrow keys to move them backward or forward.
And it’s not just about organization — using layering in conjunction with the Erase tool can create some wild effects. To give the appearance of one image being in front of another, use the Layers palette to move one image over the other. Select the top image, then on the Graphics palette that appears, select Erase. Carefully erase the parts of your text or graphics that you want to appear like they’re behind something — zooming in helps a lot with this. And don’t worry about erasing too much — you can paint it back on with the Brush tool on the Graphics palette.
Spice up text and images with textures
Another way to attract a bit of attention is to apply textures to your content. These can be anything from subtle hints of stone or watercolor to bold bokeh and light trails effects. And, of course, you can adjust the fade to capture just the amount of texture you want. Easy? Of course! It’s PicMonkey.

Open your design and select whatever you want to add the texture to. Click the Textures tab on the left, and choose your texture. This will be the hardest part because there are so many good ones. As soon as you click it, it’s applied to your content. Play with the blend mode to experiment with the overall look, then adjust the Fade and Saturation sliders to dial in the color and opacity you like. You’ve got a lot of control over the attributes, so you can quickly match the look of your design.
Customize typography for unique looks
You can do much more with fonts than just change the size and move them around. Add drop shadows and inner shadows, curve text, adjust spacing — you can even customize fonts by using colors, textures, or our touch up tools. Here are a couple of quick techniques that will draw some eyes to your text:
Drop shadows
Drop shadows provide an easy way to make your content stand out against a background — this can really aid readability in a Story.
To apply a drop shadow to text, click the text so you see the text box around it. On the Text palette, click Effects. Choose Drop Shadow, and there’s your shadow. You can do the same to a graphic, but you’ll be working on the Graphics palette.
Click the caret to the right of Drop Shadow to access the attribute sliders. Horizontal Blur and Vertical Blur control the size of the shadow, and Angle and Distance handle position. Moving the Intensity slider to the right makes the shadow darker, and moving Fade to the right blends the shadow into the background. You can create a variety of effects by adjusting the sliders, from a subtle shade to “Whoa!”
Another feature under Drop Shadow is Knockout, which knocks out (see?) the inside of your font. Try it out and see what you think of the stencilly look.
Curved text

Curved text is an eye-catching look that’s dead easy to apply.
Select the text you want to curve, and on the Text palette, select Effects. Click Curved Text, and you’re basically done. You can choose Arc or Circle, and adjust the sliders to get the curvature you want. Don’t forget about the little handle at the top of the text field — you can change the angle of your text or the starting point of circular text.
Create great, clickable experiences with multi-panel stories
Another great design technique is to keep the basic look of a Story while swapping out images in a multi-panel Story. For example, you could keep text announcing a sale constant, but have images of different sale items appear throughout the Story. How do you get the text placement exacdiddliactly the same between images? PicMonkey has you covered with our Edit a Copy feature.
Once you have your first Story panel complete, click Edit a copy in the top toolbar. Give the image a new name, click Create, and change whatever elements you like. Then lather, rinse, repeat to create additional slides for your Story. This is a great way to keep a logo or announcement in front of your audience while mixing it up with new visuals.
Scheduling your stories with Later
Once you’ve used PicMonkey to create your splendiferous Instagram Stories, set up your publishing schedule with Later. By scheduling your content in advance, you can make sure you’re posting consistently and staying top of mind with your followers. When the time comes to make your Stories live, you’ll receive a push notification to your phone, and with just a few taps, you’ll be able to share your posts with your followers. How? Well …
To schedule your Instagram Stories, upload your photos or videos to your Media Library, like you would for normal posts.
Next, click on the Stories button from your calendar view, and drag and drop your content onto your Instagram Stories scheduler.
From here, you can visually plan your stories with the storyboard tool and rearrange them as needed, or add more stories.
You can also add a caption or a URL if you’re including a swipe-up link, which is super handy for saving custom URLs. Your caption or URL will be copied to your phone when it’s time to post.
