Buckling down for fall classes doesn’t mean you have to say goodbye to summer’s glory: show off your back to school crafts skills by making a composition book cover out of your best summer pics! PicMonkey’s textures and graphics take it over the top with urban flair. Or start with a colored background and add summery graphics for a cleaner, brighter look.
Teen Dream

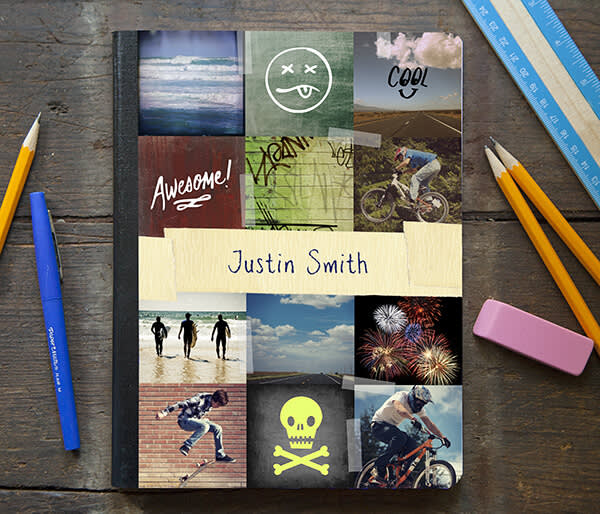
We went for an up-age look, for this one, with heavy use of one-click effects and a graffiti-esque scribbles and doodles. Here’s how to create a design for a 2092 x 2917 pixel notebook-cover-sized sheet:
Open a bunch of your favorite summer photos in PicMonkey and choose cool effects to apply to each. Crop them square, at least 800 x 800 pixels, and save them at the highest quality (you’ll combine them together later). For some of the squares in your design, you can start with a blank canvas by clicking Design on the home page, and add a texture to the background and a graphic or two. Don’t forget to comb through the themes for graphic and texture choices; we used a skull from the Demons theme and wordy Up Notes from School U. The fireworks square was made with a black canvas and a few fireworks graphics: nobody needs to know ya didn’t shoot it yourself!
Now combine all the photos together. Open your images in Collage and choose the Square Deal layout. To learn how to add cells and change the dimensions, check out our Collage tutorial. You’ll probably need to convert inches (or centimeters) to pixels, for the correct height and width for your cover. Drag your photos from the image tray into your design. Now, click the Background tab (paint palette icon) and adjust the Spacing slider to zero, so the photos in your collage bump right up against one another.
For the final touches, click the Edit button in the top toolbar to bring your collage into the Editor. To create the notebook label, apply a Tape graphic and type the name in Pencil Pete font (from the Handwriting group). Throw down a few clear Tape graphics between photos for more sticktastic fun.
Sunny Splash

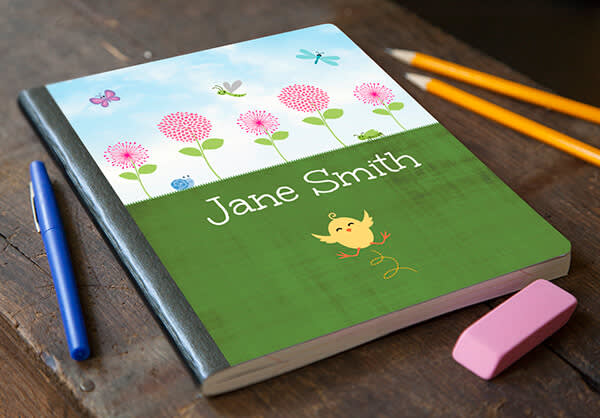
This cheery, graphic look brings flower power to the homework hour! To start, hover your mouse over Design on the home page, then click Custom in the menu that appears below it to create a canvas that’s the right pixel dimensions for your cover. Make that canvas so grassy green you can almost hear the lawnmowers, then head over to Textures, where we recommend Smudge. Save the grass image, start a new design (white canvas), and choose a Clouds texture. Set Fade to zero, then save the image at the same size.
Now open the grass image you just made and, from Graphics, click Your Own to open your clouds pic on top of it. Drag the edges of your clouds image to make it as wide as the grass, move it up so only the top half shows, then click outside the image. Voilà! The horizon of your dreams.
From there you can scroll through the myriad options in Graphics to add cutie beauty. In this one we used Buggles, Chick’n Eggs, Leaves, and Bursting Blossoms. For classic boy appeal, find truck, train and robot graphics in Stuffers, Santaland theme. And there’s plenty of goodness in Critters, Cutimals, and Ordinary Beasts to boot.
Tip: to stick the cover to the notebook, go for Mod Podge (or some ooey gluey equivalent) or overlapping columns of clear tape.
