When you hear the phrase “making something out of nothing” it often has a negative connotation. I like to take that phrase and flip it on its head. I’m an ex-model who’s building a second career as a fashion photographer, so I have to do everything on a shoestring budget. When I got the idea for a milk-bath themed shoot, I knew I could pull it together with a little ingenuity and some elbow grease.

Getting everything ready
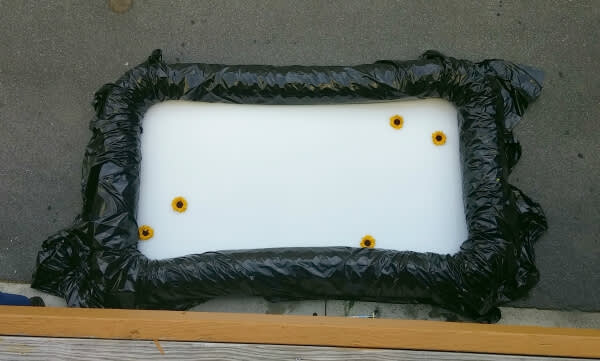
I found a local model who was willing to get her clothes wet. I had a 6’x10’ inflatable pool to accommodate her height and a black plastic drop cloth to line the pool and eliminate the blue color it casts. We used a mixture of her clothing and mine, and a series of wigs I had purchased a few years ago. At the grocery store across the street I grabbed three $3 bouquets of flowers to coordinate with the wardrobe choices. We also purchased two gallons of milk and hoped it would be enough to turn the few inches of water we put in the pool opaque.

Setting up the shots
I don’t have a fancy studio or anything. I live in a townhome in the D.C. suburbs with no yard and a shared alley way with eight other neighbors. I have a little balcony on my garage under which we set up the pool, so that I could shoot my model from above and get a whole-body shot of her. (I’m sure my neighbors thought it strange when I put the blow-up pool by my garage, but probably more so once they saw me putting milk and flowers and then a fully dressed woman in it!)

The aspect ratio problem
Once we were shooting, I realized we had a huge problem. The rounded edges of the pool were curving into the frame and I knew then that no matter what angle I shoot from, however I cropped the images, it would not be a traditional photo size. I began to panic. I worried that all the planning and set build was for nothing.

The solution: mirror images
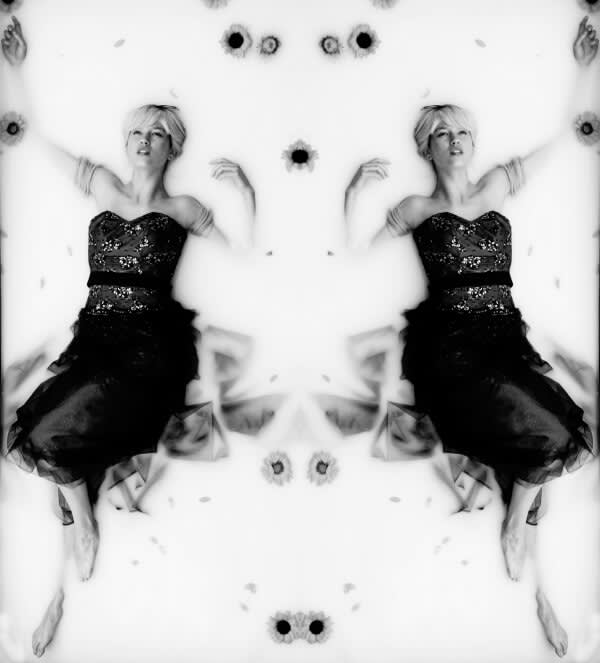
When we uploaded the images it was clear that they were worth saving, but I had to spend time on them. After cropping some, my fear was confirmed, the sizes were all wrong for how I normally share media; I wanted to be able to crop them square. My easy fix for that was mirroring. Not only did that help with the cropping issue but there is something about mirrored monochromatic images that reminds me of ink blots. It takes the photos from being just “pretty” images and brings them to a level of art where the viewer can create their own story, or see details differently than you intended when making the image.

Cloning out the edges
What about the images I didn’t plan to mirror? This is where the real work came into play. I used Picmonkey’s Clone tool to copy the milky white background where the black edges of the pool were showing. I was careful to keep re-selecting source areas. If I selected an area that didn’t work or that I couldn’t blend using the fade slider, I erased and tried again. After removing unwanted bits and blending with Clone, I applied my trusty effects. For my color images, I have three that are my holy grail and tend to make every image feel really…professional: Daguerreotype (Plumbe), Film Stock (Velvia), and Time Machine (Flo)

After sharing the images with the model and getting rave reviews from her agent, I felt all of the hard work was worth it. We totally made something out of nothing (other than a great idea).
