Jökulsárlón beach, Iceland
Love me some water shooting! Water is probably my favorite subject to shoot. It’s always unique, it’s always unpredictable, and gives thousands of creative shapes and textures that are guaranteed to be different each time. Here are a few tips for how to approach your next adventure with our liquid friend.
The look of water photography
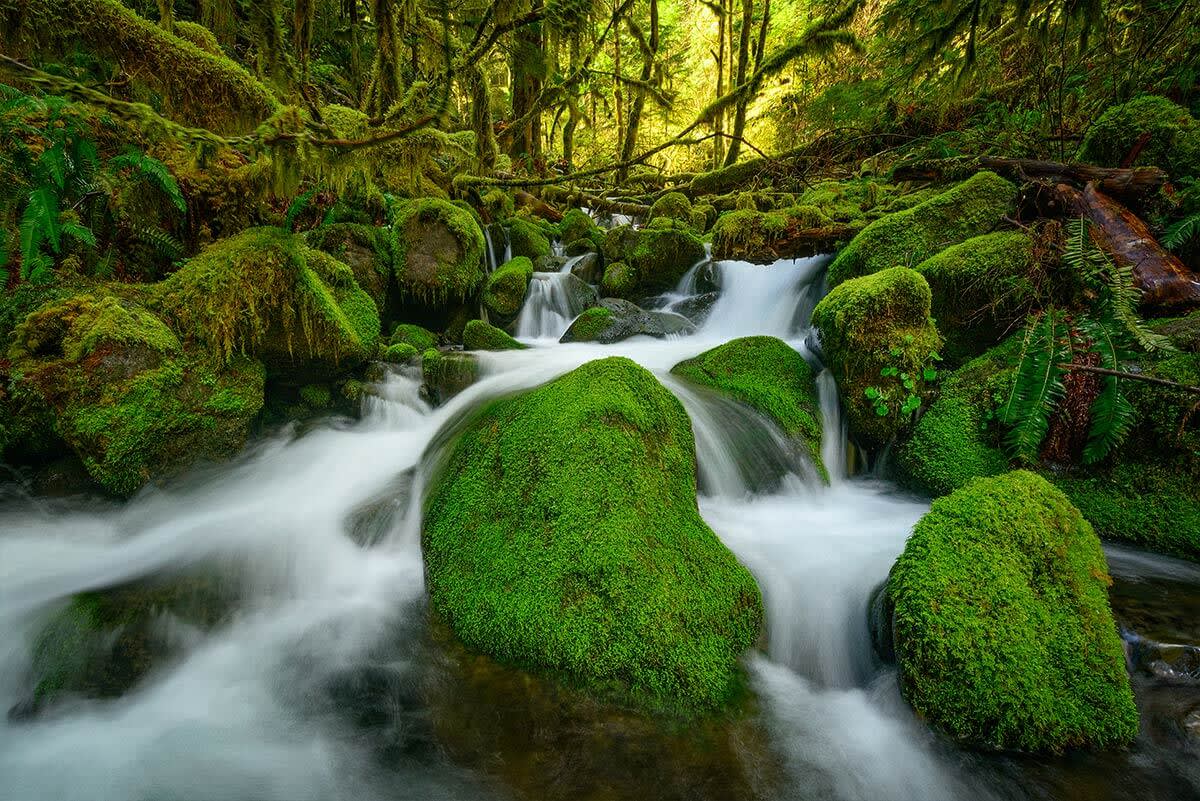
Probably the most sought-after look for water is that velvety, flowy look that makes a waterfall appear smooth and soft, or makes wave foam form interesting patterns on the sand.

The top of a 100 ft waterfall was right behind me … be careful! Columbia River Gorge, Oregon USA
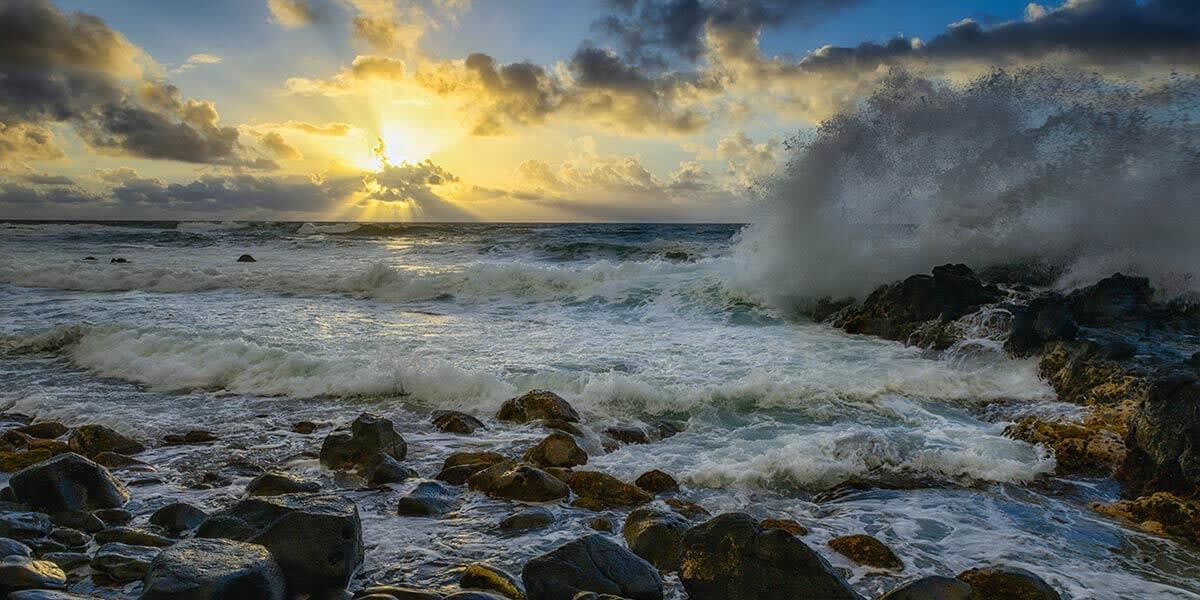
Or the other way to go is the crashing wave frozen in time against a rock or lighthouse during a coastal storm. Both have one critical factor above others, namely shutter speed.
Water photography equipment
You don’t need to go very far to get great photos of water, but you will benefit from some better-than-average equipment. Crucial to the wispy, cotton-water effect is a tripod, because otherwise it will be difficult to keep everything steady and in focus during a two-second exposure. I prefer a DSLR and a tripod, but a gorilla tripod plus iPhone plus an iOS camera app that lets you set the shutter speed to at least two seconds or longer can also work. I’ve been successful getting a nice sunset shot by the beach with my compact camera hand-held at 1/15th of a second, but I would never print that because of the noise and lack of real focus.
If you’re near waves or especially waterfalls, you’ll want some cloths for keeping water spots off your lens and camera. I usually carry three to four microfiber cloth wipes with me on a shoot, and I’m typically wiping the lens between every shot if I’m anywhere near the spray.

Shooting from the car at 400mm because I was scared. 1/80 sec North Shore, Oahu, Hawaii USA
When shooting in brighter sunlight, you may need to use a neutral density filter. These filters essentially just cut down the amount of light coming into the lens. What that helps is getting your shutter speed slow enough to get the cottony water look while not overexposing because of the bright day (see below). ND filters come in various “darkening” amounts, typically a 3-stop, 6-stop and 10-stop. The 10-stop is a super creative filter for more than just water, and is the one I use the most.
If you want a good shot, you will get wet. The best piece of equipment I can recommend is a good set of waders. This allows you a ton of freedom in the water, opening up the ability to reach right into the scene without any worry about getting wet. The next best piece of kit would be some good water shoes. In warmer climates (and softer sand), you can go barefoot, but even then, your day can be ruined by the inadvertent step on a sharp rock, some washed up glass, or a prickly sea critter.

1.6 second exposure, Point of Arches, Washington USA
Settings and water photography technique
Okay, so how do you get that soft, cotton-candy look for a waterfall, wave, or stream? Depending on how fast the water is moving, and how far you are from the action, the typical range is in the half-second to four-second range, with the sweet spot in your shutter speed typically around two seconds. Start your exposure at two seconds, and look at your f-stop to set the depth of field, hopefully landing somewhere in the f11 range. If it’s too open (like f2.8 or f5.6) it will typically blur the things farther away and close to you, but if it’s too narrow (like f22) you may get some unwanted diffraction. You can also adjust your ISO to get a good f-stop/shutter speed combo, but don’t go too high (like above ISO 800), where noise becomes a factor. Each camera will be slightly different, so these are guidelines. But usually you will wind up shooting water at one or two seconds for the best look.
When you’ve taken a few shots, experiment with longer and shorter shutter speeds to see if you like those better. Also, look at the background that is not water—it may be blurry. For example, shooting a stream in the woods will probably have leaves blowing in the wind in the background. They’ll definitely be blurry at a two-second exposure if there’s any wind. Take another shot at 1/30th of a second to freeze the leaves and blend the two shots together if you’re feeling brave.

3 second exposure, Pacific Grove California, USA
Waves on the beach have similar exposure settings, but benefit from a few other techniques. The first is getting low to give the shot real drama. The water, especially if it has foam on it, will pool up on the edge but streak across the picture right toward the viewer. Look also for rocks and the push/pull of the waves creating swirls of water and foam around them. Timing a wave as it comes in and slurps around a cool rock formation can give you many unique images you can’t anticipate, so just keep shooting! If it is after sunset, longer exposures of eight to 15 seconds can begin to give the waves and rocks a ghost-like appearance as the waves come and go on the shot.
If you want that ghost-like appearance while it’s still bright out, bring in the 10-stop ND filter mentioned above. If you want a really cool shot, do it on a day with fast moving clouds, and they’ll streak too—just like the water!

150 second exposure with 10-stop ND filter, Point Arena Lighthouse, California USA
Sunsets on the beach are great, but stay a while during “blue hour” for some magical colors. Because the exposure is way longer, small amounts of light that we see with the naked eye are continuously painted on a longer exposure as the lens is left open, and can result in an ambience you can only see on the resulting shot. If you’re not also playing with ND filters, stay until your exposures are at 30 seconds.
But what about freezing that wave smacking against a rock or lighthouse? Here again, it’s all about shutter speed, but you want it to be fast, not slow. In this mode, you’re thinking more like a sports shooter. Crank that shutter speed to 1/320th or 1/400th of a second or faster. The other great thing is you don’t need a tripod! And if it’s really stormy, shoot from under an overhang, or inside your car or tent with a long lens so you don’t have to battle the elements while shooting.

Sunrise in Hawaii. 1/80 second Kauai, Hawaii USA
One last word about shooting water: be careful! The old adage “never turn your back on the ocean” is translated in my family as “take care of the ocean and she will take care of you.” That’s equally true of waterfalls; since they’re falling over cliffs and steep inclines, you have equal opportunity to follow along. Wear good treads, be aware of your surroundings, or look for a different perspective that doesn’t carry as much risk. And don’t follow your tripod and camera if they happen to fall.

It’s a long way down: 25 sec exposure. Palouse Falls, Eastern Washington, USA
Other things to think about
I mentioned the trick of using an ND filter to get clouds to streak. This is really true of anything that moves, and the above guidelines can be used in other cases too. Shooting at night in a city? Guess how you get the red streaking tail lights. Those shots in Sweden of the aurora dancing across the sky? Taffy-like lava? All about the shutter speed.
An extra tip on that ND filter (did you buy one yet?): make sure you close the eye-hole cover on the DSLR viewfinder before you take the shot. You’d be surprised how much light actually leaks through that little window and bleeds into a 15 to 30 second shot, turning it weird colors and ruining the shot. Also, if you’re shooting at night, try light-painting the rocks or water in front of the lens (light-painting is where you use a light source like a flashlight or your phone as a brush to “paint” on the light while the shutter is open on your camera).

River runs through it, 1 second exposure. Western Washington, USA
